
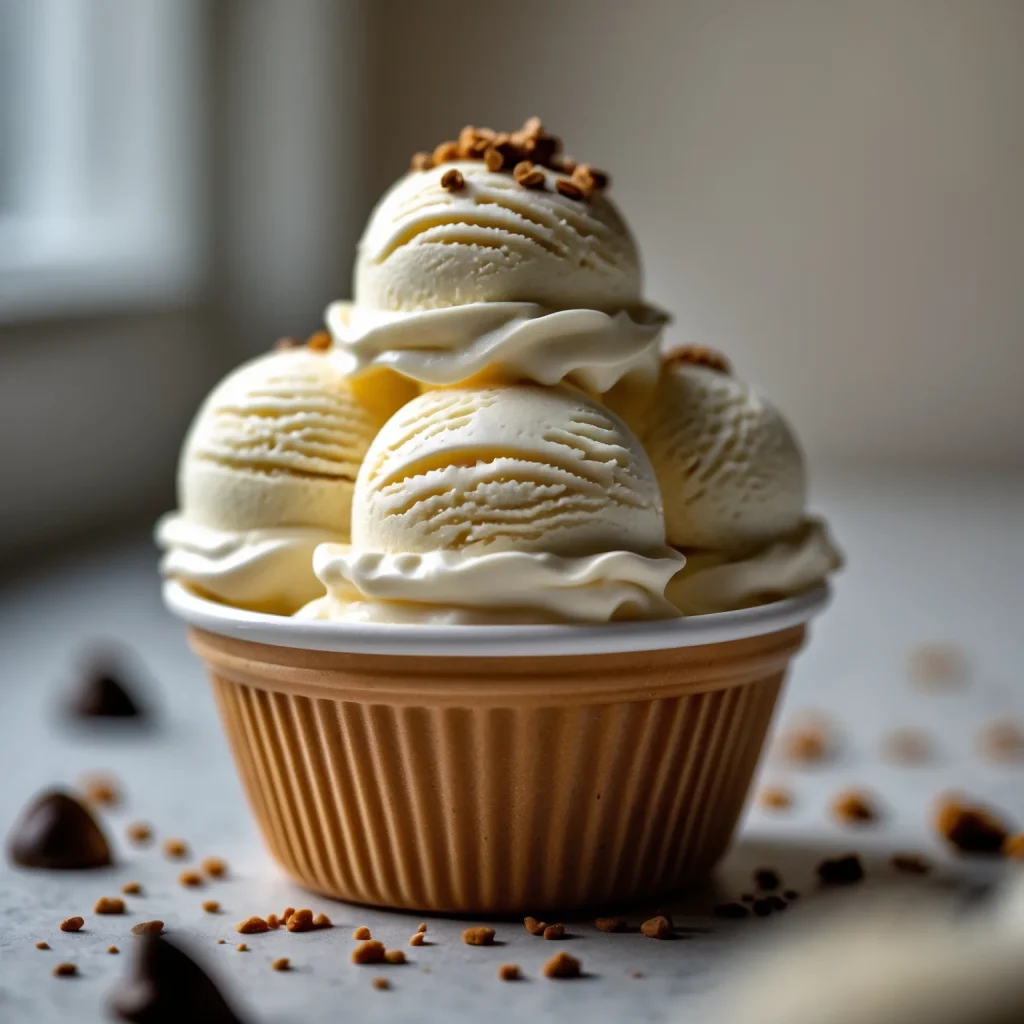
If you’ve ever wanted a scoop of rich, tangy cheesecake ice cream that actually fits your macros, I have something special for you. This Ninja Creami Cheesecake Protein Ice Cream is my current freezer obsession. It takes just 15 minutes of active prep and delivers a seriously creamy, high-protein frozen dessert that feels like a total treat.
Each generous serving packs 18g of protein, thanks to a clever blend of Greek yogurt and cottage cheese. It’s perfect for a post-workout reward, a summer dinner party, or when that late-night sweet tooth hits. This no-cook, American-style dessert proves that healthy eating doesn’t have to mean skipping the good stuff.
What is Ninja Creami Cheesecake Protein Ice Cream?
This dish is a high-protein, frozen interpretation of classic New York-style cheesecake. It originated right in my kitchen, born from a desire to create a dessert that was both indulgent and nourishing. What makes it special is the use of the Ninja Creami machine, which transforms a simple, protein-packed base into an incredibly smooth and scoopable frozen treat.
The magic lies in the texture. Unlike some homemade ice creams that can turn icy, the Creami’s blade pulverizes the frozen base into a creamy consistency that rivals what you’d get from a scoop shop. The tang from the lemon juice and dairy mimics the flavor profile of real cheesecake batter, making this a satisfyingly authentic experience.
Why You’ll Love This Recipe
Here are a few reasons this pint will become a staple.
- Serious Protein Punch — With 18g per serving, this frozen dessert is surprisingly filling and supports muscle recovery, all while tasting like a cheat meal.
- Unbeatable Creaminess — The Ninja Creami works its magic to create a texture that’s smooth and rich, avoiding the grainy or icy pitfalls of other methods.
- Quick to Prepare — Your active time is only about 15 minutes. The rest is hands-off freezing, making it an easy project for a busy week.
- Customizable Sweetness — You control the sweetener. Start with the honey and taste the base, adding more if you like. I love that flexibility.
- Clever Crust Element — Folding in graham cracker crumbs at the end gives you that essential “cheesecake crust” texture in every bite without any baking.
Ingredients Needed to Make Ninja Creami Cheesecake Protein Ice Cream
You only need nine simple ingredients, most of which you might already have. I’ve broken them down by their role in the recipe.
The Dairy & Protein Base
- 1 cup full-fat Greek yogurt — This provides a thick, tangy creaminess and a major protein boost. Full-fat is key for the richest texture.
- 1 cup full-fat cottage cheese — Blended until smooth, it adds body, more protein, and a classic cheesecake flavor note. Don’t skip it.
- 1 scoop (30g) vanilla whey protein powder — This amplifies the protein content and helps stabilize the ice cream’s structure. A good-quality powder with a clean flavor works best.
Sweeteners & Flavor
- 2 tbsp honey — It sweetens naturally and lends a subtle floral note that pairs beautifully with the tangy dairy. Maple syrup is an easy swap.
- 1 tsp vanilla extract — This deepens the overall flavor profile and enhances the “vanilla” notes from the protein powder.
- 1 tbsp lemon juice, freshly squeezed — The essential tang! Fresh juice makes a noticeable difference, giving that authentic cheesecake zing.
- 1/4 tsp kosher salt — A pinch balances all the sweet and tangy flavors, making them pop.
Mix-Ins & Adjustments
- 1/4 cup graham cracker crumbs — For that iconic crust element. You can buy them pre-crushed or blitz a sheet of graham crackers in a bag.
- 2-3 tbsp whole milk or unsweetened almond milk — This is your “if needed” ingredient to adjust the consistency of the base before freezing.
Equipment Needed
You probably have most of this already. A good blender is the only real essential besides the Creami itself.
- A High-Speed Blender or Food Processor — You need something powerful enough to completely smooth out the cottage cheese. A bullet-style blender works great for this small batch.
- Ninja Creami Machine — This is the star of the show. There’s no true alternative for achieving this specific, creamy texture, though other frozen dessert makers could be attempted.
- Ninja Creami Pint Container — The specialized container that comes with the machine is designed for optimal freezing and processing.
- Rubber Spatula — Essential for scraping every last bit of the delicious base out of the blender and for smoothing the top in the pint.
- Measuring Cups and Spoons — For accuracy, especially with the protein powder and lemon juice.
Instructions to Make Ninja Creami Cheesecake Protein Ice Cream
The process is straightforward, but a few key steps ensure success. Let’s walk through it.
Step 1: Create the Smooth Base
Combine the Greek yogurt, cottage cheese, protein powder, honey, vanilla, lemon juice, and salt in your blender. Blend on medium for a full 1-2 minutes until it’s completely homogenous. Scraping the sides halfway through is crucial—you want zero lumps of cottage cheese for the creamiest final product.
Step 2: Taste and Adjust the Consistency
Now, taste it. The mixture should be slightly sweeter than you’d prefer, as freezing dulls sweetness. If it’s perfect now, it might taste bland later. If it’s too thick to pour easily, add milk one tablespoon at a time while blending. You’re aiming for a thick but pourable batter.
Step 3: Freeze Completely
Pour the base into your Creami pint, leaving about half an inch of space at the top. Smooth the top with a spatula to minimize air pockets. Secure the lid tightly and freeze it on a level surface for a full 24 hours. A completely solid core is non-negotiable for the right texture.
Step 4: Process to Creamy Perfection
After freezing, let the pint sit out for 5-10 minutes to just soften the very edges. Place it in the machine, secure the outer bowl and lid, and select the ‘Ice Cream’ setting. The machine will run for 1-2 minutes, stopping automatically when done.
Step 5: Incorporate Mix-Ins and Serve
Open the lid and check the texture. If it looks at all crumbly, use the ‘Re-spin’ function for 30 seconds. Sprinkle the graham cracker crumbs evenly over the top. Use the ‘Mix-in’ setting for 30 seconds or fold manually with a spatula for chunkier bits. Serve immediately for soft-serve, or freeze for 1-2 more hours for a scoopable texture.
What Went Wrong and How I Fixed It
I’ve made my share of mistakes with this recipe. Here’s what I learned.
- Grainy Texture — This happened when I didn’t blend the cottage cheese long enough. The fix is to blend the base for a full two minutes, until it’s utterly smooth.
- Ice Cream Was Too Icy — In my first attempt, I didn’t freeze the base long enough. Now I always wait the full 24 hours to ensure it’s rock solid before processing.
- The Machine Sounded Strained — I skipped the 5-10 minute thaw time once. Letting the edges soften slightly prevents this and leads to a smoother churn.
- Final Result Was Too Sweet — I over-adjusted the base sweetness early on. Remember, the mixture should only be slightly sweeter than your target before freezing.
- Crumbly Outcome After Spinning — If the ice cream looks dry or crumbly right after the main cycle, don’t worry. The ‘Re-spin’ function is your best friend here to bring it together.
What Do I Serve With Ninja Creami Cheesecake Protein Ice Cream?
This ice cream is fantastic on its own, but it also plays well with others.
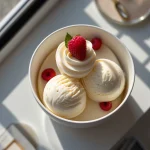
- Fresh Berry Compote — A warm sauce made from raspberries or strawberries cuts the richness beautifully and adds a fruity contrast.
- Extra Graham Cracker Crumbs — Sprinkle more on top for added crunch and to double down on the cheesecake theme.
- Dark Chocolate Shavings — A few shavings of high-quality dark chocolate add a bittersweet note and a touch of elegance.
- Sparkling Water or Coffee — A palate-cleansing drink like seltzer or a cup of black coffee makes a nice, light accompaniment.
- A Simple Sugar Cone — For a truly classic ice cream experience, scoop it right into a cone. It’s the perfect handheld treat.
Pro Tips to Make Perfect Ninja Creami Cheesecake Protein Ice Cream
A few small touches can elevate your results from good to incredible.
- Blend Until Silky — Don’t rush the initial blending. You shouldn’t see or feel any graininess from the cottage cheese before you pour it into the pint.
- Sweeten with Purpose — Taste your base mixture and consciously make it a touch sweeter than perfect. Freezing mutes flavors, so this proactive step is key.
- Level the Top Before Freezing — After pouring, use your spatula to smooth the surface flat. This promotes even freezing and more consistent processing.
- Respect the Freeze Time — Set a reminder for 24 hours. A partially frozen base will never achieve the proper creamy, scoopable consistency we’re after.
- Utilize the Re-Spin — If the texture isn’t perfect after the first cycle, don’t hesitate to use the ‘Re-spin’ function. It’s designed to fix minor iciness.
- Fold Mix-Ins for Control — If you want distinct pockets of graham cracker crust, fold the crumbs in by hand after spinning instead of using the mix-in setting.
Variations of Ninja Creami Cheesecake Protein Ice Cream
Once you master the base, the flavor possibilities are endless. Here are a few of my favorites.
- Mixed Berry Swirl — After the initial spin, swirl in a few tablespoons of sugar-free berry jam or a quick mashed berry sauce.
- Chocolate Chip Cookie Dough — Swap the graham crumbs for chunks of healthy edible cookie dough or mini dark chocolate chips during the mix-in phase.
- Lemon Blueberry — Increase the lemon juice to 2 tbsp and fold in a handful of freeze-dried blueberries for a bright, fruity twist.
- Peanut Butter Cup — Add a tablespoon of powdered peanut butter to the base before blending, then mix in chopped sugar-free peanut butter cups.
- Extra Protein Boost — For nearly 22g of protein per serving, simply add an extra half-scoop of vanilla protein powder to the initial blend.
How Do I Store Ninja Creami Cheesecake Protein Ice Cream Leftovers?
Proper storage is the secret to maintaining that just-spun texture.
- Airtight Pint Container — Simply press the original lid back on tightly. This is the easiest and most effective method for short-term storage.
- Plastic Wrap Barrier — For longer storage, press a piece of plastic wrap directly onto the surface of the ice cream before putting the lid on. This prevents ice crystals.
- Consume Within a Week — For the absolute best flavor and texture, enjoy your leftovers within 7 days. The quality is highest soon after making it.
- Freezer Placement Matters — Store the pint towards the back of the freezer where the temperature is most constant, not in the door.
How Do I Reheat Ninja Creami Cheesecake Protein Ice Cream Leftovers?
“Reheat” isn’t quite the right term for ice cream, but you will need to soften it from the freezer. Here’s how.
- Brief Room Temperature Thaw — Let the sealed pint sit on your counter for 5-10 minutes. This gently softens it to a perfect scooping consistency.
- Ninja Creami Re-Spin — For the closest experience to freshly made, process the frozen pint on the ‘Re-spin’ setting for 30-60 seconds. This re-aerates it.
- Avoid the Microwave — Do not microwave this ice cream. It will thaw unevenly, melt the protein structure, and create a watery, grainy mess.
FAQs
Can I make this Ninja Creami Cheesecake Protein Ice Cream without a Ninja Creami?
Unfortunately, no appliance replicates the Creami’s unique texture perfectly. You could freeze the base in a standard container and blend servings in a powerful food processor, but the result will be more like a frozen mousse and less like scoopable ice cream.
What can I use instead of cottage cheese?
The cottage cheese is crucial for the authentic tang and creamy body. If you must substitute, try using an additional cup of full-fat Greek yogurt, but note the texture and flavor will be different, and the protein content may be slightly lower.
How long does this Ninja Creami Cheesecake Protein Ice Cream last in the freezer?
It will be safe to eat for up to a month if stored airtight. However, for optimal creaminess and to avoid ice crystals, I strongly recommend enjoying it within one week.
Can I use a different protein powder flavor?
Absolutely. A plain or cheesecake-flavored protein powder would work wonderfully. I’d avoid strongly flavored powders like chocolate or cookies & cream unless you’re intentionally creating a different variation.
My ice cream is too hard after storing. What do I do?
This is common. Simply let it sit at room temperature for 5-10 minutes before scooping. For the best texture restoration, process it on the ‘Re-spin’ setting in your Creami for about 30 seconds.
Final Words
This recipe has become my go-to for a guilt-free dessert that never feels like a compromise. The process is simple, but the payoff—a creamy, protein-rich pint with the nostalgic flavor of cheesecake—is huge. I hope this Ninja Creami Cheesecake Protein Ice Cream finds a permanent spot in your freezer rotation, too. Give it a try this weekend; you won’t be disappointed.
PrintNinja Creami Cheesecake Protein Ice Cream
A creamy, high-protein frozen dessert with the tangy flavor of classic cheesecake, made smooth and scoopable using the Ninja Creami. This recipe delivers 18g of protein per serving without compromising on richness or texture.
- Prep Time: 15
- Total Time: 15
- Yield: 4 1x
- Category: Dessert
- Method: No-Cook
- Cuisine: American
Ingredients
- 1 cup full-fat Greek yogurt
- 1 cup full-fat cottage cheese
- 1 scoop (30g) vanilla whey protein powder
- 2 tbsp honey
- 1 tsp vanilla extract
- 1 tbsp lemon juice, freshly squeezed
- 1/4 cup graham cracker crumbs
- 1/4 tsp kosher salt
- 2–3 tbsp whole milk or unsweetened almond milk, if needed for consistency
Instructions
- In a blender or food processor, combine 1 cup full-fat Greek yogurt, 1 cup full-fat cottage cheese, 1 scoop vanilla whey protein powder, 2 tbsp honey, 1 tsp vanilla extract, 1 tbsp lemon juice, and 1/4 tsp kosher salt. Blend on medium speed for 1-2 minutes until completely smooth and no lumps remain; this ensures a creamy base and even distribution of protein for a consistent texture. Scrape down the sides with a spatula halfway through to incorporate all ingredients thoroughly.
- Taste the mixture and adjust sweetness if desired by adding more honey or a sugar-free syrup in small increments; the mixture should be slightly sweeter than preferred as freezing dulls sweetness. If the consistency is too thick for pouring, add milk one tablespoon at a time while blending until it reaches a pourable state similar to thick pancake batter, which prevents over-thinning and maintains richness.
- Pour the blended mixture into a Ninja Creami pint container, leaving about 1/2 inch of space at the top to allow for expansion during freezing. Use a spatula to smooth the top evenly; this minimizes air pockets and ensures uniform freezing for optimal processing later.
- Secure the lid tightly on the pint container and place it on a level surface in the freezer. Freeze for at least 24 hours, or until completely solid; this step is crucial because a fully frozen base yields a creamier texture when processed in the Ninja Creami, preventing iciness.
- After freezing, remove the pint from the freezer and let it sit at room temperature for 5-10 minutes to slightly soften the edges; this allows the Creami blade to process the mixture more evenly without straining the machine. Avoid thawing too much, as a partially frozen core is ideal for the ice cream setting.
- Place the pint in the Ninja Creami machine and secure the outer bowl and lid according to the manufacturer’s instructions. Ensure the container is centered and locked in place to prevent vibrations or uneven processing during operation.
- Select the ‘Ice Cream’ setting on the Ninja Creami and start the machine; it will process for 1-2 minutes until the mixture becomes smooth and creamy, stopping automatically. Listen for a consistent whirring sound and watch for the mixture to pull away from the sides, indicating proper aeration and texture development.
- Once the cycle completes, open the lid and check the texture; if it appears crumbly or icy, use the ‘Re-spin’ function for an additional 30-60 seconds to break down ice crystals and achieve a smoother consistency. Avoid over-processing, as this can cause melting and a grainy outcome.
- If adding graham cracker crumbs, sprinkle 1/4 cup evenly over the processed ice cream in the pint. Use the ‘Mix-in’ setting on the Ninja Creami for 30 seconds to incorporate the crumbs uniformly, or fold them in manually with a spatula for a chunkier texture that mimics cheesecake crust.
- Serve the ice cream immediately for a soft-serve consistency, scooping it into bowls or cones. For a firmer, scoopable texture similar to traditional ice cream, return the pint to the freezer for 1-2 hours before serving to allow it to set further.
- To store leftovers, cover the pint tightly with its lid or plastic wrap to prevent freezer burn and odor absorption. Freeze for up to 1 month; for best texture and flavor, consume within a week, as prolonged storage can lead to ice crystal formation.
- If the ice cream becomes too hard after storage, let it sit at room temperature for 5-10 minutes before scooping, or process it briefly in the Ninja Creami on the ‘Re-spin’ setting to restore creaminess. Avoid microwaving or thawing completely, as this can compromise the protein structure and make it watery.
Notes
Store in an airtight container in the freezer for up to 1 month; for optimal quality, eat within a week. No reheating is needed—simply thaw slightly if too hard. For a protein boost, consider adding an extra 1/2 scoop of protein powder to the base mixture, increasing protein to about 22g per serving.
Nutrition
- Calories: 183
- Sugar: 15g
- Sodium: 250mg
- Saturated Fat: 2g
- Carbohydrates: 19g
- Fiber: 0.5g
- Protein: 18g
- Cholesterol: 13mg
Keywords: Ninja Creami cheesecake protein ice cream, high protein ice cream, cheesecake ice cream, Ninja Creami recipe, protein dessert, frozen yogurt, healthy ice cream, no cook dessert, low calorie ice cream, homemade protein ice cream, protein-packed treat, frozen cheesecake