
A high protein chocolate pie sounds like a contradiction, but it works beautifully here. Instead of a heavy custard, this no-bake American dessert blends cottage cheese with chocolate protein powder and cocoa into a silky, mousse-like filling that sits on a crisp chocolate wafer crust.
Total time is just 20 minutes of hands-on work plus chilling, and it lands firmly in beginner territory. It’s the kind of dessert I bring to birthdays and potlucks where nobody expects a healthier option. Each serving packs 14g of protein from the blended cottage cheese and protein powder, and the only real challenge is getting the filling completely smooth.
What Is This High-Protein Chocolate Pie?
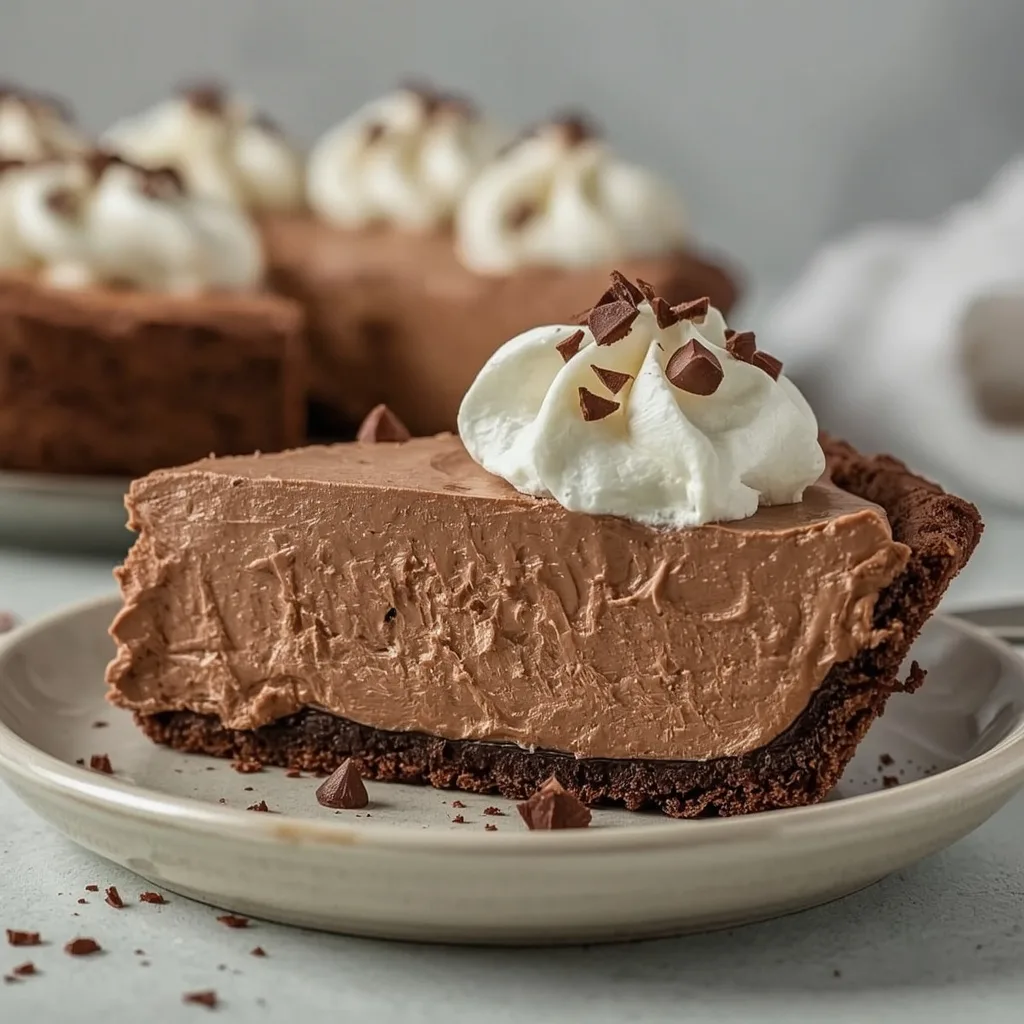
This is a no-bake chocolate pie made by blending full-fat cottage cheese, chocolate protein powder, cocoa powder, heavy cream, and a touch of sweetener into a smooth filling, then pouring it over a pressed chocolate wafer crust. It tastes deeply chocolatey and rich, with a texture closer to chocolate mousse than a traditional baked custard pie. The crust adds a light snap that contrasts nicely with the creamy filling. Serve it chilled for a weeknight dessert, holiday dinner, or meal-prep treat you can portion out ahead of time.
Why You’ll Love This Chocolate Pie
Here’s what convinced me to keep this one in rotation after the first slice.
- Real protein, no chalky aftertaste — 14g per slice comes from 2 cups of cottage cheese and 1/2 cup of chocolate protein powder, and the cocoa hides any protein flavor completely.
- No oven required — the whole thing comes together on the counter in 20 minutes, which matters a lot in summer or when the oven is already occupied.
- Silky, not grainy — blending for a full 2-3 minutes breaks down every curd, so you get that classic silk pie texture instead of a lumpy bowl of cottage cheese.
- Surprisingly filling — the protein and fat combo means one slice actually satisfies, so you’re not sneaking back to the fridge ten minutes later.
- Keeps for days — covered in the fridge, it stays firm and fresh for up to 3 days, making it a solid make-ahead dessert.
- Cheaper than a bakery pie — the ingredient list is short and mostly pantry staples you may already own.
Ingredients for Cottage Cheese Chocolate Pie
You’ll find most of these in the baking aisle or already in your pantry. One note before you start: use full-fat cottage cheese, not low-fat, because the fat is what gives the filling its creamy body.
For the Crust
- Chocolate wafer cookies — 1 cup (about 20 cookies), finely crushed; these create that crisp, sandy base. A food processor makes this fast, or seal them in a bag and crush with a rolling pin.
- Unsalted butter — 3 tbsp, melted; binds the crumbs so the crust holds together when sliced.
- Granulated sugar — 1 tbsp, just enough to round out the cookie’s bitterness.
- Kosher salt — a pinch deepens the chocolate flavor in the crust.
For the Filling
- Full-fat cottage cheese (4% milkfat) — 2 cups, drained if watery; this is your protein backbone and the reason the filling gets so thick and creamy.
- Chocolate protein powder — 1/2 cup (about 2 scoops); adds sweetness, chocolate flavor, and a big share of the protein. Whey blends smoothest.
- Unsweetened cocoa powder — 1/4 cup; pure chocolate depth without added sugar.
- Powdered erythritol or granulated sugar — 1/4 cup; adjust to taste since protein powders vary in sweetness.
- Heavy cream — 1/4 cup; loosens the mixture so the blender can actually get it smooth.
- Vanilla extract — 1 tsp; rounds out the cocoa and softens any tang from the cottage cheese.
- Kosher salt — 1/4 tsp; makes the chocolate taste more like chocolate.
For the Garnish (Optional)
- Shaved dark chocolate — 1 tbsp, for a pretty finish that also adds a little texture.
- Fresh raspberries — 4 berries; the tartness cuts through the rich filling.
Equipment You’ll Need
Nothing fancy here — you probably own everything already.
- Blender or food processor — essential for getting a completely smooth filling; a high-speed blender gives the best result, but a food processor works if you scrape down the sides often.
- 9-inch pie dish — a standard glass or ceramic dish; metal works too but holds cold differently.
- Measuring cup — you’ll use the flat bottom to press the crust firmly into the dish.
- Offset spatula — smooths the top of the filling; a regular spatula or the back of a spoon is fine in a pinch.
- Sharp knife — for clean slices, especially when dipped in hot water and wiped dry between cuts.
How to Make High Protein Chocolate Pie Step by Step
The process splits cleanly into two phases: crust, then filling. Both are quick, but the blending step is where you should slow down and pay attention.
Step 1: Make the Crust
In a medium bowl, stir together the crushed chocolate wafer cookies, melted butter, sugar, and salt with a fork until the mixture looks like wet sand and holds together when you squeeze a handful. If it crumbles apart, add 1 teaspoon more melted butter. Getting this texture right is what keeps the crust from falling apart later.
Step 2: Press and Chill the Crust
Press the mixture firmly into the bottom and up the sides of a 9-inch pie dish using the back of a measuring cup. Really pack it in — loose crumbs mean a crust that shatters on the first slice. Freeze it for 10 minutes to set while you make the filling.
Step 3: Blend the Filling
Add the cottage cheese, chocolate protein powder, cocoa powder, sweetener, heavy cream, vanilla, and salt to your blender or food processor. Blend on high for 2-3 minutes, scraping down the sides as needed. The goal is zero visible curds — if you still see any, keep blending. This is the one step where rushing will cost you the silky texture.
Step 4: Taste and Adjust
Give the filling a taste and add 1 tablespoon more sweetener if you want it sweeter, then blend for another 10 seconds. Protein powders vary a lot in sweetness, so this quick check matters more than you’d think.
Step 5: Fill, Chill, and Serve
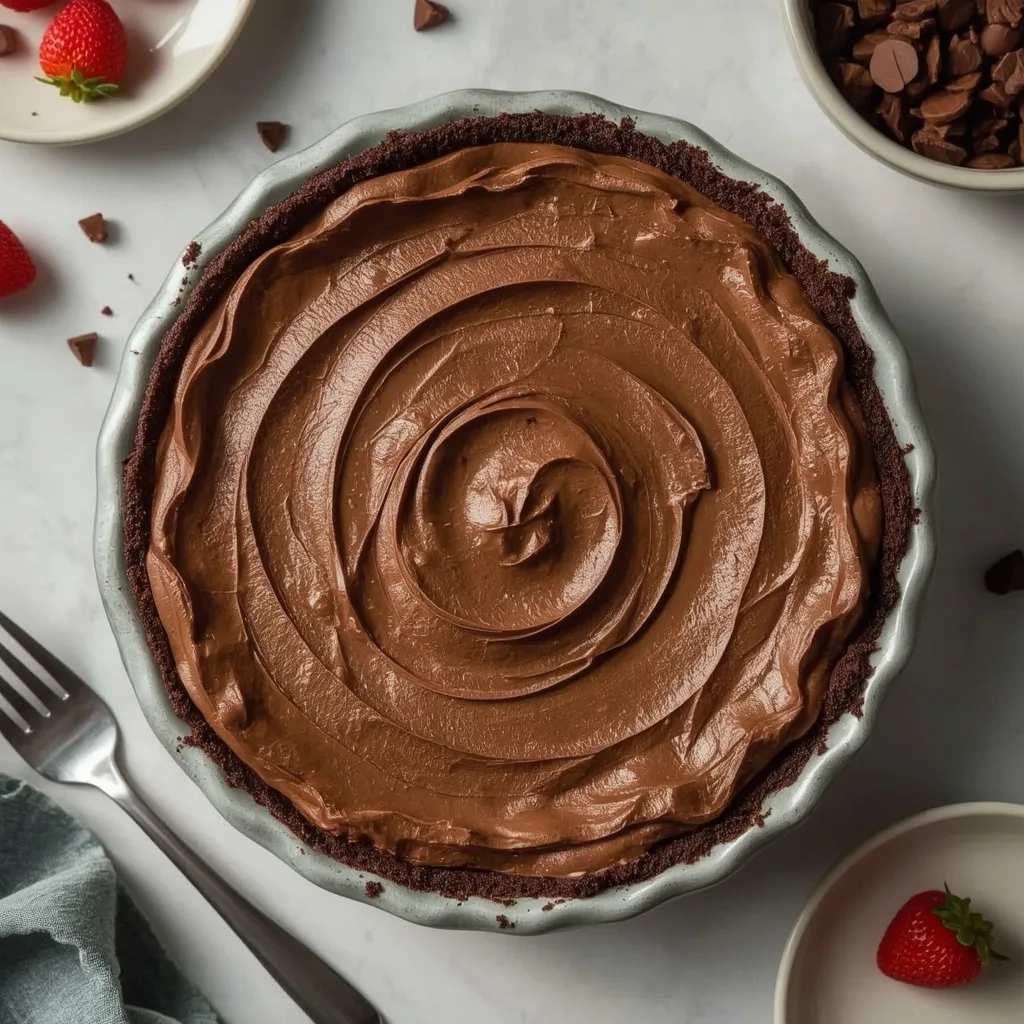
Pour the filling into the chilled crust and smooth the top with an offset spatula. Tap the dish gently on the counter a few times to release air bubbles. Refrigerate for at least 4 hours or overnight until fully firm — don’t freeze it at this stage, as it can change the texture. Before serving, garnish with shaved chocolate and raspberries, and slice with a hot, dry knife for clean edges.
What Went Wrong and How I Fixed It
These are the snags I hit during my first few attempts, plus the fixes that actually worked.
- Gritty filling — I stopped blending too early because it looked smooth from the top; the fix is scraping the sides and running the blender a full 2-3 minutes until it’s glossy and curd-free.
- Crumbly crust — my first crust fell apart because I skimped on butter; if the mixture doesn’t hold when squeezed, add a teaspoon more melted butter before pressing.
- Watery texture — cottage cheese that’s sitting in liquid throws off the ratio, so drain it well before measuring.
- Sagging center — cutting into it too soon is the usual culprit; give it the full 4 hours in the fridge, not 2.
- Overly sweet or flat flavor — different protein powders vary wildly, so taste the filling and adjust sweetener before pouring it in.
- Messy slices — a cold knife drags through the filling; dip it in hot water and wipe it dry between every cut.
What to Serve With Chocolate Pie
This pie is rich enough to stand alone, but a few pairings balance it nicely.
- Fresh berries — raspberries or strawberries add tartness that cuts through the richness.
- Whipped cream — a small dollop on top lightens each bite; keep it lightly sweetened.
- Hot coffee — the bitterness of a dark roast plays well against the sweet chocolate filling.
- Cold brew or iced espresso — a chilled option for summer gatherings.
- A glass of cold milk — old-school and still one of the best matches for chocolate pie.
- Fresh mint tea — a light, herbal finish after a heavy dessert.
Pro Tips for the Best Chocolate Pie
Small details separate a good slice from a great one.
- Room-temperature ingredients blend smoother — let the cottage cheese sit out 15 minutes before blending so it doesn’t seize up.
- A high-speed blender beats a food processor — the finer the blend, the silkier the set.
- Chill the crust while you blend — a cold crust keeps the filling from spreading at the edges.
- Tap out the air bubbles — a few gentle taps on the counter prevent small pockets from ruining the texture.
- Boost protein further — add 1/2 scoop unflavored collagen peptides for about 2g extra protein per serving.
- Sweeten to your protein powder — taste before pouring; some powders are much sweeter than others.
- Slice with a hot, dry knife — dip, wipe, cut, repeat for bakery-clean slices.
Easy Variations of Chocolate Pie
Once you’ve nailed the base, these tweaks are worth trying.
- Mocha version — add 1 teaspoon instant espresso powder to the filling for a coffee-chocolate twist.
- Peanut butter swirl — swirl 2 tablespoons of warmed peanut butter through the filling before chilling.
- Mint chocolate — swap the vanilla extract for 1/2 teaspoon peppermint extract.
- White chocolate crust — use vanilla wafer cookies instead of chocolate ones for a lighter base.
- Extra protein — blend in 1/2 scoop unflavored collagen peptides for roughly 2g more per slice.
- Store-bought shortcut — use a pre-made chocolate crust to save 10 minutes.
How Long Does Chocolate Pie Last?
Handled properly, this pie stays fresh for days in the fridge and weeks in the freezer.
- Refrigerator storage — cover tightly and keep for up to 3 days; the filling stays firm the whole time.
- Freezer storage — wrap tightly in plastic wrap and foil, then freeze for up to 1 month.
- Thawing — move it to the refrigerator overnight before serving; skip the microwave entirely.
- Serving temperature — always serve cold; letting it sit out too long softens the filling.
- Garnishes — add shaved chocolate and raspberries right before serving so they stay fresh.
FAQs About Chocolate Pie
Can you make high protein chocolate pie ahead of time?
Yes, and it’s actually better that way. The filling needs at least 4 hours to set, so making it the night before gives you a firm, sliceable pie with zero last-minute work.
How long does chocolate pie last in the fridge?
Covered tightly, it keeps for up to 3 days. After that, the crust starts to soften and the filling loses its firm set.
Can I freeze it?
Absolutely. Wrap the pie tightly in plastic wrap and foil, then freeze for up to 1 month. Thaw it in the refrigerator overnight before serving.
Can I use low-fat cottage cheese?
You can, but full-fat 4% gives a much creamier result. Low-fat versions tend to turn out thinner and slightly grainier.
Why is my filling grainy?
It almost always means you didn’t blend long enough. Run the blender a full 2-3 minutes on high, scraping the sides, until no curds are visible.
Do I have to use protein powder?
It’s what pushes the protein to 14g per slice and adds chocolate flavor, so skipping it changes both. If you leave it out, add extra cocoa and sweetener to compensate.
PrintHigh Protein Chocolate Silk Pie (Cottage Cheese)

This no-bake chocolate silk pie is impossibly creamy and rich, yet packed with 14 grams of protein per slice thanks to blended cottage cheese and chocolate protein powder. The filling whips up in minutes and sets to a silky, mousse-like texture in the fridge. A chocolate cookie crust adds a crisp contrast, making this a guilt-free dessert you’ll crave.
- Prep Time: 20
- Total Time: 20
- Yield: 4 1x
- Category: Dessert
- Method: No-Bake
- Cuisine: American
Ingredients
- For the crust:
- 1 cup chocolate wafer cookies (about 20 cookies), finely crushed
- 3 tbsp unsalted butter, melted
- 1 tbsp granulated sugar
- Pinch of kosher salt
- For the filling:
- 2 cups full-fat cottage cheese (4% milkfat), drained if watery
- 1/2 cup chocolate protein powder (about 2 scoops)
- 1/4 cup unsweetened cocoa powder
- 1/4 cup powdered erythritol or granulated sugar (adjust to taste)
- 1/4 cup heavy cream
- 1 tsp vanilla extract
- 1/4 tsp kosher salt
- For garnish (optional):
- 1 tbsp shaved dark chocolate
- 4 fresh raspberries
Instructions
- Make the crust: In a medium bowl, combine the crushed chocolate wafer cookies, melted butter, sugar, and salt. Stir with a fork until the mixture resembles wet sand and holds together when squeezed. If it seems dry, add 1 teaspoon more melted butter.
- Press the crust mixture firmly into the bottom and up the sides of a 9-inch pie dish using the back of a measuring cup. Place the crust in the freezer for 10 minutes to set while you make the filling.
- Make the filling: In a blender or food processor, combine the cottage cheese, chocolate protein powder, cocoa powder, sweetener, heavy cream, vanilla extract, and salt. Blend on high for 2-3 minutes, scraping down the sides as needed, until the mixture is completely smooth and silky. It should have no visible curds; if it does, keep blending.
- Taste the filling and adjust sweetness if desired by adding 1 tablespoon more sweetener and blending for 10 seconds.
- Pour the filling into the chilled crust and smooth the top with an offset spatula. Tap the pie dish gently on the counter a few times to release any air bubbles.
- Refrigerate the pie for at least 4 hours, or overnight, until the filling is fully set and firm to the touch. Do not freeze at this stage, as it can affect the texture.
- Before serving, garnish with shaved dark chocolate and raspberries if desired. Slice with a sharp knife dipped in hot water and wiped dry between cuts for clean slices.
- Serve chilled. Store leftovers covered in the refrigerator for up to 3 days.
Notes
Storage: Cover and refrigerate for up to 3 days. Freezing: The pie can be frozen for up to 1 month; wrap tightly in plastic wrap and foil. Thaw in the refrigerator overnight before serving. Reheating: Not recommended; serve cold. Protein boost: For an extra 2g protein per serving, add 1/2 scoop unflavored collagen peptides to the filling. Sweetener: Adjust to taste; if using a liquid sweetener, reduce heavy cream by 1 tablespoon. Crust alternative: Use a pre-made chocolate crust to save time.
Nutrition
- Calories: 320
- Sugar: 8g
- Sodium: 450mg
- Unsaturated Fat: 9g
- Carbohydrates: 23g
- Fiber: 3g
- Protein: 14g
- Cholesterol: 45mg
Keywords: high protein chocolate silk pie, cottage cheese chocolate pie, protein powder dessert, no bake chocolate pie, healthy chocolate pie, cottage cheese dessert, high protein dessert, chocolate silk pie recipe, easy no bake pie, protein pie, cottage cheese recipes, chocolate protein dessert