
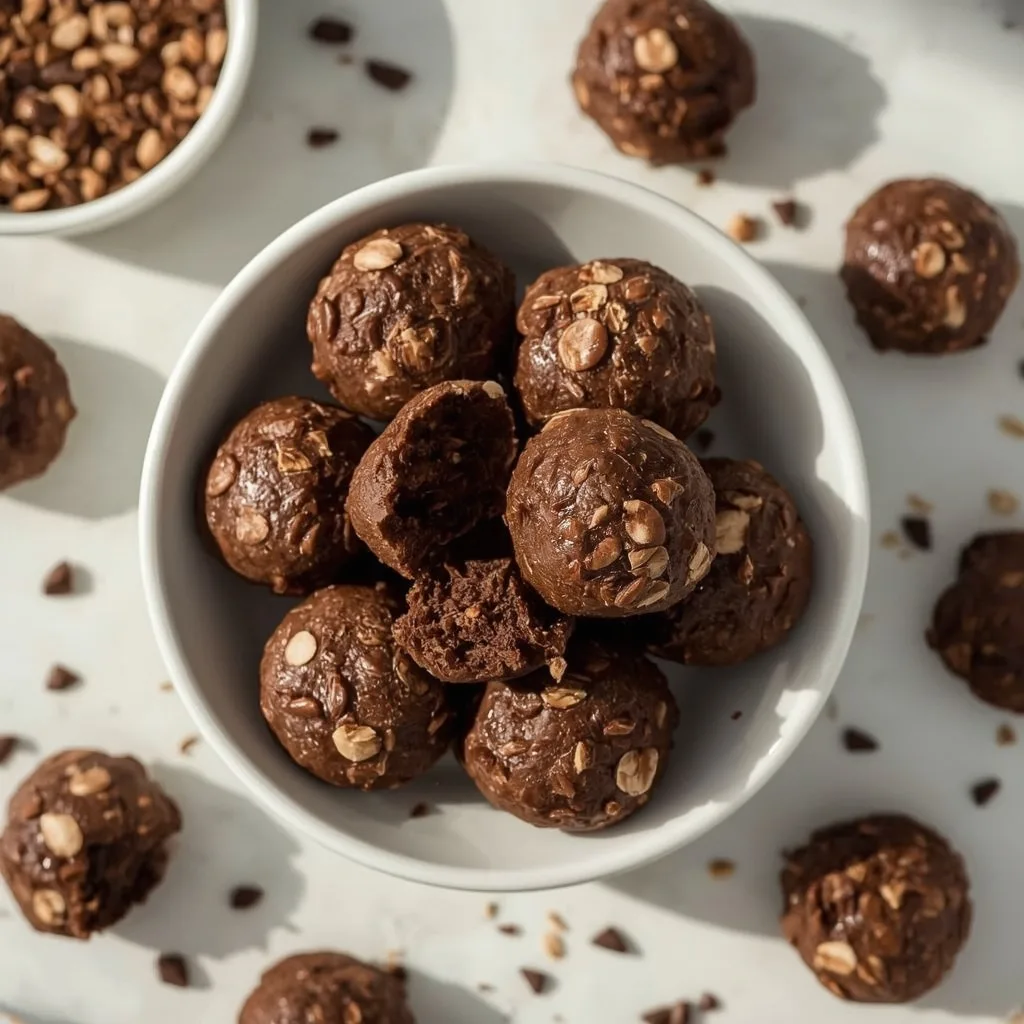
High Protein No Bake Brownie Protein Bites are exactly what they sound like: fudgy, chocolate-heavy snack balls made with rolled oats, cocoa powder, and chocolate protein powder, all mixed in one bowl without turning on the oven. They taste like a cross between a brownie and a peanut butter energy bite, and they hold up in the fridge for a full week.
Total time is 45 minutes, but only 15 of those are hands-on — the rest is chill time. This is a beginner-friendly recipe, perfect for meal prep, lunchboxes, or a post-workout snack. Each serving packs 15g of protein. The one slightly tricky part is adding the almond milk slowly at the end so the dough doesn’t turn sticky.
What is High Protein No Bake Brownie Protein Bites?
These are no-bake energy bites made from old-fashioned rolled oats, Dutch-process cocoa powder, chocolate protein powder, ground flaxseed, peanut butter, and maple syrup. You mix everything into a thick dough, roll it into 12 one-inch balls, and chill them until firm. The texture lands somewhere between a dense brownie and a soft cookie dough — chewy from the oats, rich from the cocoa, and just sweet enough from the maple syrup.
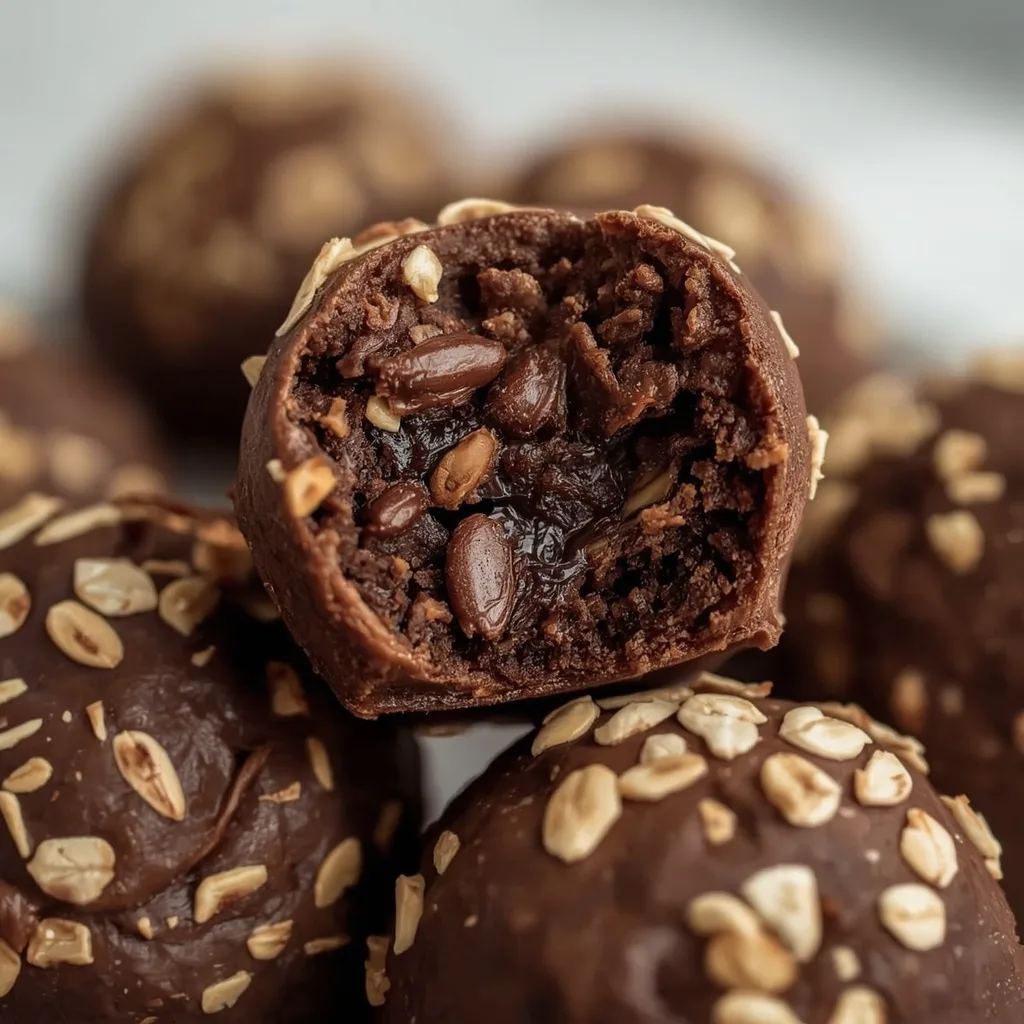
Why You’ll Love This Recipe
Honestly, I started making these because I wanted a chocolate fix that wouldn’t leave me hungry an hour later. Here’s what keeps them in my rotation.
- Protein that actually satisfies — 15g per serving means these hold you over, not just spike your blood sugar and drop you.
- No oven required — the whole thing comes together on the counter in 15 minutes, which matters in July.
- Real chocolate flavor — Dutch-process cocoa plus chocolate protein powder gives you a deep, unsweet fudgy taste instead of a powdery one.
- Meal-prep friendly — one batch makes 12 bites and keeps for a week in the fridge.
- Flexible ingredients — sunflower seed butter, oat milk, and plant protein all work, so you can adapt it to what’s in your pantry.
Ingredients Needed to Make High Protein No Bake Brownie Protein Bites
You probably already have most of these in your pantry. If not, everything below is easy to find at a regular grocery store.
Dry Ingredients
- Old-fashioned rolled oats — 1 cup. These give the bites their chew. Don’t swap in quick oats; they turn to mush.
- Chocolate or unflavored protein powder — 1 scoop (about 1/3 cup / 30g). Whey or plant-based both work. Chocolate powder deepens the flavor; unflavored keeps it more brownie-like.
- Unsweetened Dutch-process cocoa powder — 1/4 cup. Dutch-process is smoother and less bitter than natural cocoa, which matters here since there’s no baking to mellow it out.
- Ground flaxseed — 2 tbsp. Adds fiber and helps bind the dough.
- Fine sea salt — 1/4 tsp. Just enough to make the chocolate taste more like chocolate.
Wet Ingredients
- Natural creamy peanut butter — 1/2 cup, unsweetened with no added oil. The natural stuff stirs into the maple syrup more smoothly.
- Pure maple syrup — 1/4 cup. Honey works too if that’s what you have.
- Pure vanilla extract — 1 tsp. Rounds out the flavor.
- Unsweetened almond milk — 2–4 tbsp, as needed. Add this last and slowly; it’s the difference between perfect dough and sticky dough.
Optional Add-In
- Mini dark chocolate chips — 2 tbsp. Not required, but they add little pockets of chocolate that make these feel more like dessert.
Equipment Needed
Nothing fancy here — this is a bowl-and-spatula kind of recipe.
- Large mixing bowl — for the dry ingredients. Any size works as long as you can whisk without spilling.
- Medium mixing bowl — for the wet mixture. A second bowl keeps the protein powder from clumping.
- Whisk — to break up cocoa and protein powder clumps. A fork works in a pinch.
- Sturdy spatula — the dough gets thick. A flimsy spatula will bend.
- Parchment paper and a small plate or baking sheet — for chilling the rolled bites without sticking.
Instructions to Make High Protein No Bake Brownie Protein Bites
The process is simple, but the order matters. Mixing dry and wet separately first is what keeps the texture even.
Step 1: Combine the Dry Ingredients
In a large mixing bowl, whisk together the oats, protein powder, cocoa powder, ground flaxseed, and sea salt for about 30 seconds. You want no clumps of protein powder or cocoa left — those clumps turn into dry, chalky pockets in the finished bites.
Step 2: Mix the Wet Ingredients
In a separate medium bowl, stir the peanut butter, maple syrup, and vanilla until completely smooth. If your peanut butter is stiff, warm it in the microwave for 15–20 seconds until it stirs easily — but don’t let it get hot, or it’ll melt the chocolate chips later.
Step 3: Form the Dough
Pour the wet mixture into the dry ingredients and fold and knead with a sturdy spatula or your hands for 1–2 minutes until a thick dough forms. Squeeze a small amount — if it holds together, you’re done. If it crumbles, add almond milk 1 tablespoon at a time. Go slow here; too much liquid and the bites turn sticky and won’t roll.
Step 4: Add the Chocolate Chips
If you’re using mini chocolate chips, fold them in now until they’re evenly distributed. Waiting until the dough is formed keeps them from getting crushed during mixing.
Step 5: Roll the Bites
Scoop 1-tablespoon portions and roll firmly between your palms into smooth 1-inch balls. You should get 12 bites. If the dough sticks to your hands, dampen your palms with water or chill the dough for 10 minutes first.
Step 6: Chill
Place the bites on a parchment-lined plate or small baking sheet and refrigerate for at least 30 minutes. One hour is better — the flavors meld and the texture firms up to a proper fudgy chew.
What Went Wrong and How I Fixed It
Here’s what tripped me up the first few times I made these.
- Sticky dough that wouldn’t roll — I added all 4 tablespoons of almond milk at once. Add 1 tablespoon at a time and stop the second the dough holds together.
- Crumbly bites falling apart — usually a sign the peanut butter was too stiff. Warm it briefly before mixing and the dough comes together much easier.
- Chalky, dry texture — this happened when I didn’t whisk the dry ingredients well enough and hit pockets of unblended protein powder. Thirty seconds of whisking fixes it.
- Bites tasting flat — skipping the salt. That 1/4 teaspoon is doing real work here.
- Soft bites that never firmed up — under-chilling. Give them a full hour in the fridge if you can wait.
- Lumpy wet mixture — peanut butter straight from the fridge. Room-temperature or lightly warmed peanut butter stirs smooth in seconds.
What Do I Serve With High Protein No Bake Brownie Protein Bites?
These work as a standalone snack, but they pair well with a few things depending on the time of day.
- Morning coffee — the bitterness cuts through the sweetness and makes the chocolate flavor pop.
- Greek yogurt — a small bowl alongside adds extra protein and turns a snack into a light breakfast.
- Sliced banana — the classic chocolate-peanut butter combo, no explanation needed.
- Cold glass of almond milk — for dunking, obviously.
- Trail mix — a couple of bites plus nuts and dried fruit makes a solid hiking snack.
- Apple slices — crisp and tart, and they balance the richness nicely.
Pro Tips to Make Perfect High Protein No Bake Brownie Protein Bites
Small adjustments make a big difference with a no-bake recipe. These are the ones I come back to every time.
- Pulse the oats — a few quick pulses in a food processor gives you a smoother, more brownie-like bite. Skip it if you like the chew.
- Chill your hands — if your kitchen is warm, run cold water over your palms before rolling. The dough sticks far less.
- Scoop evenly — a 1-tablespoon measure keeps all 12 bites the same size so they chill at the same rate.
- Boost the protein — add an extra 1/2 scoop of protein powder and 1 extra tablespoon of almond milk for about 18g per serving.
- Taste the dough — before rolling, pinch off a bit. If it needs more sweetness, add a teaspoon of maple syrup; if it needs depth, add a pinch more salt.
- Let them rest overnight — the flavor is noticeably better on day two. Make them the night before you need them.
- Use a light hand with the milk — you may not need all 4 tablespoons. Stop as soon as the dough holds.
Variations of High Protein No Bake Brownie Protein Bites
Once you’ve made the base recipe a couple of times, these tweaks are worth trying.
- Nut-free version — swap peanut butter for sunflower seed butter and use oat or coconut milk.
- Vegan version — use plant-based protein powder and maple syrup instead of honey.
- Mocha twist — add 1 teaspoon of instant espresso powder to the dry ingredients for a coffee-chocolate flavor.
- Extra protein boost — add 1/2 scoop more protein powder plus 1 tablespoon of almond milk, pushing each serving closer to 18g.
- Coconut almond — swap 2 tablespoons of oats for shredded unsweetened coconut and use almond extract instead of vanilla.
- Mint chocolate — add 1/4 teaspoon of peppermint extract to the wet ingredients and use mini chocolate chips.
How Do I Store High Protein No Bake Brownie Protein Bites Leftovers?
These keep well, but how you store them changes the texture.
- Refrigerator — airtight container for up to 7 days. This is the ideal way to keep them firm.
- Freezer — freeze in a single layer on a sheet pan first, then transfer to a freezer bag for up to 3 months.
- Parchment layers — if stacking in a container, put a sheet of parchment between layers to prevent sticking.
- Small containers — portion out 2–3 bites per container if you’re packing them for work or school.
- Away from strong smells — these absorb odors easily in the fridge. Keep the lid sealed tight.
How Do I Reheat High Protein No Bake Brownie Protein Bites Leftovers?
Technically these don’t need reheating, but if you want them softer or warmer, here’s how.
- Room temperature — let frozen bites sit out for 5–10 minutes. This is my preferred method; they soften to a perfect fudgy chew.
- Microwave — 5–8 seconds on high for a single bite. Any longer and they’ll melt into a puddle.
- Oven — 300°F for 3–4 minutes on a parchment-lined sheet if you want them warm throughout. Watch closely; they soften fast.
- Air fryer — 300°F for 2 minutes. Check at the 90-second mark to be safe.
FAQs
Can I freeze High Protein No Bake Brownie Protein Bites?
Yes. Freeze them in a single layer first so they don’t clump together, then move them to a freezer bag. They keep for up to 3 months, and a 5–10 minute thaw at room temperature brings them right back.
How long does High Protein No Bake Brownie Protein Bites last in the fridge?
Up to 7 days in an airtight container. After that, the oats start to dry out and the texture gets crumbly.
Can I use a different protein powder?
Whey and plant-based both work fine. Just avoid anything labeled “cookies and cream” or similar blends with added sweeteners — they throw off the flavor balance.
Why are my bites crumbly?
Usually the peanut butter was too stiff or you didn’t add enough liquid. Warm the peanut butter before mixing and add almond milk 1 tablespoon at a time until the dough holds when squeezed.
Do I have to use rolled oats?
Old-fashioned rolled oats give the best chew. Quick oats turn mushy, and steel-cut oats stay too hard. If you want a smoother texture, pulse rolled oats in a food processor instead of switching types.
Are these gluten-free?
Only if you use certified gluten-free oats. The rest of the ingredients are naturally gluten-free, but oats are often processed in facilities that handle wheat.
Try These Recipes
Final Words
If you’ve been looking for a chocolate snack that earns its place in your fridge, these High Protein No Bake Brownie Protein Bites are worth a batch. They take 15 minutes of hands-on work, need no oven, and deliver 15g of protein per serving. Make them tonight and they’ll be ready by tomorrow.
PrintHigh Protein No Bake Brownie Protein Bites
Rich, fudgy, and intensely chocolatey, these no-bake brownie protein bites deliver serious decadence without ever turning on the oven. Rolled oats and a double dose of cocoa create a satisfying chew, while chocolate protein powder and creamy peanut butter pack in 15 grams of protein per serving. They set up firm in the fridge and taste even better the next day.
- Prep Time: 15
- Total Time: 45
- Yield: 4 1x
- Category: Snack
- Method: No-Cook
- Cuisine: American
Ingredients
- 1 cup old-fashioned rolled oats
- 1 scoop (about 1/3 cup / 30g) chocolate or unflavored whey or plant-based protein powder
- 1/4 cup unsweetened Dutch-process cocoa powder
- 2 tbsp ground flaxseed
- 1/4 tsp fine sea salt
- 1/2 cup natural creamy peanut butter (unsweetened, no added oil)
- 1/4 cup pure maple syrup (or honey)
- 1 tsp pure vanilla extract
- 2–4 tbsp unsweetened almond milk (or milk of choice), as needed
- 2 tbsp mini dark chocolate chips (optional)
Instructions
- In a large mixing bowl, combine the oats, protein powder, cocoa powder, ground flaxseed, and fine sea salt. Whisk thoroughly until no clumps of protein powder or cocoa remain, about 30 seconds. This even distribution ensures every bite has the same rich chocolate flavor and balanced texture.
- In a separate medium bowl, stir together the peanut butter, maple syrup, and vanilla extract until completely smooth and lump-free. If your peanut butter is stiff, warm it in the microwave for 15–20 seconds until easily stirrable, but not hot.
- Pour the wet mixture into the dry ingredients. Using a sturdy spatula or your hands, fold and knead until a thick, cohesive dough forms, about 1–2 minutes. The mixture should hold together when squeezed; if it crumbles, add almond milk 1 tablespoon at a time until it just comes together — avoid adding too much liquid or the bites will be sticky.
- If using chocolate chips, fold them in now until evenly distributed throughout the dough.
- Scoop 1-tablespoon portions of dough and roll firmly between your palms into smooth 1-inch balls. You should get 12 bites total. If the dough sticks to your hands, lightly dampen your palms with water or chill the dough for 10 minutes first.
- Place the bites on a parchment-lined plate or small baking sheet. Refrigerate for at least 30 minutes to firm up and allow the flavors to meld. For best texture, let them chill for 1 hour before eating.
- Store in an airtight container in the refrigerator for up to 1 week, or freeze for up to 3 months. To serve from frozen, let them thaw at room temperature for 5–10 minutes — they soften to a perfect fudgy chew.
Notes
Storage: Keep refrigerated in an airtight container for up to 7 days. For longer storage, freeze in a single layer, then transfer to a freezer bag; they’ll keep for 3 months. Reheating: No reheating needed — enjoy cold or at room temperature. If frozen, thaw at room temp for 5–10 minutes. Substitutions: For a nut-free version, swap peanut butter with sunflower seed butter; use a nut-free milk like oat or coconut. For a vegan option, ensure protein powder is plant-based and use maple syrup. Protein boost: For even higher protein, add an extra 1/2 scoop of protein powder and increase almond milk by 1 tbsp. Texture tip: For a smoother bite, pulse the oats in a food processor a few times before mixing. Do not use bacon or pork products — none are included.
Nutrition
- Calories: 413
- Sugar: 15g
- Sodium: 210mg
- Saturated Fat: 5g
- Carbohydrates: 39g
- Fiber: 7g
- Protein: 15g
- Cholesterol: 6mg
Keywords: no bake brownie protein bites, brownie protein balls, high protein snacks, no bake energy bites, chocolate protein bites, healthy dessert, post workout snack, meal prep snacks, gluten free protein bites, easy no bake recipe