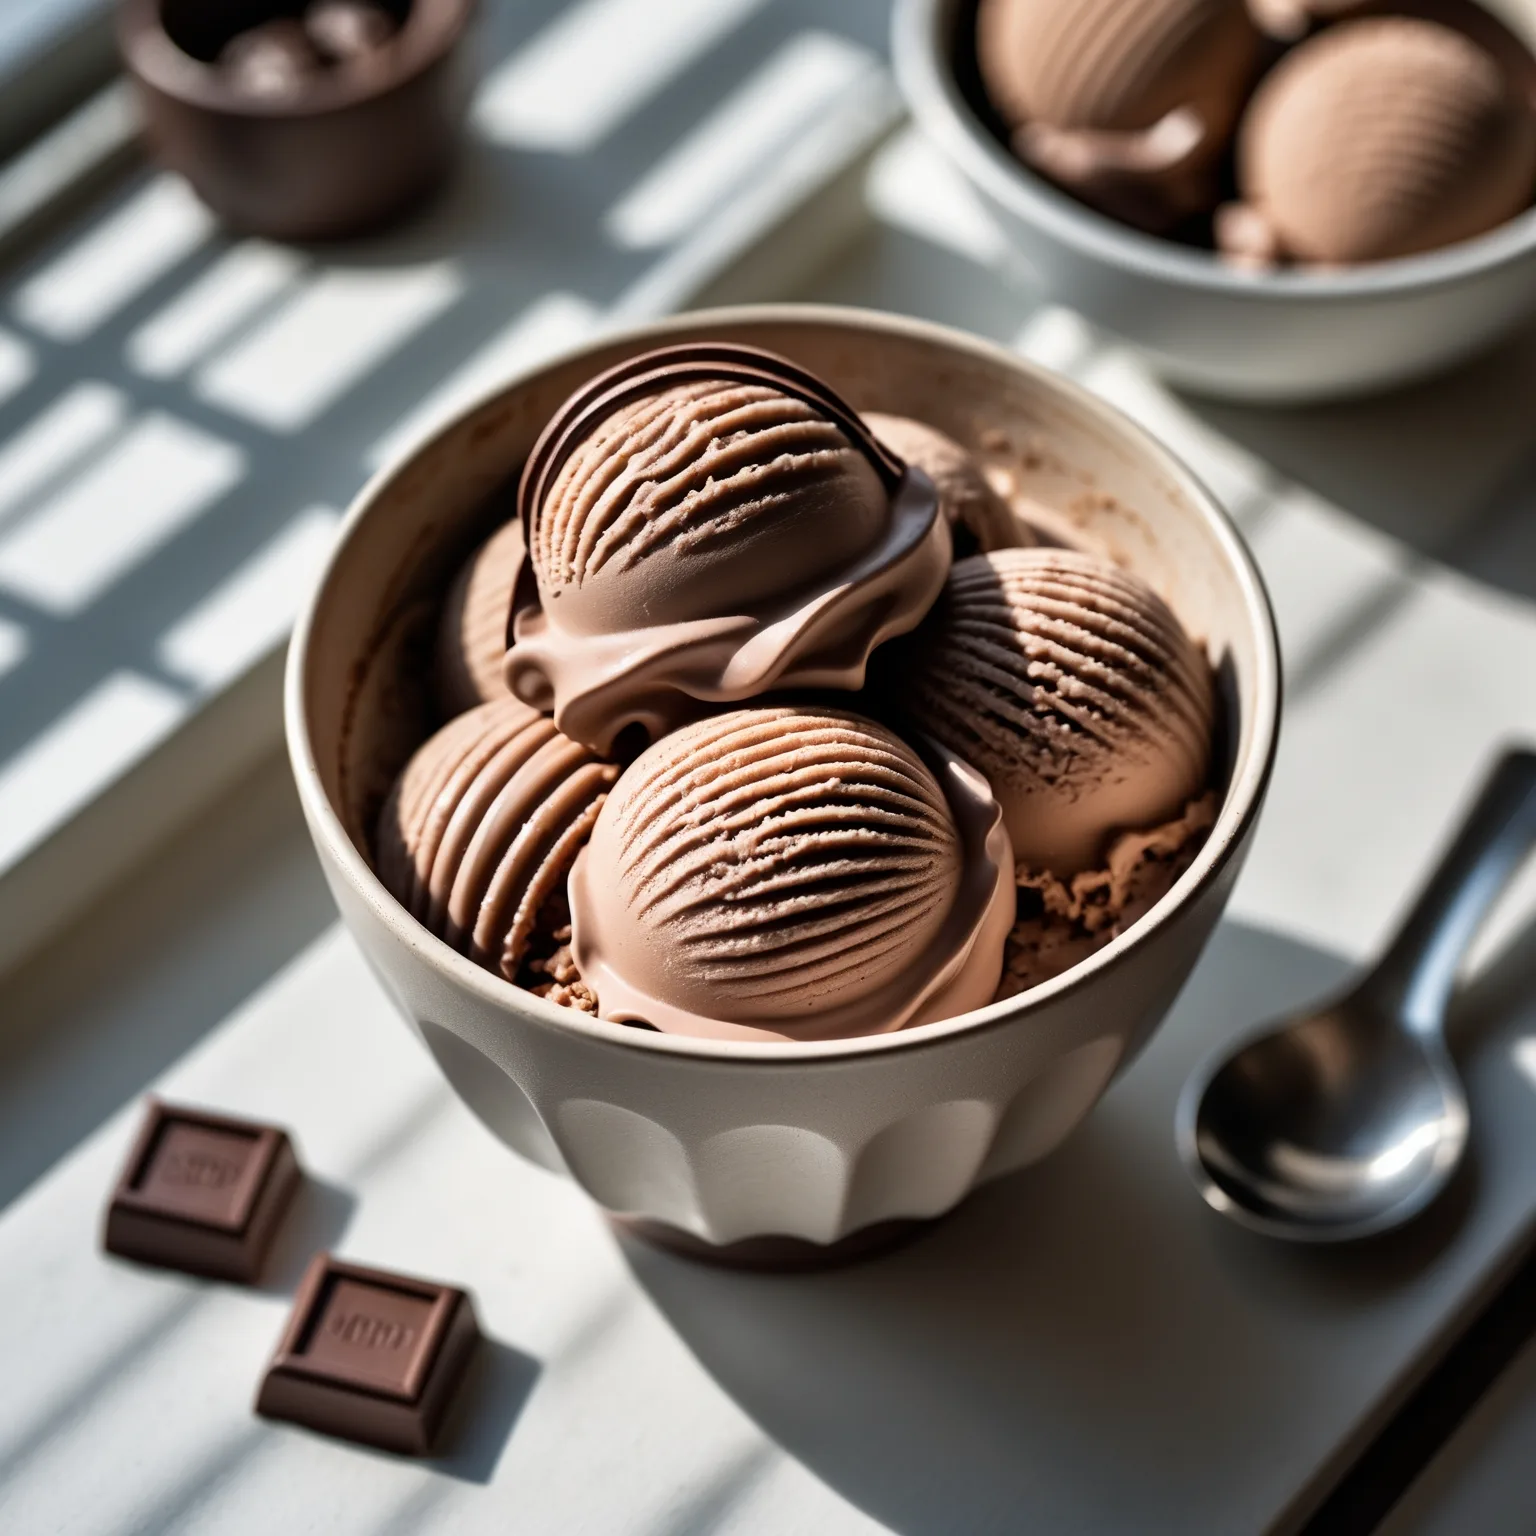
If you’ve ever wanted a rich, fudgy bowl of ice cream that doesn’t derail your nutrition goals, you’re in the right place. This Ninja Creami Chocolate Fudge Protein Ice Cream is my go-to when that deep chocolate craving hits. It comes together in about 12 minutes of active time and each generous serving packs 22 grams of protein, making it a surprisingly filling dessert or a brilliant post-workout treat.
What I love most is its texture. The Ninja Creami transforms a simple frozen base into something incredibly creamy and scoopable, rivaling any premium pint. It’s a no-cook, American-style dessert that feels indulgent but is built on smart, high-protein ingredients like Greek yogurt and chocolate protein powder.
What is Ninja Creami Chocolate Fudge Protein Ice Cream?
This isn’t your average protein shake disguised as dessert. It’s a fully realized, deeply chocolate frozen treat made specifically for the Ninja Creami machine. The concept originated with home cooks and fitness enthusiasts looking to create healthier ice cream alternatives without artificial sweeteners or gums.
What makes it special is the combination of ingredients that freeze and spin perfectly. The full-fat Greek yogurt provides a tangy creaminess and serious protein, while the cocoa powder and protein powder build layers of chocolate flavor. The honey adds a natural sweetness that doesn’t crystallize too much in the freezer. The result is a dessert with a smooth, soft-serve consistency that’s genuinely satisfying.
Why You’ll Love This Recipe
Here’s what makes this recipe a regular in my freezer rotation.
- Serious Protein Power — With 22g per serving, this ice cream helps keep you full and supports muscle recovery, all from whole-food sources.
- Incredibly Creamy Texture — The Ninja Creami works its magic, churning the frozen base into a scoopable, dreamy consistency you have to taste to believe.
- Deep Chocolate Flavor — Using both cocoa powder and chocolate protein powder creates a rich, fudgy taste that’s not at all chalky.
- Quick to Prepare — Your active time is only about 10 minutes for prepping the base. The freezer and machine do the rest of the work.
- Naturally Sweetened — Relying on honey keeps it free from refined sugars, and you can easily adjust the sweetness to your liking.
Ingredients Needed to Make Ninja Creami Chocolate Fudge Protein Ice Cream
You only need seven simple ingredients to create this high-protein dessert. Here’s what each one does.
The Dairy & Protein Base
- 1.5 cups full-fat Greek yogurt — This is the star for creaminess and protein. Full-fat works best for texture, but low-fat can make the ice cream icier.
- 2 scoops (60g) chocolate protein powder — Choose a powder you enjoy the taste of on its own; it forms the primary chocolate flavor backbone.
- 1/2 cup whole milk — The liquid component that blends everything smoothly. For a dairy-free version, unsweetened almond or oat milk works.
Flavor Enhancers
- 1/4 cup unsweetened cocoa powder — This adds that deep, dark fudge note. Use a good-quality one for the best flavor.
- 1/4 cup honey — Our natural sweetener. You can substitute maple syrup or agave if you prefer.
- 1 teaspoon vanilla extract — A classic flavor enhancer that rounds out the chocolate and adds warmth.
- 1/4 teaspoon kosher salt — Never skip this. Salt makes the chocolate flavor pop and balances the sweetness perfectly.
Equipment Needed
- A Blender — Essential for creating a completely smooth, lump-free base before freezing.
- Two Ninja Creami Pint Containers — The recipe makes enough for two pints. Having both on hand lets you make a batch and save one for later.
- Measuring Cups and Spoons — Accuracy matters for the right texture, especially with the dry ingredients.
- A Spatula — For scraping down the blender and leveling the mixture in the pints.
- Your Ninja Creami Machine — The key piece of equipment that transforms the frozen block into creamy ice cream.
Instructions to Make Ninja Creami Chocolate Fudge Protein Ice Cream
Follow these steps closely for a perfect, scoopable result every time.
Step 1: Blend the Base
Add the Greek yogurt, protein powder, and cocoa powder to your blender. I give them a quick stir with a spatula first—this little hack prevents the dry ingredients from flying everywhere and clumping. Then, pour in the milk, honey, vanilla, and salt.
Secure the lid and blend on medium for 30 seconds, then on high for another 30. You want a velvety, homogeneous mixture. Scrape the sides if needed and blend again for a few seconds to ensure no dry pockets remain.
Step 2: Taste and Freeze
Now, taste it. Dip a clean spoon into the blender. It should taste a touch sweeter than you want the final ice cream to be, as freezing dulls sweetness. If needed, add another tablespoon of honey. Be cautious with extra cocoa powder, as too much can make the final texture gritty.
Divide the mixture between the two Ninja Creami pints, filling to about an inch from the top. Level the surface with your spatula to remove air bubbles. Secure the lids and freeze the containers upright on a flat surface for a full 24 hours. This complete freeze is non-negotiable for the right texture.
Step 3: Process in the Ninja Creami
After 24 hours, take one pint out and let it sit on the counter for 5-10 minutes. This slight thaw helps the blade work efficiently. Place the outer bowl of your Ninja Creami on a stable surface, insert the frozen pint, and lock the lid until it clicks.
Select the ‘ICE CREAM’ function and press start. The machine will run for about 2 minutes. When it stops, open the lid. If you see any icy spots or it seems too soft, use the ‘RESPIN’ function for 30-60 seconds to achieve that perfect, creamy consistency.
Step 4: Serve and Store
Scoop and enjoy immediately! For a fudge swirl, mix a tablespoon each of cocoa powder and milk with a scoop of protein powder to make a thick sauce, then ripple it through the just-spun ice cream.
For any leftovers, press them back into the pint container, seal tightly, and return to the freezer. It will keep well for up to 2 months.
What Went Wrong and How I Fixed It
I’ve made my share of mistakes with this recipe. Here’s how to troubleshoot the common ones.
- Grainy Texture — This usually means the protein powder or cocoa wasn’t fully dissolved. Blending the base for a full minute on high usually fixes it.
- Ice Cream is Too Hard — Skipping the 5-10 minute counter thaw before spinning can cause this. Let the pint soften slightly next time.
- Result is Too Soft or Slushy — The pint likely didn’t freeze solid for the full 24 hours. Patience is key here—ensure it’s rock hard.
- Bland Chocolate Flavor — Not using enough salt or a weak cocoa powder can be the culprit. A pinch more salt and a quality dark cocoa powder make all the difference.
- Difficult-to-Blend Base — Adding the liquids after the dry ingredients helps, but starting your blender on low before going to high can also prevent clumping.
What Do I Serve With Ninja Creami Chocolate Fudge Protein Ice Cream?
This ice cream is fantastic on its own, but a few simple pairings can make it feel extra special.
- Fresh Berries — A handful of raspberries or strawberries adds a tart, juicy contrast to the rich chocolate.
- Crushed Nuts — Try almonds or walnuts for a satisfying crunch and a boost of healthy fats.
- A Warm Brownie — For the ultimate indulgence, serve a scoop over a freshly baked, fudgy protein brownie.
- Whipped Cream — A dollop of light whipped cream or coconut cream makes it feel like a true dessert shop treat.
- Espresso Shot — Pour a shot of hot espresso over a scoop for an effortless, decadent affogato.
Pro Tips to Make Perfect Ninja Creami Chocolate Fudge Protein Ice Cream
- Quality Protein Powder Matters — Since it’s a main flavor component, use a chocolate protein powder you genuinely like the taste of.
- Don’t Overfill the Pints — Leaving that one-inch gap at the top is crucial. The mixture expands as it freezes and needs room.
- Embrace the Respin — If the texture isn’t perfect after the first spin, don’t worry. The respin function is there to save the day and get it creamy.
- Scrape the Sides — After blending, use your spatula to scrape down the blender walls thoroughly to incorporate every bit of cocoa powder.
- Freeze on a Level Surface — An uneven freeze can lead to inconsistent texture. Make sure your freezer shelf is flat.
- Sweeten to Your Taste — The honey level is a guideline. Always taste the base and adjust before freezing.
Variations of Ninja Creami Chocolate Fudge Protein Ice Cream
Once you’ve mastered the base, it’s fun to play around with flavors.
- Mint Chocolate Chip — Add 1/2 teaspoon of peppermint extract to the base and fold in chopped dark chocolate or cacao nibs after spinning.
- Rocky Road — After processing, mix in a handful of mini marshmallows and chopped almonds for classic texture.
- Double Chocolate Chunk — Boost the chocolate further by folding in chunks of your favorite chocolate bar or sugar-free chocolate chips.
- Chocolate Peanut Butter — Swirl in two tablespoons of natural peanut butter after the first spin for a rich, salty-sweet combo.
- Mocha Swirl — Dissolve a teaspoon of instant espresso powder into the milk before blending for a coffee-chocolate twist.
- Higher Protein Version — Add an extra scoop of protein powder and an extra tablespoon of milk to the base to bump the protein even higher.
How Do I Store Ninja Creami Chocolate Fudge Protein Ice Cream Leftovers?
- Airtight Pint Container — Always store leftovers back in the Ninja Creami pint. Press the ice cream down to minimize air pockets and seal the lid tightly.
- Consume Within Two Weeks — For the absolute best texture and flavor, try to enjoy it within this timeframe.
- Label Your Pints — Use a piece of masking tape and a marker to note the flavor and date you made it.
- Freezer Placement — Store the pint towards the back of the freezer where the temperature is most constant, avoiding the door.
How Do I Reheat Ninja Creami Chocolate Fudge Protein Ice Cream Leftovers?
“Reheating” isn’t quite right for ice cream—it’s more about restoring the perfect creamy texture after storage.
- Countertop Thaw — Simply let the sealed pint sit on your kitchen counter for 5 to 10 minutes to soften slightly before scooping.
- Ninja Creami Respin — For the best results, process the frozen leftovers on the ‘RESPIN’ function for 30 seconds to bring back the fresh, soft-serve consistency.
- Microwave in a Pinch — If you’re scooping directly into a bowl, you can microwave a single serving for 5-10 seconds, but watch it closely to avoid melting.
FAQs
Can I make Ninja Creami Chocolate Fudge Protein Ice Cream without a Ninja Creami?
Unfortunately, no. The unique spinning and aerating action of the Ninja Creami is what creates the signature creamy texture from a frozen block. A regular ice cream maker churns a liquid base, so it won’t work with this method.
My ice cream turned out icy. What happened?
This is often due to not using full-fat yogurt, skipping the 24-hour freeze, or not processing it long enough. Ensure your base is completely solid and use the respin function if the first spin leaves icy patches.
How long does Ninja Creami Chocolate Fudge Protein Ice Cream last in the freezer?
Stored properly in its sealed pint, it will be safe to eat for up to 2 months. For optimal creaminess and flavor, I recommend consuming it within 2 weeks.
Can I use a different sweetener instead of honey?
Yes, maple syrup or agave nectar are easy 1:1 swaps. If using a granulated sweetener like monk fruit or erythritol, you may need to add a bit more liquid to the base.
Is Ninja Creami Chocolate Fudge Protein Ice Cream good for meal prep?
It’s excellent for meal prep! Making two pints at once means you have a ready-made, high-protein dessert for days. Just remember to respin each pint individually when you’re ready to serve it.
Can I add mix-ins before freezing?
I don’t recommend it. Adding things like nuts or chocolate chips before freezing can interfere with the blade. Always fold in your mix-ins after the ice cream has been processed and is soft and creamy.
Final Words
This recipe proves you don’t have to choose between a decadent dessert and hitting your protein goals. Once you try this Ninja Creami Chocolate Fudge Protein Ice Cream, I think you’ll be as hooked as I am. Give it a spin this week—I’d love to hear how it turns out for you.
PrintNinja Creami Chocolate Fudge Protein Ice Cream

This rich and creamy protein ice cream features a deep chocolate fudge flavor with a smooth, scoopable texture, making it a guilt-free dessert or post-workout treat packed with 22g of protein per serving.
- Prep Time: 10
- Cook Time: 2
- Total Time: 12
- Yield: 4 1x
- Category: Dessert
- Method: No-Cook
- Cuisine: American
Ingredients
- 1.5 cups full-fat Greek yogurt
- 2 scoops (60g) chocolate protein powder
- 1/4 cup unsweetened cocoa powder
- 1/2 cup whole milk
- 1/4 cup honey
- 1 teaspoon vanilla extract
- 1/4 teaspoon kosher salt
Instructions
- Gather all ingredients and equipment, including a blender, measuring cups and spoons, and two Ninja Creami pint containers. This mise en place ensures efficiency and prevents interruptions during blending.
- In the blender jar, add 1.5 cups full-fat Greek yogurt, 2 scoops chocolate protein powder, and 1/4 cup unsweetened cocoa powder. Use a spatula to briefly stir the dry ingredients into the yogurt; this prevents clumping and ensures even distribution when blending.
- Pour in 1/2 cup whole milk, 1/4 cup honey, 1 teaspoon vanilla extract, and 1/4 teaspoon kosher salt. The liquid helps create a smooth base, while salt enhances the chocolate flavor by balancing sweetness.
- Secure the blender lid and blend on medium speed for 30 seconds, then increase to high for another 30 seconds until the mixture is completely smooth with no lumps. Scrape down the sides with a spatula if needed to incorporate any stuck ingredients.
- Taste a small amount of the mixture with a clean spoon. If it lacks sweetness, add an additional tablespoon of honey and blend for 10 seconds; adjust chocolate intensity with more cocoa powder sparingly, as extra dry ingredients can affect final texture.
- Divide the mixture evenly between the two Ninja Creami pint containers, filling each to about 1 inch from the top to allow for expansion during freezing. Use a spatula to level the surface and remove air bubbles for consistent freezing.
- Place the lids securely on the containers and wipe any spills from the outside. Set the containers upright in the freezer on a flat surface; this promotes even freezing and prevents uneven texture in the final ice cream.
- Freeze the containers for at least 24 hours or until the mixture is completely solid. Do not shortcut this time, as partial freezing will result in a slushy, inconsistent texture after processing in the Ninja Creami.
- After freezing, remove one pint from the freezer and let it sit at room temperature for 5-10 minutes. This slight softening helps the Ninja Creami blade process the ice cream evenly without straining the motor.
- Assemble the Ninja Creami by placing the outer bowl on a stable, level surface. Insert the frozen pint container into the bowl and align the lid, ensuring it clicks into place securely to prevent leaks during operation.
- Select the ‘Ice Cream’ function on the Ninja Creami control panel and press start. The machine will run for approximately 2 minutes, churning and aerating the mixture into a creamy, soft-serve consistency.
- Once the cycle completes, open the lid and check the texture. If the ice cream is too soft or has icy spots, use the ‘Respin’ function for 30-60 seconds until it reaches a smooth, scoopable consistency without over-processing.
- For a fudge swirl variation, prepare a quick sauce by mixing 1 tablespoon cocoa powder with 1 tablespoon milk and 1 scoop protein powder until smooth. Drizzle this over the processed ice cream and gently fold in with a spoon for added richness.
- Serve the ice cream immediately into bowls or cones. For storage, transfer any leftovers back to the pint container, seal tightly, and return to the freezer; respin for 30 seconds before serving if stored to restore creaminess.
Notes
Store leftover ice cream in the sealed pint container in the freezer for up to 2 months. To serve after storage, let sit at room temperature for 5-10 minutes to soften slightly, then respin in the Ninja Creami for 30 seconds to restore creaminess. For optimal texture, consume within 2 weeks. If desired, boost protein further by adding an extra scoop of protein powder to the base mixture.
Nutrition
- Calories: 220
- Sugar: 20g
- Sodium: 50mg
- Saturated Fat: 1g
- Carbohydrates: 26g
- Fiber: 2g
- Protein: 22g
- Cholesterol: 5mg
Keywords: Ninja Creami chocolate fudge protein ice cream, high protein ice cream recipe, chocolate protein ice cream, Ninja Creami dessert, healthy chocolate ice cream, no-cook protein dessert, homemade fudge ice cream, post-workout ice cream, guilt-free chocolate treat, low-fat protein snack, protein-packed frozen dessert, easy Ninja Creami recipe