
You know that craving for creamy, dreamy ice cream that hits after dinner or a workout? I’ve been there. But what if I told you the fix could be simple, satisfying, and pack a serious protein punch?
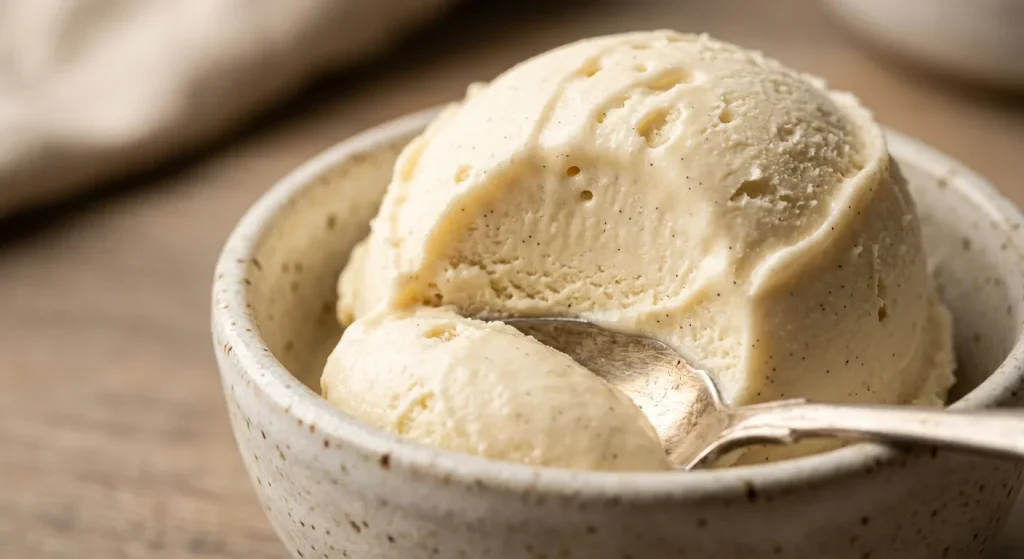
Let me introduce you to my Ninja Creami Vanilla Protein Ice Cream. It’s a rich, smooth frozen dessert with a classic vanilla flavor that feels indulgent. Each serving delivers 17 grams of protein, making it a fantastic, healthy dessert or post-exercise treat. With just 10 minutes of active prep and a handful of simple ingredients, you’re about 24 hours away from the creamiest homemade protein ice cream you’ve ever tasted.
What is Ninja Creami Vanilla Protein Ice Cream?
This isn’t your average store-bought pint. Ninja Creami Vanilla Protein Ice Cream is a homemade, high-protein frozen dessert made specifically for the Ninja Creami machine. It transforms a simple mixture of Greek yogurt, protein powder, and milk into a texture that rivals premium soft-serve.
The magic lies in the machine’s high-speed blending, which pulverizes the frozen base into an incredibly smooth consistency. What makes it special is its dual purpose: it satisfies a sweet tooth while providing a substantial nutritional boost, thanks to the Greek yogurt and protein powder. It’s a treat you can feel good about enjoying any day of the week.
Why You’ll Love This Recipe
Here are just a few reasons this has become a staple in my freezer.
- Serious Protein Power — With 17 grams per serving, this ice cream is surprisingly filling and helps support muscle recovery, making it more than just a dessert.
- Incredibly Simple Process — The active work is just whisking a few ingredients together. The machine does the heavy lifting to create that perfect creamy texture.
- Healthier Indulgence — You control the ingredients, so there are no artificial additives or excessive sugars, just wholesome components like Greek yogurt and honey.
- Creamy, Dreamy Texture — The combination of full-fat Greek yogurt and the Creami’s processing gives you a rich, scoopable consistency that’s far from icy or gritty.
- Endlessly Customizable — The classic vanilla base is a perfect canvas. Once you master it, you can create countless flavor variations to match your mood.
Ingredients Needed to Make Ninja Creami Vanilla Protein Ice Cream
You only need six simple ingredients for this high-protein frozen dessert. Quality matters here for the best flavor and texture.
The Creamy Dairy Base
- 2 cups full-fat Greek yogurt — This is the star, providing a thick, creamy body and a huge protein boost. Full-fat gives the richest mouthfeel.
- 1/2 cup whole milk — Thins the base just enough for the Creami to process it smoothly. Using whole milk adds to the creaminess.
Sweeteners & Flavor
- 2 tablespoons honey — Adds natural sweetness and helps keep the ice cream from freezing too hard. Maple syrup is an easy vegan swap.
- 1 teaspoon pure vanilla extract — Use the real stuff for a deep, aromatic vanilla flavor that artificial extracts can’t match.
- 1/4 teaspoon kosher salt — A small pinch is crucial. It balances the sweetness and makes the vanilla flavor pop.
The Protein Booster
- 1 scoop (30g) vanilla protein powder — This builds the protein content and reinforces the vanilla flavor. A whey/casein blend or a good quality whey isolate works best for creaminess.
Equipment Needed
You probably have most of this already. The only specialty item is the machine itself.
- A Large Mixing Bowl — You need enough space to comfortably whisk all the ingredients together without spills.
- Whisk or Hand Mixer — Essential for creating a perfectly smooth base with no lumps of protein powder, which would ruin the texture.
- Measuring Cups & Spoons — Accuracy is key, especially for the liquid and protein powder measurements.
- Ninja Creami Machine — The key piece of equipment. Its unique blade design is what transforms a frozen block into creamy ice cream.
- Ninja Creami Pint Container — This specific container is designed to fit the machine’s blade assembly. Don’t try to substitute it.
Instructions to Make Ninja Creami Vanilla Protein Ice Cream
The process is straightforward: mix, freeze, then spin. Here’s how to get it right at each stage.
Step 1: Creating the Ice Cream Base
In your large bowl, combine all six ingredients: the Greek yogurt, protein powder, milk, honey, vanilla, and salt. Use a whisk or an electric hand mixer on its lowest setting to blend everything until it’s completely smooth. This step is non-negotiable—any dry pockets of protein powder will leave you with a gritty final product.
Step 2: Tasting and Freezing
Now, taste the mixture. It should taste slightly sweeter than you want the final ice cream to be, because freezing dulls sweetness. Adjust with a touch more honey if needed. Pour the base into the Creami pint, leaving about half an inch of space at the top for expansion. Tap the container gently on the counter to release air bubbles, then secure the lid tightly. Freeze it for a full 24 hours, or until completely solid. A solid freeze is critical for the right consistency.
Step 3: Processing to Perfection
Remove the pint from the freezer and let it sit at room temperature for 5-10 minutes. This slight softening helps the blades work evenly. Place the pint into the Creami’s outer bowl, lock it into the base, and select the ‘Ice Cream’ function. Let it run its cycle (about 2-3 minutes). When it stops, check the texture. If it looks at all crumbly, use the ‘Respin’ function for another 1-2 minutes until perfectly smooth.
Step 4: Serving and Storing
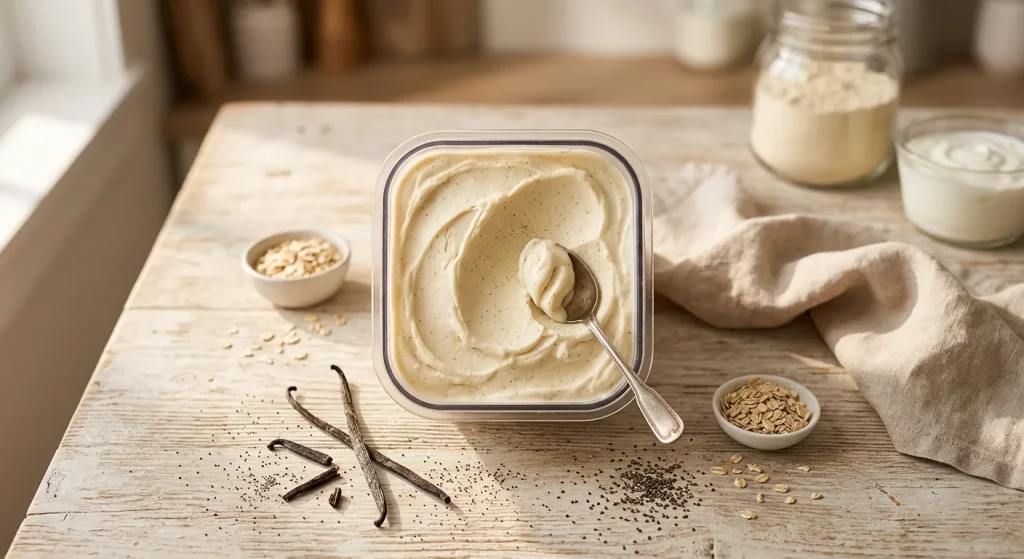
Scoop the freshly spun ice cream into bowls immediately—it’s at its creamiest right out of the machine. For any leftovers, press a small piece of parchment paper directly onto the surface inside the pint before re-sealing the lid. This creates a barrier against freezer air and prevents ice crystals from forming when you store it.
What Went Wrong and How I Fixed It
I’ve made my share of mistakes with this machine. Here are the common pitfalls and how to avoid them.
- Gritty Texture — This almost always means the protein powder wasn’t fully dissolved. I now mix the base for a full 2-3 minutes, scraping the bowl, to ensure zero dry spots.
- Crumbly Results After Spinning — The pint likely wasn’t frozen solid enough. Ensure a full 24-hour freeze, especially if your freezer is packed. A longer freeze fixes this.
- Overly Soft or Melty Ice Cream — Letting the pint sit out too long before spinning or using the ‘Respin’ function too many times can cause this. Stick to 5-10 minutes of thawing and only one respin if needed.
- Lack of Flavor — If the finished product tastes bland, you probably didn’t sweeten the base enough before freezing. Remember, it needs to be sweeter than your target taste.
- Difficult Scooping After Re-freezing — Leftovers will harden. Let the pint sit in the fridge for 10-15 minutes before scooping again, or give it a quick “Re-spin” to soften it up.
What Do I Serve With Ninja Creami Vanilla Protein Ice Cream?
The classic vanilla flavor makes it a perfect pairing partner. Here are some of my favorite ways to dress it up.
- Fresh Berries or Fruit — A handful of raspberries, sliced strawberries, or warm sautéed peaches adds a bright, fresh contrast.
- A Drizzle of Nut Butter — Warm up a spoonful of almond or peanut butter for a decadent, protein-rich sauce.
- Crunchy Granola or Nuts — Sprinkling on some chopped pecans, walnuts, or your favorite high-protein granola adds wonderful texture.
- Hot Fudge or Caramel Sauce — For a true treat-yourself moment, a little homemade or high-quality store-bought sauce is divine.
- A Crispy Waffle Cone — Serve a scoop (or two) in a cone for the ultimate nostalgic experience, with the bonus of extra protein.
Pro Tips to Make Perfect Ninja Creami Vanilla Protein Ice Cream
These small details make a big difference in your final bowl.
- Always Taste Before Freezing — Your base mixture should taste a little too sweet. This ensures the flavor is perfectly balanced once frozen.
- Full 24-Hour Freeze is Key — Don’t rush this. A completely solid pint processes more evenly and yields the creamiest texture.
- Scrape the Bowl Sides While Mixing — Protein powder loves to hide. Stop mixing and scrape down the sides of the bowl at least once to incorporate everything.
- Use Parchment for Leftovers — Pressing parchment directly on the surface before re-freezing is the single best trick to prevent icy, crystallized leftovers.
- Experiment with Protein Powders — Different brands and types (whey, casein, plant-based) behave differently. A blend often gives the creamiest result, but find one you like.
- Don’t Skip the Salt — That quarter teaspoon is not optional. It elevates the vanilla from flat to fantastic.
Variations of Ninja Creami Vanilla Protein Ice Cream
Once you’ve mastered the classic, try these easy twists.
- Chocolate Swirl — After spinning, fold in sugar-free chocolate chips or a ribbon of warmed nut butter before serving.
- Strawberry Cheesecake — Blend 1/2 cup of frozen strawberries into the base and fold in crushed graham crackers after processing.
- Cookie Dough Chunks — Add chunks of your favorite healthy protein cookie dough or sugar-free chocolate chips to the spun ice cream.
- Mocha Chip — Add 1 tablespoon of instant coffee or espresso powder to the base and fold in cacao nibs after processing for a caffeine kick.
- Double Vanilla Bean — Scrape the seeds from half a vanilla bean pod into the base along with the extract for intense, speckled vanilla flavor.
- Extra-Protein Peanut Butter — Add 2 tablespoons of powdered peanut butter to the base mixture for a stronger peanut flavor and an extra protein boost.
How Do I Store Ninja Creami Vanilla Protein Ice Cream Leftovers?
Proper storage keeps your ice cream fresh and scoopable for next time.
- Immediate Parchment Press — For any ice cream left in the pint, press a small square of parchment paper directly onto the surface before putting the lid back on.
- Airtight Pint Container — Your Ninja Creami pint with its lid is the perfect storage vessel. Just ensure the lid is sealed tightly.
- Freezer Placement — Store the pint in the back of your freezer where the temperature is most consistent, not on the door.
- Optimal Consumption Timeline — For the absolute best texture and flavor, enjoy leftovers within 1-2 weeks. It will be safe for longer, but quality may decline.
How Do I Reheat Ninja Creami Vanilla Protein Ice Cream Leftovers?
This is a frozen dessert, so “reheating” isn’t quite the right term. Think of it as softening or re-texturizing.
- Brief Countertop Thaw — Simply let the sealed pint sit on your counter for 8-12 minutes before scooping. This is the gentlest method.
- The Quick Respin — For the closest texture to fresh-spun, place the hard-frozen pint back in the Creami and use the “Re-spin” function for 60-90 seconds.
- Refrigerator Softening — For more controlled softening, place the pint in the refrigerator for 15-20 minutes before you plan to serve it.
FAQs
Can I make Ninja Creami Vanilla Protein Ice Cream without a Ninja Creami?
Unfortunately, no. The machine’s unique high-speed, downward-pressing blade is essential for transforming the solid frozen block into a creamy consistency. A standard blender or food processor won’t achieve the same result.
What type of protein powder works best?
I’ve found a whey protein isolate or a whey/casein blend yields the creamiest texture with minimal grit. Some plant-based powders can be grainier, so you may need to experiment with your favorite brand.
My ice cream is too hard after storing. What can I do?
This is normal! Homemade ice cream without stabilizers hardens more. Just use one of the softening methods above: a short counter thaw, a quick “Re-spin” in the machine, or 15 minutes in the fridge before scooping.
Can I use low-fat or non-fat Greek yogurt?
You can, but the ice cream won’t be as rich or creamy. The fat in full-fat Greek yogurt contributes significantly to the luxurious mouthfeel and helps prevent an icy texture.
How long does Ninja Creami Vanilla Protein Ice Cream last in the freezer?
For optimal taste and texture, enjoy it within 2 weeks. If you use the parchment paper method, it can be stored for up to 2 months, though it may gradually develop more ice crystals over time.
Can I double this recipe?
I don’t recommend it. The recipe is perfectly calibrated for the volume of the Ninja Creami pint container. Overfilling it won’t allow for proper expansion during freezing or processing.
Try These Recipes
- Ninja Creami Chocolate Protein Ice Cream
- Herb & Goat Cheese Baked Eggs
- Southwest Black Bean Egg Scramble
- Mushroom & Swiss Protein Omelette
Final Words
This recipe has honestly changed my relationship with “healthy” desserts. It proves you don’t have to choose between a treat that tastes incredible and one that fuels your body well.
I hope this guide gives you the confidence to make your own perfect batch of Ninja Creami Vanilla Protein Ice Cream. It’s simple, satisfying, and proves that good food can be both indulgent and wholesome. Give it a try—I think you’ll be hooked after the first creamy spoonful.
PrintNinja Creami Vanilla Protein Ice Cream
Creamy, high-protein ice cream with a rich vanilla flavor and smooth texture, made with Greek yogurt and protein powder for a healthy dessert or post-workout treat.
- Prep Time: 10
- Cook Time: 5
- Total Time: 255
- Yield: 4 1x
- Category: Dessert
- Method: No-Cook
- Cuisine: American
Ingredients
- 2 cups full-fat Greek yogurt
- 1 scoop (30g) vanilla protein powder
- 1/2 cup whole milk
- 2 tablespoons honey
- 1 teaspoon pure vanilla extract
- 1/4 teaspoon kosher salt
Instructions
- In a large mixing bowl, combine 2 cups full-fat Greek yogurt, 1 scoop vanilla protein powder, 1/2 cup whole milk, 2 tablespoons honey, 1 teaspoon pure vanilla extract, and 1/4 teaspoon kosher salt. Use a whisk or electric hand mixer on low speed to blend until the mixture is completely smooth and no dry pockets of protein powder remain; this prevents grittiness in the final ice cream.
- Taste the base and adjust sweetness if desired by adding more honey or a sugar-free sweetener. Since freezing dulls sweetness, the mixture should taste slightly sweeter than your target final product to ensure balanced flavor.
- Pour the mixture into a Ninja Creami pint container, leaving about 1/2 inch of space at the top to allow for expansion during freezing. Gently tap the container on the counter to release any air bubbles, which helps achieve a smoother texture.
- Secure the lid tightly on the pint container to prevent freezer burn. Place it in the freezer and freeze for at least 24 hours or until the mixture is completely solid; a longer freeze ensures proper consistency when processed.
- Remove the pint from the freezer and let it sit at room temperature for 5-10 minutes to slightly soften the exterior. This allows the Creami blades to process the frozen base more evenly without straining the machine.
- Place the pint into the Ninja Creami outer bowl and lock it securely into the base unit. Ensure the bowl is properly seated to avoid vibrations or mishaps during processing.
- Select the ‘Ice Cream’ setting on the Ninja Creami and start the machine. It will process the mixture for about 2-3 minutes, transforming the frozen base into creamy ice cream through high-speed blending.
- After the cycle completes, open the lid and check the texture. If the ice cream appears crumbly or uneven, select the ‘Respin’ function and process for an additional 1-2 minutes until smooth; avoid over-processing, which can cause melting.
- Using a spatula, scoop the ice cream into serving bowls immediately for the creamiest texture. Serve right away as it will begin to soften quickly at room temperature, affecting its consistency.
- For any leftovers, press a piece of parchment paper directly onto the surface of the ice cream in the pint to prevent ice crystal formation. Re-seal the lid and store in the freezer for optimal freshness.
Notes
Store in an airtight container in the freezer for up to 2 weeks. For longer storage, keep in the pint with parchment paper pressed on top for up to 2 months. No reheating needed; serve frozen. If using a different protein powder, adjust sweetness as brands vary in sweetness and macros.
Nutrition
- Calories: 149
- Sugar: 12g
- Sodium: 120mg
- Unsaturated Fat: 1g
- Carbohydrates: 15g
- Fiber: 0g
- Protein: 17g
- Cholesterol: 5mg
Keywords: Ninja Creami vanilla protein ice cream, protein ice cream recipe, high-protein dessert, vanilla ice cream, Ninja Creami recipe, healthy ice cream, protein powder dessert, no-cook ice cream, frozen dessert, post-workout snack, low-fat ice cream, homemade protein ice cream