
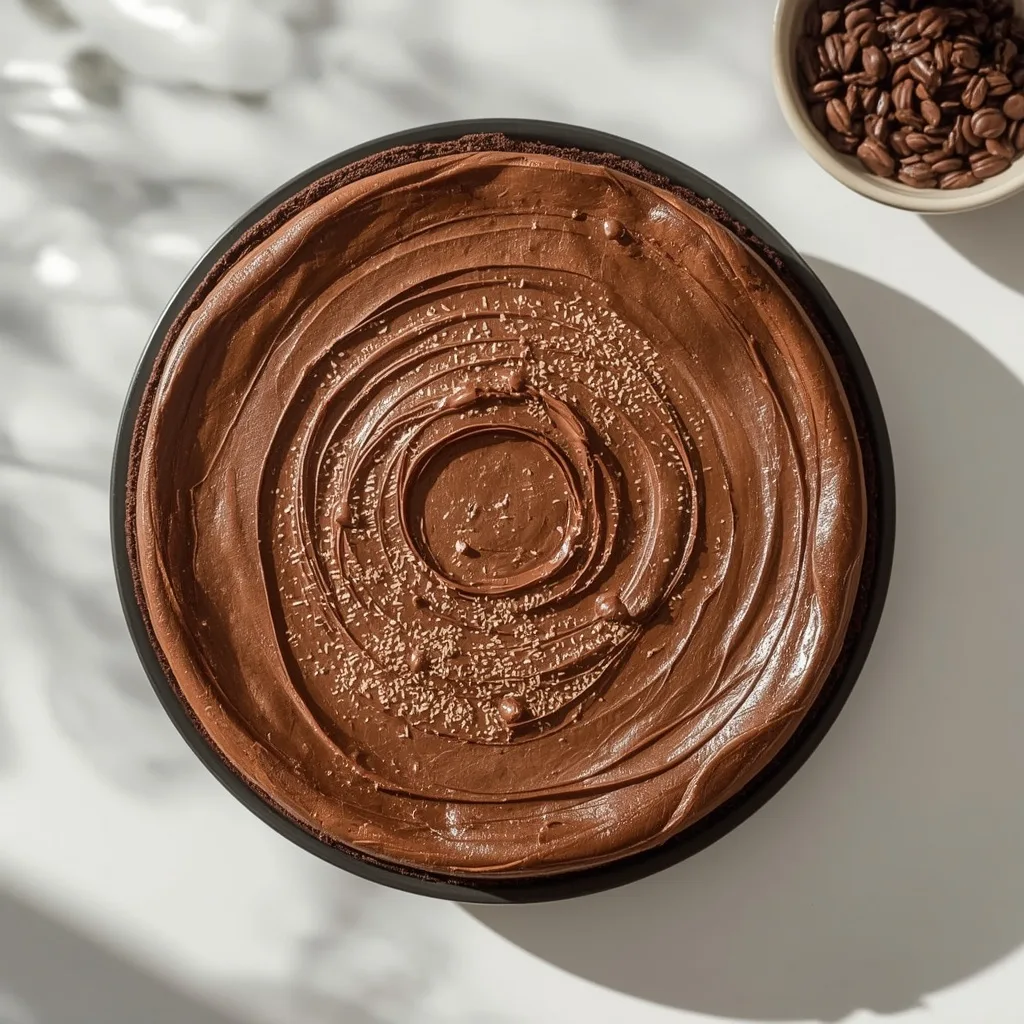
High Protein Chocolate Cheesecake is the dessert that makes you wonder why every cheesecake isn’t built this way. It’s rich, dense, and deeply chocolatey, yet each serving packs a surprising 30g of protein courtesy of cottage cheese and Greek yogurt.
You’ll need about 75 minutes total plus chilling time, and I’d rate it intermediate — the water bath isn’t hard, but it does require patience. This is perfect for post-workout recovery, a weekend treat, or whenever you want dessert that actually earns its place at the table.
What is High Protein Chocolate Cheesecake?
This isn’t your average cheesecake recipe. Instead of relying purely on cream cheese and heavy cream, this version blends full-fat cottage cheese and Greek yogurt into the filling. The result keeps that iconic velvety texture while cutting sugar and boosting the protein count to nearly triple what you’d find in a traditional slice.
It’s an American-style baked cheesecake with a chocolate graham cracker crust and a dark chocolate-infused batter. The cottage cheese and yogurt get warmed before blending, which is the trick that keeps everything smooth rather than lumpy. You bake it low and slow in a water bath, then let it cool gradually in the oven to prevent cracking.
The flavor is bold, thanks to unsweetened cocoa powder and melted 70% cacao dark chocolate. It’s not overly sweet — the sugar substitute keeps things balanced — so you actually taste the chocolate rather than just sugar.

Why You’ll Love This Recipe
Here’s what makes this cheesecake worth your time:
- 30g protein per serving — that’s nearly three times what a standard cheesecake offers, which makes this an easy choice when you want dessert that also hits your daily protein targets.
- Rich, decadent flavor — the combination of cocoa powder and melted dark chocolate delivers an intense chocolate experience that doesn’t rely on excessive sweetness.
- Creamy texture without the guilt — full-fat cottage cheese and Greek yogurt create a silky, dense crumb that mirrors the mouthfeel of traditional cheesecake.
- Actually satisfying — this dessert keeps you full. The protein and fat content means one slice genuinely satisfies that craving, so you won’t be grazing an hour later.
- Straightforward baking approach — the water bath and gradual cooling steps are explained clearly, so you get professional results on your first try.
Ingredients Needed to Make High Protein Chocolate Cheesecake
You’ll need 13 ingredients, and most are probably already sitting in your fridge and pantry.
For the Crust
- 1/2 cup chocolate graham cracker crumbs — about 4 full sheets crushed fine. You can use a food processor or place them in a zip-top bag and roll with a pin.
- 1 tbsp unsalted butter, melted — this binds the crumbs together. Unsalted keeps the crust from tasting overly salty, which matters against the chocolate filling.
For the Filling
- 1 cup full-fat cottage cheese — this is a protein powerhouse. It brings moisture without thinning the batter. Do not use low-fat here; the texture depends on the fat.
- 1/2 cup full-fat Greek yogurt — adds tanginess and creaminess while contributing even more protein. Full-fat is essential for that rich final texture.
- 1/2 cup cream cheese, softened (4 oz) — the classic base. Make sure it’s room temperature before you start, otherwise you’ll have lumps.
- 3 large eggs, at room temperature — they provide structure. Cold eggs will seize the batter and create a lumpy filling.
- 1/2 cup granulated sugar substitute — allulose or a monk fruit blend work great. You can swap in real sugar, though it will affect the macros.
- 1/2 cup unsweetened cocoa powder — sift it before adding to avoid dry clumps hiding in your batter.
- 1 tsp vanilla extract — rounds out the chocolate flavor and adds warmth.
- 1/4 tsp fine sea salt — this isn’t about making it salty; it sharpens the chocolate notes.
- 2 oz dark chocolate (70% cacao), melted — this ups the chocolate depth beyond what cocoa powder alone can deliver.
- 1 tbsp chocolate protein powder (optional) — adds an extra protein boost. The nutrition facts already include this, so decide upfront.
- 3 tbsp water — use only if the batter is too stiff. Add it one tablespoon at a time.
Equipment Needed
You probably own most of this already. Here’s what makes the process smooth:
- 9-inch springform pan — essential for releasing the cheesecake without destroying the crust. You’ll line the bottom with parchment and grease the sides.
- Handheld electric mixer or stand mixer — whisking by hand won’t achieve the smooth consistency you need for cottage cheese and cream cheese. A paddle attachment works best.
- Large microwave-safe bowl — for warming the cottage cheese and yogurt mixture. This step prevents lumps.
- Small sifter — you’ll need this for the cocoa powder. Skipping it means lumpy patches of dry cocoa in your filling.
- Large roasting pan or baking dish — big enough to hold the springform pan while you create the water bath.
- Instant-read thermometer — not mandatory, but helpful. The cheesecake is done at 150°F (66°C) in the center.
Instructions to Make High Protein Chocolate Cheesecake
These steps might look lengthy, but each one has a purpose. Follow the order exactly and you’ll get a clean, crack-free cheesecake.
Step 1: Prep the Oven and Pan
Preheat your oven to 325°F (163°C) and move the rack to the lower-middle position. Line the bottom of the springform pan with parchment paper and lightly grease the sides with butter or cooking spray. This ensures clean release later.
Step 2: Make the Chocolate Crust
Combine the graham cracker crumbs with the melted butter in a small bowl, mixing with a fork until all the crumbs are evenly moistened. Press the mixture into the pan’s bottom using a flat-bottomed glass to compact it firmly, then freeze while you prepare the filling. The cold sets the butter and prevents the crust from turning soggy during baking.
Step 3: Warm the Protein Dairy
Put the cottage cheese and Greek yogurt in a large microwave-safe bowl. Heat in 20-second intervals, stirring after each, until warm but not hot — about 40 to 50 seconds total. You’re doing this to prevent the cottage cheese from forming lumps when you blend it with the other ingredients.
Step 4: Beat in the Cream Cheese
Add the softened cream cheese to the warm dairy. Using medium speed, beat until smooth for 1 to 2 minutes, then scrape the sides and beat another 30 seconds. If you still see small lumps, keep beating until they disappear completely.
Step 5: Incorporate the Eggs
Add the eggs one at a time, beating on low just until blended after each addition. Do not overmix — that’s the main culprit behind cracking cheesecakes. Scrape the bowl well after each egg goes in.
Step 6: Sift and Add the Dry Ingredients
Sift the cocoa powder into a separate small bowl to remove lumps. Add the cocoa, sugar substitute, vanilla, and fine sea salt to the batter, beating on medium until fully incorporated and no dry streaks remain. Make sure to scrape the bottom — ingredients love to hide there.
Step 7: Finish with Protein Powder and Chocolate
Stir in the chocolate protein powder now if you’re using it, dissolving completely. Then fold in the melted dark chocolate until the batter is uniform. The batter should be thick but flow off a spoon; if it’s too stiff, incorporate up to 3 tablespoons of water, one at a time, until it pours smoothly.
Step 8: Assemble and Start the Water Bath
Pull the crust from the freezer and pour the cheesecake batter over it. Tap the pan gently on the counter a few times to release any trapped air bubbles. Place the springform pan inside your larger roasting pan or baking dish.
Step 9: Bake in the Water Bath
Pour hot (not boiling) water into the outer pan until it reaches one inch up the sides of the springform pan. This gentle, even heat yields a creamy center without cracks. Bake for 45 to 55 minutes, until the edges set but the middle wobbles slightly when you shake it. An internal temperature of 150°F (66°C) means it’s done.
Step 10: Cool Gradually in the Oven
Turn the oven off and prop the door open with a wooden spoon. Let the cheesecake cool inside for one full hour. This slow temperature drop is your best defense against unsightly cracks.
Step 11: Cool and Refrigerate
Remove the pan from the water bath and place it on a wire rack. Let it cool completely to room temperature — about another hour. Cover with plastic wrap or foil and refrigerate at least 4 hours, though overnight is better. The chill fully sets the structure so you can slice it cleanly.
Step 12: Unmold and Slice
Run a knife under hot water, dry it, then trace around the pan edge to release. Remove the springform ring and slice into 4 equal portions using a hot, clean knife for neat cuts.
What Went Wrong and How I Fixed It
Baking a cheesecake has some common failure points. I’ve hit every one — here’s what I learned:
- Cracked surface — this usually means overmixing or cooling too fast. Beat eggs on low and never skip the gradual cooling step in the turned-off oven.
- Lumpy filling — cold dairy won’t blend smoothly. That warming step for cottage cheese and yogurt feels odd, but it genuinely prevents lumps from forming.
- Soggy crust — if you skip the freezer time, the butter melts into the pan before baking. Freeze that crust properly; it makes a real difference.
- Center sinks after chilling — that’s a sign of underbaking. The center should wobble slightly, not ripple like liquid. Use the thermometer as your guide.
- Cocoa powder clumps — I skipped sifting once to save time and regretted it. Dry cocoa lumps don’t dissolve during baking — sift always.
- Overly dense texture — this happens with too much protein powder. Stick to the single tablespoon, or you’ll get a dry, heavy cake.
What Do I Serve With High Protein Chocolate Cheesecake?
This cheesecake stands strong on its own, but pairing it thoughtfully makes any occasion feel special.
- Fresh raspberries or strawberries — the tartness cuts through the rich chocolate and adds a bright pop of color that makes plating look professional.
- A dollop of Greek yogurt — adds more tang and stays on-theme for protein. Stir in a little vanilla for extra flavor.
- Hot espresso or black coffee — the bitterness of coffee enhances the dark chocolate. It’s a simple, grown-up pairing.
- Glass of cold milk — classic and comforting. The cheesecake’s density pairs surprisingly well with something cold and plain.
- Whipped cream — you can go regular or use a sugar-free version to maintain your macros. The textural contrast works beautifully.
Pro Tips to Make Perfect High Protein Chocolate Cheesecake
These are the details that turn good cheesecake into great cheesecake:
- Warm the dairy — that initial microwave step with cottage cheese and yogurt isn’t optional. It changes the protein structure so everything blends into a silky batter.
- Room temperature eggs — cold eggs stiffen the batter and create overmixing temptations. Pull them out an hour before you start baking.
- Compact the crust firmly — a loose crust will crumble when you slice. Use the bottom of a glass and apply real pressure.
- Check temperature early — ovens vary wildly. Start checking around the 40-minute mark rather than waiting for the full 55.
- Let it chill overnight — 4 hours works, but overnight delivers better flavor and a firmer texture that slices perfectly.
- Hot knife for clean cuts — run your knife under hot water, dry it, slice once, then repeat. It makes a visible difference in presentation.
Variations of High Protein Chocolate Cheesecake
Once you’ve mastered the base recipe, you can play with flavors without losing the protein benefits.
- Peanut butter swirl — warm 2 tablespoons of peanut butter and drop spoonfuls over the batter before baking. Drag a knife through to create swirls.
- Mint chocolate — stir in 1/4 teaspoon of peppermint extract with the vanilla. A few drops of green food coloring make it visually festive.
- Extra protein boost — add another scoop of chocolate protein powder and increase water by 2 tablespoons. You’ll gain roughly 6-8g of protein per serving.
- Mocha version — dissolve 1 teaspoon of instant espresso powder into the melted chocolate before adding. It amplifies the cocoa flavor without adding coffee taste.
- Orange chocolate — grate in the zest of one orange during the filling stage. The bright citrus notes transform the chocolate profile completely.
How Do I Store High Protein Chocolate Cheesecake Leftovers?
Storing this properly means it tastes just as good on day three as it did on day one.
- Refrigerator container — keep in an airtight container for up to 5 days. Place a paper towel underneath to absorb excess moisture — this prevents surface film.
- Freezer wrap — individual slices freeze better than whole cakes. Wrap tightly in plastic wrap, then aluminum foil, and freeze up to 3 months.
- Separate slices — use parchment squares between pieces if stacking in a container. This prevents sticking and makes grabbing one easy.
- Thaw correctly — always thaw in the refrigerator overnight. Room temperature thawing makes the cheesecake weep and lose texture.
How Do I Reheat High Protein Chocolate Cheesecake Leftovers?
Here’s the thing — this cheesecake is genuinely best served chilled. Reheating is optional, and if you do it, gentle is the keyword.
- Room temperature rest — pull it from the fridge and let it sit 20-30 minutes. This softens the texture slightly without any microwave risk.
- Oven method — warm at 300°F for 5-7 minutes only if you want it truly warm. Watch carefully — it can dry out fast.
- Microwave caution — use 10-second bursts at 30% power if you absolutely must. The cheesecake will melt if you use full power.
FAQs
Can I make High Protein Chocolate Cheesecake without a water bath?
You can, but you risk a cracked surface and uneven baking. The water bath provides steady, gentle heat that cooks the outside without shocking the center. If you skip it, place a pan of hot water on the rack below the cheesecake instead.
How long does High Protein Chocolate Cheesecake last in the fridge?
It stays fresh for up to 5 days in an airtight container in the refrigerator. The texture remains creamy and the chocolate flavor matures slightly, which many people actually prefer.
Can I freeze High Protein Chocolate Cheesecake?
Yes, wrap individual slices tightly in plastic wrap then foil, and freeze for up to 3 months. Thaw overnight in the refrigerator before serving — never use the microwave to defrost it.
Can I use regular sugar instead of sugar substitute?
Yes, use a 1/2 cup of granulated sugar in place of the substitute. It may slightly increase the carbohydrate count, but the texture and flavor will work perfectly.
Why is my cottage cheese not blending smooth?
You likely skipped the warming step. Cold cottage cheese combines with cream cheese to create lumps that are nearly impossible to beat out. Heat it with the Greek yogurt first, even if it seems unnecessary.
Try These Recipes
Final Words
This High Protein Chocolate Cheesecake has earned a permanent spot in my dessert rotation. It hits that rich chocolate craving while genuinely delivering on the protein front — 30g per slice doesn’t require any shortcuts or chalky compromises.
Take your time with the water bath and the gradual cooling step. Those two things make the difference between a good cheesecake and one that looks bakery-bought. Whether you’re rewarding yourself after a workout or serving it to unsuspecting guests, this one delivers every time.
PrintHigh Protein Chocolate Cheesecake

This decadent cheesecake delivers a rich, creamy chocolate experience with nearly three times the protein of a classic recipe, thanks to Greek yogurt and cottage cheese. Perfect for a high-protein dessert or post-workout treat, it has a velvety texture and a bold chocolate flavor without the extra sugar.
- Prep Time: 20
- Cook Time: 55
- Total Time: 75
- Yield: 4 1x
- Category: Dessert
- Method: Baking
- Cuisine: American
Ingredients
- 1/2 cup chocolate graham cracker crumbs (about 4 full sheets)
- 1 tbsp unsalted butter, melted
- 1 cup full-fat cottage cheese
- 1/2 cup full-fat Greek yogurt
- 1/2 cup cream cheese, softened (4 oz)
- 3 large eggs, at room temperature
- 1/2 cup granulated sugar substitute (e.g., allulose or monk fruit blend, or use real sugar if preferred)
- 1/2 cup unsweetened cocoa powder
- 1 tsp vanilla extract
- 1/4 tsp fine sea salt
- 2 oz dark chocolate (70% cacao), melted
- 1 tbsp chocolate protein powder (optional, for extra protein boost)
- 3 tbsp water (for mixing cocoa, adjust as needed)
Instructions
- Preheat your oven to 325°F (163°C). Adjust the oven rack to the lower-middle position. Line the bottom of a 9-inch springform pan with parchment paper, and lightly grease the sides with butter or cooking spray.
- Prepare the crust: In a small bowl, combine the chocolate graham cracker crumbs and melted butter. Mix with a fork until all crumbs are uniformly moistened. Press the mixture evenly into the bottom of the prepared pan, using the flat bottom of a glass to compact it. Place the pan in the freezer while you make the filling; this sets the crust and prevents it from becoming soggy.
- Make the filling: In a large microwave-safe bowl, combine the cottage cheese and Greek yogurt. Heat in 20-second intervals, stirring after each, until warm but not hot (about 40-50 seconds total). This warms the dairy to prevent lumps when blending.
- Add the softened cream cheese to the warm dairy mixture. Using a handheld electric mixer or a stand mixer with the paddle attachment, beat on medium speed until smooth, 1-2 minutes. Scrape down the sides and beat for another 30 seconds.
- Add the eggs one at a time, beating on low speed just until incorporated after each addition. Do not overmix; this reduces the chance of cracking. Scrape the bowl well after each egg.
- In a separate small bowl, sift the cocoa powder to remove lumps. Add the cocoa, sugar substitute, vanilla, and fine sea salt to the batter. Beat on medium speed until fully incorporated and no dry streaks remain. Scrape the bottom of the bowl to ensure even mixing.
- If using, stir in the chocolate protein powder now until completely dissolved. Then add the melted dark chocolate and mix until the batter is uniform. The batter should be thick but flow off a spoon; if it’s too stiff, mix in up to 3 tablespoons of water, one at a time, until a smooth, pourable consistency is achieved.
- Remove the crust from the freezer. Pour the cheesecake batter over the crust. Tap the pan gently on the counter a few times to release any air bubbles. Place the springform pan in a larger roasting pan or baking dish.
- Create a water bath: Pour hot (not boiling) water into the larger pan until it reaches about 1 inch (2.5 cm) up the sides of the springform pan. The water bath provides gentle, even heat, helping to prevent cracks and yielding a creamy texture.
- Bake in the preheated oven for 45-55 minutes, or until the edges are set but the center still wobbles slightly when the pan is gently shaken. A thermometer inserted into the center should read 150°F (66°C). Do not overbake; the center will continue to set as it cools.
- Turn off the oven and crack the oven door open (prop it with a wooden spoon if needed). Let the cheesecake cool in the turned-off oven for 1 hour. This gradual cooling minimizes cracking from sudden temperature change.
- Remove the pan from the water bath and place on a wire rack. Let cool completely to room temperature, about 1 hour. Then cover with plastic wrap or foil and refrigerate for at least 4 hours, preferably overnight, to fully set.
- To serve, run a knife under hot water, wipe dry, and run around the edges of the pan to release the cheesecake. Remove the springform ring, then slice into 4 equal pieces using a clean, hot knife. For neat slices, clean and reheat the knife between cuts.
- Store leftovers in an airtight container in the refrigerator for up to 5 days. This cheesecake can be frozen (see notes) for longer storage.
Notes
Storage: Store in the refrigerator in an airtight container for up to 5 days. Freezing: After baking and cooling, wrap the entire cheesecake (or individual slices) tightly in plastic wrap then foil, and freeze for up to 3 months. Thaw overnight in the refrigerator before serving. Reheating: Serve chilled; do not microwave as it will melt. For a warm sauce, drizzle with melted dark chocolate or a spoonful of chocolate protein powder mixed with water before serving. Protein boost: Add an extra scoop of chocolate protein powder to the batter (increase water slightly) for an additional 6-8g protein per serving. Nutrition is calculated with the optional protein powder included.
Nutrition
- Calories: 430
- Sugar: 9g
- Sodium: 420mg
- Saturated Fat: 13g
- Carbohydrates: 22g
- Fiber: 4g
- Protein: 30g
- Cholesterol: 185mg
Keywords: high protein cheesecake, chocolate cheesecake, healthy chocolate dessert, Greek yogurt cheesecake, cottage cheese cheesecake, no-bake cheesecake, low sugar cheesecake, protein dessert, chocolate cheesecake cups, gluten free cheesecake