
The High Protein Cottage Cheese Wrap is the kind of recipe that quietly solves a problem you didn’t realize you had — namely, how to get a soft, pliable flatbread without a single grain of regular flour. It’s mild, slightly tangy, and sturdy enough to hold whatever you stuff inside, from grilled chicken to roasted veggies.
You’ll have these on the table in about 30 minutes, and they’re beginner-friendly despite one small trick: getting the batter smooth. Each serving delivers 16g of protein, which makes this a surprisingly filling snack or light lunch. The only mildly finicky step is swirling the batter into an even circle, but I’ll walk you through that below.
What is High Protein Cottage Cheese Wrap?
It’s essentially a thin, soft flatbread built on a base of blended cottage cheese and eggs, with almond flour standing in for wheat. The cottage cheese purees into a silky liquid that, once cooked, sets into a flexible wrap that doesn’t crack or tear when you roll it. Think of it as a cross between a crepe and a tortilla — but with more protein and fewer carbs.
This style of wrap fits neatly into low-carb, gluten-free, and keto-friendly eating plans. The flavor is neutral enough to go sweet or savory, though I think it shines brightest with deli meat, fresh greens, and a swipe of mustard or hummus. It’s an American-style stovetop creation, not tied to any single cuisine, which makes it endlessly adaptable.
Why You’ll Love This Recipe
Here is what convinced me to make these wraps every single week.
- Built-in protein boost — Between the cottage cheese, eggs, and Parmesan, each wrap packs a solid 16g of protein that keeps hunger at bay for hours.
- Naturally low-carb — With only 5g of carbs per serving, these fit easily into low-carb or keto meals without any sacrifice in texture.
- Ready in 30 minutes — The batter comes together in a blender, and each wrap cooks in about 4 minutes, so the whole batch is done before your coffee cools.
- Pliable, not brittle — Unlike some low-carb alternatives that crack when bent, these stay soft and bendable even after they cool, making them ideal for roll-ups.
- Only 8 ingredients — You likely already have most of these in your fridge and pantry, which means no specialty shopping trips.
- Works for meal prep — These wraps store beautifully for days, and they freeze well too, so you can batch-cook once and eat all week.
Ingredients Needed to Make High Protein Cottage Cheese Wrap
You only need eight simple ingredients, most of which are probably already sitting in your kitchen.
The Base
- 1 cup (225g) full-fat cottage cheese — This is the protein backbone of the wrap. Full-fat is important here because it adds richness and helps the batter blend into a smoother consistency. Low-fat works in a pinch, but the texture will be slightly less tender.
- 2 large eggs — They bind everything together and give the wraps their structure. Room-temperature eggs blend more evenly, so pull them out of the fridge a few minutes early if you remember.
The Dry Ingredients
- 1/2 cup (60g) almond flour — This replaces traditional flour and keeps the carbs low. Fine-ground almond flour works best; coarser meal will leave a slightly grainy texture.
- 1/4 cup (30g) grated Parmesan cheese — It adds a savory, nutty depth that elevates the flavor from plain to something you actually crave. Freshly grated melts more smoothly than the pre-shredded stuff.
The Seasonings
- 1/4 teaspoon garlic powder — A subtle savory note that doesn’t overpower. If you prefer a bolder flavor, you can bump it up to 1/2 teaspoon.
- 1/4 teaspoon kosher salt — This balances the natural tang of the cottage cheese. Table salt is saltier, so if you’re substituting, use a bit less.
- 1/8 teaspoon black pepper — Just a whisper to round things out. Freshly cracked pepper gives the best flavor here.
For the Skillet
- Olive oil or avocado oil spray — A light coating keeps the wraps from sticking and helps them develop that golden exterior. Avocado oil has a higher smoke point, but olive oil works fine at medium heat.
Equipment Needed
You probably have most of this already. Here’s what you’ll want on hand before you start.
- Blender or food processor — This is non-negotiable. You need something powerful enough to completely puree the cottage cheese so no lumps remain. A high-speed blender works best, but a food processor does the job too.
- Non-stick skillet (8-inch or 9-inch) — The size matters because it determines how thick your wraps turn out. An 8-inch pan gives you slightly thicker wraps; 9-inch yields thinner ones. Make sure it’s truly non-stick or your first wrap will be a struggle.
- Flexible spatula — You need this to flip the delicate wrap without tearing it. A thin, flexible silicone spatula is ideal because it slides underneath easily.
- Measuring cups and spoons — Precise measurements matter in this recipe. Baking-style accuracy ensures the batter has the right consistency.
- Clean kitchen towel — This keeps the finished wraps warm and moist while you cook the rest of the batch.
Instructions to Make High Protein Cottage Cheese Wrap
The process is straightforward, but a few key details make all the difference between a perfect wrap and a crumbly mess. Follow these steps in order.
Step 1: Blend the Batter
Place the cottage cheese, eggs, almond flour, Parmesan, garlic powder, salt, and pepper into your blender or food processor. Blend on high for 30–45 seconds, stopping to scrape down the sides once or twice. You’re looking for a completely smooth mixture — if you can still see cottage cheese curds, keep blending.
The batter will look thinner than you might expect, almost like a thick pancake batter. That’s exactly right. The almond flour needs that liquid to hydrate properly.
Step 2: Rest the Batter
Let the batter sit for 5 minutes after blending. This step is easy to skip, but don’t. The almond flour absorbs liquid during this rest, which thickens the batter and makes it much easier to spread in the pan. A too-thin batter will run to the edges and produce wraps with thin, lacy spots.
Step 3: Heat the Skillet
Place your non-stick skillet over medium heat and lightly spray with olive or avocado oil. You’ll know the pan is ready when a drop of water flicked onto the surface sizzles and evaporates immediately. If it takes longer than a second, give the pan another minute.
Getting this heat level right matters. Too hot and the batter will set before you can spread it. Too cool and the wraps will be pale and rubbery.
Step 4: Pour and Swirl the Batter
Pour about 1/4 cup (60 ml) of batter into the center of the hot skillet. Immediately tilt and swirl the pan to spread the batter into a thin, even circle about 7–8 inches in diameter. Work quickly — the batter starts setting almost as soon as it touches the pan.
If you end up with a slightly lopsided shape, don’t stress. It’ll still taste great, and you can fill it just the same.
Step 5: Cook the First Side
Cook for 2–3 minutes, until the edges look set and the top surface appears dry and no longer shiny. Lift an edge with your spatula to check — the bottom should be lightly golden. If it’s still pale, give it another 30 seconds.
You’ll notice the wrap starting to pull away from the pan when it’s ready to flip. That’s your sign.
Step 6: Flip and Cook the Second Side
Slide your flexible spatula underneath the wrap and flip it carefully. Cook for another 1–2 minutes until the second side is golden and cooked through. The wrap should be firm but pliable, not crispy.
If you flip too early, the wrap may tear. If it’s browning too fast, lower the heat slightly for the next batch.
Step 7: Keep Wraps Warm
Transfer each cooked wrap to a plate and cover with a clean kitchen towel. This traps steam and keeps them soft and pliable while you cook the remaining batter. Stack them as you go, keeping them under the towel the whole time.
Step 8: Let Wraps Cool Briefly
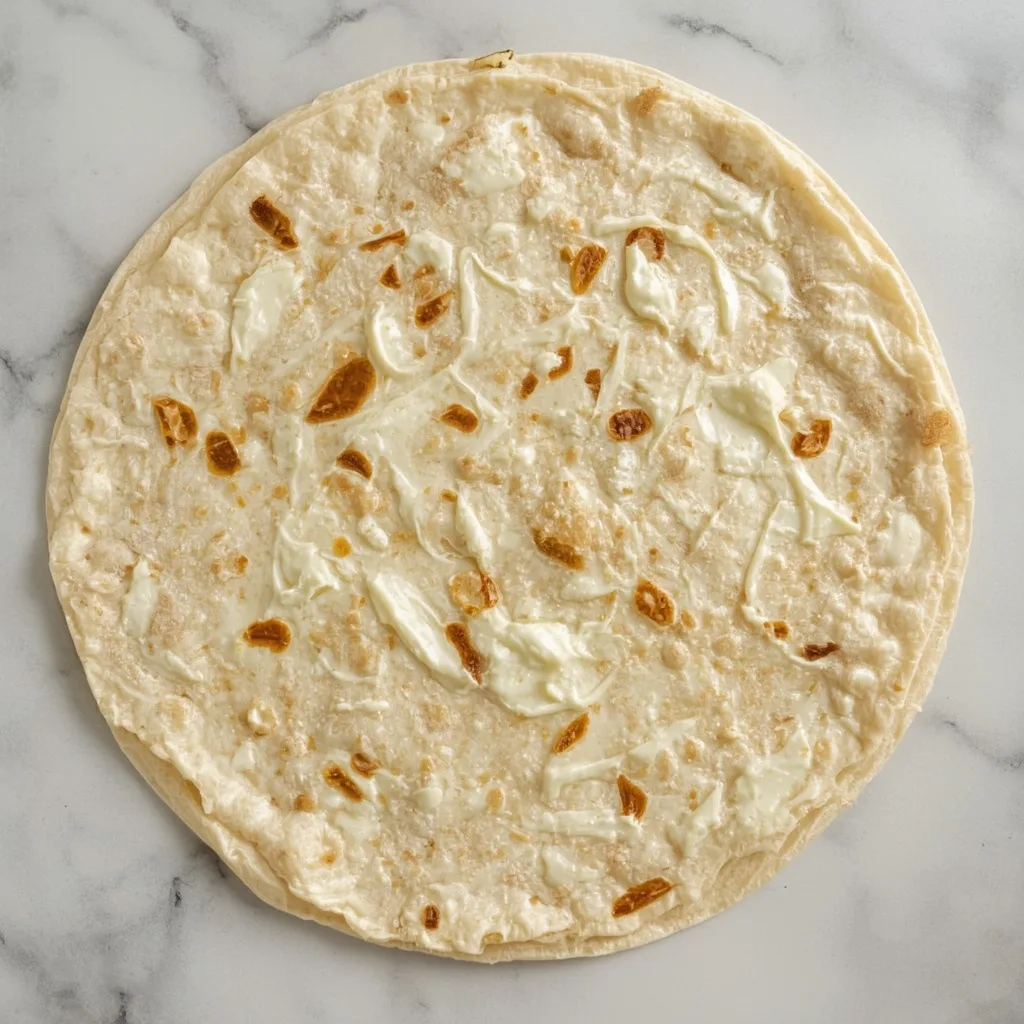
Before filling, let the wraps cool for 2–3 minutes. They will firm up slightly as they cool, which makes them easier to handle without tearing. You want them warm, not hot, when you roll them.
Step 9: Fill and Roll
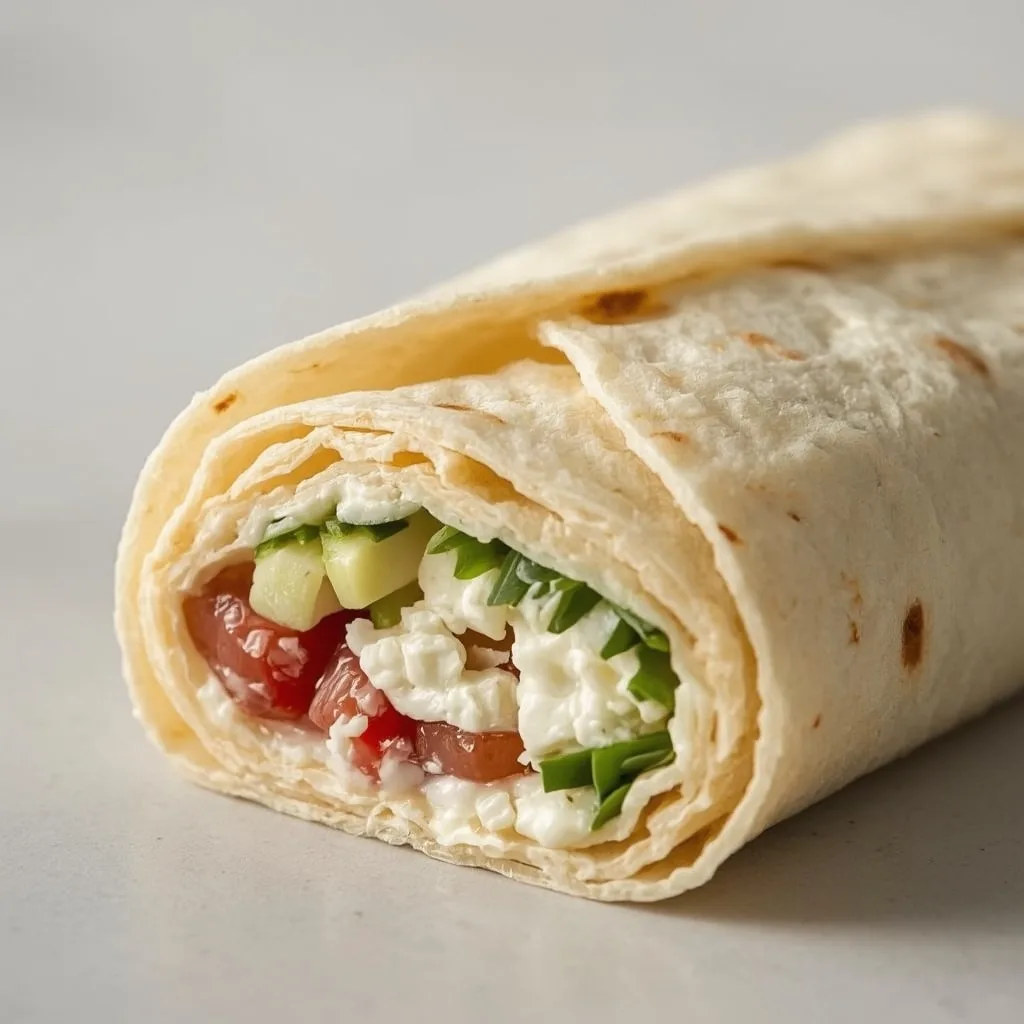
Place a wrap on a flat surface, add your desired fillings — grilled chicken, lettuce, tomato, avocado, whatever you love — and roll tightly. Slice in half if you like, or eat it whole. The wraps hold their shape beautifully even with generous fillings.
What Went Wrong and How I Fixed It
My first batch of these had a few rough moments. Here are the issues I ran into and exactly how I solved them.
- Lumpy batter — The cottage cheese wasn’t fully pureed because I rushed the blending. Fix: blend for a full 45 seconds and scrape down the sides at least once. If your blender is weaker, add 10 more seconds.
- Torn wraps on the flip — The wrap stuck to the pan because I hadn’t used enough spray oil. Fix: coat the skillet generously before each wrap, and make sure the first side is fully set before attempting the flip.
- Pale and rubbery texture — The pan wasn’t hot enough, so the wraps cooked too slowly. Fix: wait for the water sizzle test before pouring any batter. Medium heat is your friend.
- Batter ran to the edges — I skipped the 5-minute rest, so the batter was too thin. Fix: always let the batter rest. It needs that time for the almond flour to soak up moisture.
- Dark spots on the surface — The heat was too high, which browned the exterior before the inside cooked through. Fix: dial back to medium-low and cook a bit longer on each side.
What Do I Serve With High Protein Cottage Cheese Wrap?
These wraps are a blank canvas — here are some of my favorite ways to fill and pair them.
- Grilled chicken and avocado — Sliced grilled chicken, creamy avocado, crisp lettuce, and a squeeze of lime make a filling that never misses. The healthy fats in the avocado complement the protein nicely.
- Turkey and hummus — Spread a generous layer of hummus, add sliced turkey, cucumber, and shredded carrots. It’s a classic lunch that feels fresh and light.
- Egg salad — A scoop of egg salad with some arugula gives you an extra protein punch. The creamy filling pairs beautifully with the slightly tangy wrap.
- Caprese style — Fresh mozzarella, sliced tomatoes, basil leaves, and a drizzle of balsamic glaze. This one tastes like summer and requires zero cooking.
- Breakfast burrito — Scrambled eggs, cheddar cheese, and a handful of spinach make a great breakfast wrap. You get double the protein to start your day right.
- Peanut butter and banana — For a sweet twist, spread peanut butter on the wrap, add banana slices, and roll it up. It’s like a crepe but with a savory edge that somehow works.
Pro Tips to Make Perfect High Protein Cottage Cheese Wrap
Over the dozens of batches I’ve made, these tips have saved me more than once.
- Blend longer than you think — The batter should be completely smooth with zero curds visible. A full 45 seconds in the blender is the sweet spot, even if it looks done at 20.
- Rest the batter religiously — Those 5 minutes are not optional. The almond flour needs time to hydrate, and skipping this step gives you thin, holey wraps.
- Re-spray the pan every time — Even if the pan looks slick, add fresh oil before each wrap. This prevents sticking and helps the wrap develop that golden color.
- Use medium heat, not high — High heat sets the batter too fast and leads to browning before the middle cooks. Medium gives you evenly cooked, pliable wraps.
- Keep cooked wraps under a towel — This simple step keeps them soft and prevents them from drying out while you finish the batch. Don’t skip it.
- Add a protein boost — For extra protein, sprinkle a few tablespoons of unflavored collagen powder into the blender with the batter. It disappears completely and adds about 10g of protein per serving.
Variations of High Protein Cottage Cheese Wrap
Once you’ve made the basic version a few times, try these twists to keep things interesting.
- Herb and garlic — Add 1 tablespoon of dried Italian herbs and an extra 1/2 teaspoon of garlic powder to the batter. This creates a savory wrap that’s perfect for Mediterranean fillings.
- Spicy southwest — Mix in 1 teaspoon of chili powder and 1/2 teaspoon of cumin. These wraps pair brilliantly with scrambled eggs, black beans, and salsa.
- Cinnamon sweet — Skip the garlic and pepper, then add 1 teaspoon of cinnamon and 1 tablespoon of sweetener of choice. These make excellent dessert wraps with Greek yogurt and berries.
- Everything bagel — Sprinkle everything bagel seasoning on top of each wrap right after pouring the batter into the pan. The seeds toast into the surface and add incredible texture.
- Spinach wrap — Add a handful of fresh spinach to the blender with the other ingredients. The wraps turn a lovely green and pick up a subtle earthy flavor.
- Extra protein version — Blend in 1 scoop of unflavored protein powder and reduce the almond flour to 1/3 cup. This bumps the protein to over 25g per serving without changing the taste much.
How Do I Store High Protein Cottage Cheese Wrap Leftovers?
These wraps keep well, which makes them perfect for meal prep. Here’s how to store them properly.
- Refrigerator — Store leftover wraps in an airtight container for up to 3 days. Place a sheet of parchment paper between each wrap to prevent sticking.
- Freezer — Wrap each cooled wrap individually in plastic wrap and place them in a freezer-safe bag. They’ll keep for up to 2 months.
- Thawing — Transfer frozen wraps to the fridge and let them thaw overnight before using. This gradual thawing preserves their texture.
- Pre-filled wraps — If you’ve already filled your wraps, wrap them tightly in foil and refrigerate. Eat them within 2 days for best quality.
How Do I Reheat High Protein Cottage Cheese Wrap Leftovers?
Reheating these wraps the right way makes all the difference between soft and brittle.
- Skillet method — Heat a dry non-stick skillet over medium heat and warm each wrap for 20–30 seconds per side. This restores the original texture best.
- Microwave method — Place a wrap on a microwave-safe plate and heat on high for 15–20 seconds. Cover with a damp paper towel to keep it from drying out.
- Air fryer method — Set your air fryer to 350°F and warm the wrap for 2–3 minutes. Check it at the 2-minute mark; you want it warm but not crispy.
- Oven method — Wrap the tortilla in foil and heat at 350°F for 5–8 minutes. This works well if you’re reheating multiple wraps at once.
FAQs
Can I freeze High Protein Cottage Cheese Wrap?
Yes, absolutely. Wrap each cooled wrap individually in plastic wrap and place them in a freezer-safe bag. They’ll keep for up to 2 months, and thawing overnight in the fridge gives the best texture.
How long does High Protein Cottage Cheese Wrap last in the fridge?
These wraps stay fresh for up to 3 days when stored in an airtight container with parchment paper between each one. After that, they start to dry out and lose their pliability.
Can I use low-fat cottage cheese instead?
You can, but the texture will be slightly less tender. Full-fat cottage cheese blends into a richer, smoother batter, which translates to softer wraps that are easier to roll.
Why is my batter so thin?
That’s normal right after blending. The batter thickens after the 5-minute rest, so wait before judging the consistency. If it’s still very thin after resting, add an extra tablespoon of almond flour.
Are these wraps gluten-free?
Yes, they’re completely gluten-free since they’re made with almond flour instead of wheat flour. Just double-check that your other ingredients, like the Parmesan, are certified gluten-free if that matters to you.
Can I make these wraps without a blender?
Technically yes, but it’s difficult. You’d need to press the cottage cheese through a fine sieve to remove lumps, then whisk everything together thoroughly. A blender or food processor makes it far easier and gives a smoother result.
Try These Recipes
Final Words
This High Protein Cottage Cheese Wrap has become a staple in my kitchen, and I think it will become one in yours too. It’s versatile enough for breakfast, lunch, or dinner, and the protein content makes it genuinely filling. Give it a try this week — you might surprise yourself with how often you make it again.
PrintHigh Protein Cottage Cheese Wrap
These high-protein cottage cheese wraps are soft, pliable, and packed with 25 grams of protein per serving. They’re perfect for sandwiches, tacos, or roll-ups, with a mild, slightly tangy flavor that pairs well with any filling.
- Prep Time: 10
- Cook Time: 20
- Total Time: 30
- Yield: 4 1x
- Category: Snack
- Method: Stovetop
- Cuisine: American
Ingredients
- 1 cup (225g) full-fat cottage cheese
- 2 large eggs
- 1/2 cup (60g) almond flour
- 1/4 cup (30g) grated Parmesan cheese
- 1/4 teaspoon garlic powder
- 1/4 teaspoon kosher salt
- 1/8 teaspoon black pepper
- Olive oil or avocado oil spray, for the skillet
Instructions
- Place the cottage cheese, eggs, almond flour, Parmesan, garlic powder, salt, and pepper in a blender or food processor. Blend on high until the mixture is completely smooth and no lumps of cottage cheese remain. This should take about 30–45 seconds. Scrape down the sides as needed.
- Let the batter rest for 5 minutes. This allows the almond flour to hydrate, which will make the batter thicker and easier to spread in the pan.
- Heat a non-stick skillet (8-inch or 9-inch) over medium heat. Lightly spray with olive oil or avocado oil spray. The pan is ready when a drop of water sizzles and evaporates immediately.
- Pour about 1/4 cup (about 60 ml) of the batter into the center of the skillet. Immediately tilt and swirl the pan to spread the batter into a thin, even circle about 7–8 inches in diameter.
- Cook for 2–3 minutes, until the edges look set and the top surface appears dry and no longer shiny. The bottom should be lightly golden when you lift an edge with a spatula.
- Carefully flip the wrap using a flexible spatula. Cook for another 1–2 minutes, until the second side is golden and cooked through. The wrap should be firm but pliable, not crispy.
- Transfer the cooked wrap to a plate and cover with a clean kitchen towel to keep it warm and moist. Repeat with the remaining batter, spraying the pan lightly each time. Stack finished wraps under the towel.
- Let the wraps cool for 2–3 minutes before filling. They will firm up slightly as they cool, making them easier to handle.
- To serve, place a wrap on a flat surface, add your desired fillings (e.g., grilled chicken, lettuce, tomato, avocado), roll tightly, and enjoy.
Notes
Storage: Store leftover wraps in an airtight container in the refrigerator for up to 3 days. Place a sheet of parchment paper between each wrap to prevent sticking. Freezing: Wrap each cooled wrap in plastic wrap and place in a freezer-safe bag for up to 2 months. Thaw overnight in the fridge before use. Reheating: For best texture, reheat in a dry non-stick skillet over medium heat for 20–30 seconds per side, or microwave on high for 15–20 seconds. Do not overheat or they will become dry and brittle.
Nutrition
- Calories: 178
- Sugar: 2g
- Sodium: 330mg
- Unsaturated Fat: 3g
- Carbohydrates: 5g
- Fiber: 1g
- Protein: 16g
- Cholesterol: 110mg
Keywords: cottage cheese wrap, high protein wrap, low carb wrap, keto wrap, healthy wrap, gluten free wrap, no bake, quick snack, meal prep, high protein snack