
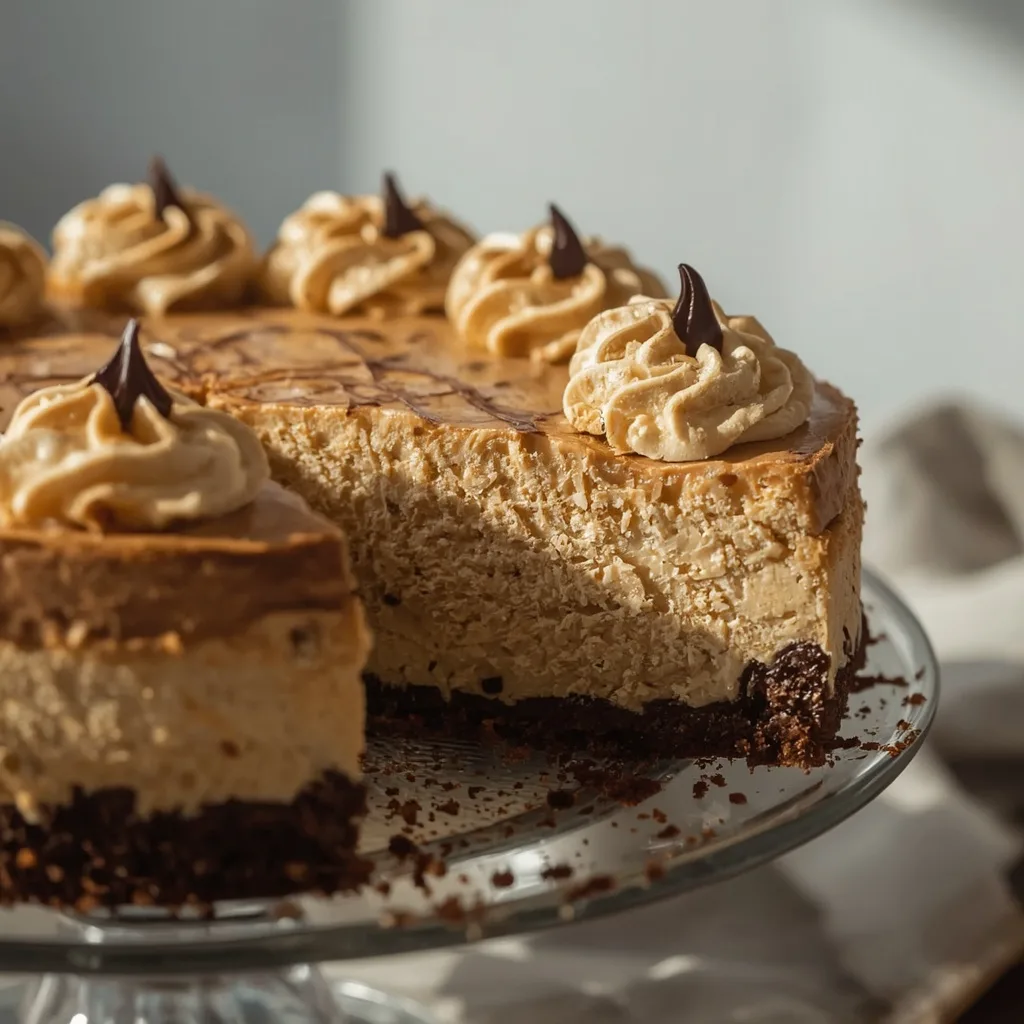
This High Protein No Bake Coffee Cheesecake is a creamy, espresso-spiked dessert that sets in the fridge without ever touching an oven. The filling blends Greek yogurt, cottage cheese, and vanilla protein powder into a silky, sliceable texture that tastes like a coffeehouse treat.
Total time is about 4 hours 30 minutes, though almost all of that is hands-off chilling. It’s beginner-friendly, and each serving packs 45g of protein. The only step worth slowing down for is packing the almond flour crust firmly — a loose base crumbles when you slice.
What is High Protein No Bake Coffee Cheesecake?
It’s a chilled cheesecake made with Greek yogurt, cottage cheese, protein powder, and instant espresso powder, set over a buttery almond flour crust in a springform or loaf pan. The texture lands somewhere between mousse and classic cheesecake — dense but silky, never heavy. Flavor-wise, it’s bold coffee up front with a clean, lightly sweet finish. I make it most often for meal-prep desserts or a weekend treat when I want something that feels indulgent but still earns its place in a high-protein day.
Why You’ll Love This Recipe
Here’s what keeps this one in my regular rotation.
- Seriously creamy without the oven — The blender does all the work, and the fridge does the rest.
- 45g of protein per slice — Greek yogurt, cottage cheese, and protein powder carry the load, so dessert actually fills you up.
- Real coffee flavor — Instant espresso powder gives a deep, roasted kick that vanilla extract alone can’t match.
- Four ingredients do the heavy lifting — Yogurt, cottage cheese, protein powder, and espresso powder.
- Make-ahead friendly — It needs at least 4 hours to set, so it’s ideal for prepping the night before.
- No alcohol, no pork, no fuss — Espresso powder is pure coffee, so the flavor is clean and suitable for everyone at the table.
Ingredients Needed to Make High Protein No Bake Coffee Cheesecake
You probably have most of the filling ingredients already. The only item worth a quick grocery run is instant espresso powder.
For the Crust
- Almond flour (1 cup) — The base of the crust; its natural oils help it bind with less butter than graham crackers would need.
- Unsalted butter (2 tbsp, melted) — Brings the crumbs together. Add an extra teaspoon if the mixture feels dry.
- Granulated sugar (1 tbsp) — A small amount of sweetness to balance the salty, nutty base.
- Kosher salt (1/4 tsp) — Sharpens the flavor of the almond flour.
For the Filling
- Full-fat Greek yogurt (1 cup) — The creamy backbone and a major protein source; full-fat gives the best set.
- Low-fat cottage cheese (1/2 cup) — Blends completely smooth and adds protein without a tangy aftertaste.
- Vanilla protein powder (1/2 cup) — Thickens the filling and pushes the protein higher; whey or a whey-casein blend works best.
- Powdered sugar (1/4 cup) — Dissolves instantly so the filling stays lump-free.
- Instant espresso powder (2 tbsp) — The coffee flavor comes entirely from here; it’s pure coffee, not alcohol.
- Vanilla extract (1 tsp) — Rounds out the coffee and adds warmth.
- Kosher salt (1/4 tsp) — Keeps the sweetness from taking over.
For the Topping
- Heavy whipping cream (1/4 cup) — Whips into a soft, cloud-like dollop for each slice.
- Powdered sugar (1 tbsp) — Sweetens the cream without making it gritty.
- Vanilla extract (1/4 tsp) — A touch of aroma in the topping.
- Cocoa powder (1 tbsp, optional) — A light dusting that echoes the coffee flavor.
Equipment Needed
Nothing unusual here — just a few tools that make the process cleaner.
- Blender or food processor — Essential for getting the filling completely smooth; a high-speed blender works fastest.
- 7-inch springform pan or 9×5-inch loaf pan — Springform makes release easier; a loaf pan lined with parchment works just as well.
- Offset spatula — Spreads the filling evenly and smooths the top in a few passes.
- Hand mixer or whisk — For whipping the cream topping to soft peaks.
- Measuring cup with a flat bottom — The easiest way to pack the crust down tightly and evenly.
Instructions to Make High Protein No Bake Coffee Cheesecake
The whole process runs in three phases: crust, filling, and a long chill. Here’s how it goes.
Step 1: Make the Crust
In a medium bowl, combine 1 cup almond flour, 2 tablespoons melted butter, 1 tablespoon granulated sugar, and 1/4 teaspoon kosher salt. Stir with a fork until the mixture looks like coarse sand and holds together when you press it between your fingers. If it stays crumbly, add another teaspoon of melted butter — dry mix is the number one cause of a falling-apart base.
Step 2: Press and Freeze the Crust
Press the mixture firmly and evenly into the bottom of a 7-inch springform pan or a parchment-lined 9×5-inch loaf pan. Use the flat bottom of a measuring cup to pack it down hard — this is what keeps the base intact when you slice. Pop the pan in the freezer while you make the filling.
Step 3: Blend the Filling
Add 1 cup Greek yogurt, 1/2 cup cottage cheese, 1/2 cup protein powder, 1/4 cup powdered sugar, 2 tablespoons espresso powder, 1 teaspoon vanilla extract, and 1/4 teaspoon kosher salt to your blender. Blend on high for 45 to 60 seconds until completely smooth, scraping down the sides halfway through. Any lumps left now will show up in the final texture.
Step 4: Taste and Adjust
Give the filling a taste. It should be intensely coffee-forward with balanced sweetness. Want a stronger kick? Blend in another teaspoon of espresso powder for 10 seconds. If it’s too thick to pour, loosen it with a tablespoon of milk — you want pourable, not runny.
Step 5: Assemble and Chill
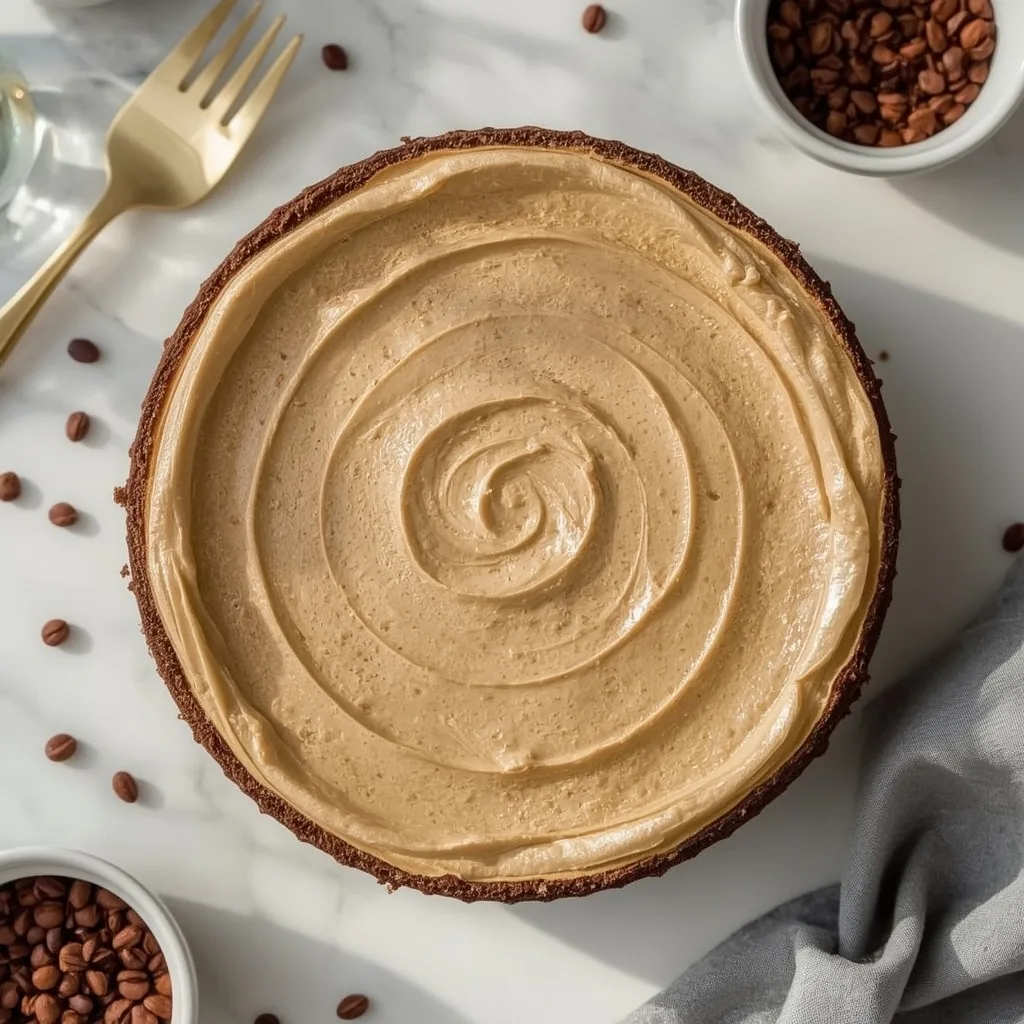
Pull the crust from the freezer and pour the filling over it, spreading evenly with an offset spatula. Tap the pan gently on the counter a few times to release air bubbles, then smooth the top. Cover with plastic wrap — making sure it doesn’t touch the surface — and refrigerate for at least 4 hours, preferably overnight. The longer it chills, the better the flavor and the firmer the set.
Step 6: Whip the Topping and Serve
Just before serving, whip 1/4 cup heavy cream with 1 tablespoon powdered sugar and 1/4 teaspoon vanilla extract until soft peaks form. Stop when the beaters leave a gentle peak that curls slightly — overwhipped cream turns grainy. Run a thin knife around the edge, release the pan, and slice into 4 equal portions. Top each with a dollop of cream and a dusting of cocoa powder if you like.
What Went Wrong and How I Fixed It
Here’s what tripped me up the first few times, so you can skip the frustration.
- A crumbly crust — I didn’t pack it hard enough. Use the flat bottom of a measuring cup and press until it feels solid, not sandy.
- Lumpy filling — Cottage cheese needs a full 45 to 60 seconds in the blender, with a scrape-down halfway through. Short blending leaves curds behind.
- Soupy center — Four hours is the minimum, not a suggestion. If it still wobbles, give it overnight.
- Weak coffee flavor — Not all espresso powders are equal. Taste the filling before chilling and add another teaspoon if it needs more punch.
- Grainy whipped cream — Overwhipping is the culprit. Pull the mixer the moment soft peaks form.
- Messy slices — Dip your knife in hot water and wipe it dry between every cut for clean, sharp edges.
What Do I Serve With High Protein No Bake Coffee Cheesecake?
This dessert holds its own, but a few pairings make it feel like a proper finish to a meal.
- Fresh berries — Raspberries and strawberries cut through the richness with bright acidity.
- Espresso or cold brew — Doubling down on coffee sounds odd until you try it; the flavors amplify each other.
- Toasted nuts — Sliced almonds or pecans add crunch that contrasts the silky filling.
- Whipped Greek yogurt — Swap the cream topping for extra yogurt to add protein and a light tang.
- Dark chocolate shavings — A few curls on top bring a bittersweet edge that pairs well with espresso.
- A light green salad — If you’re serving this after a heavy dinner, a citrusy salad beforehand keeps things balanced.
Pro Tips to Make Perfect High Protein No Bake Coffee Cheesecake
These little adjustments make a noticeable difference.
- Chill overnight if you can — The filling firms up more and the coffee flavor deepens considerably.
- Use full-fat Greek yogurt — Low-fat versions often set too soft and taste thinner.
- Warm your knife between slices — Hot water and a quick wipe give you clean, professional-looking cuts.
- Taste before chilling — Adjust sweetness and coffee strength while the filling is still in the blender.
- Add collagen peptides — A 1/4 cup of unflavored collagen adds about 5g more protein per serving with no taste change.
- Don’t skip the salt — That 1/4 teaspoon in both the crust and filling keeps everything from tasting flat.
- Keep plastic wrap off the surface — If it touches the filling, it leaves marks and pulls up the top layer.
Variations of High Protein No Bake Coffee Cheesecake
A few easy tweaks if you want to change things up.
- Mocha version — Add 1 tablespoon of cocoa powder to the filling for a chocolate-coffee blend.
- Protein-boosted — Stir 1/4 cup unflavored collagen peptides into the filling for roughly 5g extra protein per serving.
- Dairy-free take — Swap in plant-based yogurt, cottage cheese, and coconut cream, though protein will drop.
- Sweeter finish — Bump the powdered sugar to 1/3 cup if you prefer a dessert-style sweetness.
- Individual cups — Layer the crust and filling into small jars for grab-and-go portions.
How Do I Store High Protein No Bake Coffee Cheesecake Leftovers?
Storage is simple, but a couple of details protect the texture.
- Refrigerator — Keep it tightly covered for up to 3 days; it’s best within the first 2.
- Freezer — Wrap individual slices in plastic, then foil, and freeze for up to 1 month.
- Airtight container — For sliced portions, a sealed container beats loose foil every time.
- Keep the topping separate — Whipped cream doesn’t hold up well, so add it fresh at serving.
How Do I Reheat High Protein No Bake Coffee Cheesecake Leftovers?
Short answer: you don’t. This is a cold dessert, and heat ruins the texture.
- Refrigerator thawing — Move frozen slices to the fridge overnight; they’ll be ready by morning.
- Counter thawing — For a faster option, leave a slice at room temperature for 20 to 30 minutes.
- Microwave — Skip it entirely; even a few seconds turns the filling runny and greasy.
- Oven or air fryer — Also a no. These are for baked cheesecakes, not this one.
FAQs
Can I freeze High Protein No Bake Coffee Cheesecake?
Yes. Wrap individual slices in plastic wrap, then foil, and freeze for up to 1 month. Thaw overnight in the refrigerator for the best texture.
How long does High Protein No Bake Coffee Cheesecake last in the fridge?
It keeps tightly covered for up to 3 days, though I find it’s at its best within the first 2.
Can I make this without protein powder?
You can, but the filling will be softer and protein drops significantly. If you skip it, add an extra 2 tablespoons of Greek yogurt and expect a looser set.
Is espresso powder the same as instant coffee?
They’re similar but not identical. Espresso powder is more concentrated and dissolves fully, which is why it blends so cleanly into the filling.
Why is my cheesecake still soft after chilling?
It likely needs more time. Four hours is the minimum — overnight gives a noticeably firmer, cleaner slice.
Does this recipe contain alcohol?
No. Espresso powder is pure coffee, so there’s no alcohol anywhere in this dessert.
Try These Recipes
Final Words
This High Protein No Bake Coffee Cheesecake proves you don’t need an oven — or a cheat day — to enjoy a rich, coffee-forward dessert. Blend it, chill it, and slice it. If you try it, I’d love to know whether you went with the mocha twist or kept it pure espresso.
PrintHigh Protein No Bake Coffee Cheesecake
This no-bake coffee cheesecake is luxuriously creamy with a bold espresso kick, yet secretly packed with protein thanks to Greek yogurt, cottage cheese, and a boost from protein powder. The almond flour crust is buttery and crisp, while the filling sets to a silky, sliceable texture in the fridge—no oven required.
- Prep Time: 30
- Total Time: 270
- Yield: 4 1x
- Category: Dessert
- Method: No-Cook
- Cuisine: American
Ingredients
- For the Crust:
- 1 cup almond flour
- 2 tbsp unsalted butter, melted
- 1 tbsp granulated sugar
- 1/4 tsp kosher salt
- For the Filling:
- 1 cup full-fat Greek yogurt
- 1/2 cup low-fat cottage cheese
- 1/2 cup vanilla protein powder
- 1/4 cup powdered sugar
- 2 tbsp instant espresso powder
- 1 tsp vanilla extract
- 1/4 tsp kosher salt
- For the Topping:
- 1/4 cup heavy whipping cream
- 1 tbsp powdered sugar
- 1/4 tsp vanilla extract
- 1 tbsp cocoa powder, for dusting (optional)
Instructions
- Make the crust: In a medium bowl, combine 1 cup almond flour, 2 tablespoons melted butter, 1 tablespoon granulated sugar, and 1/4 teaspoon kosher salt. Stir with a fork until the mixture resembles coarse sand and holds together when pressed between your fingers. If it seems dry, add an extra teaspoon of melted butter.
- Press the crust mixture firmly and evenly into the bottom of a 7-inch springform pan or a 9×5-inch loaf pan lined with parchment paper. Use the flat bottom of a measuring cup to pack it down tightly—this prevents a crumbly base. Place the pan in the freezer while you prepare the filling.
- Make the filling: In a blender or food processor, combine 1 cup Greek yogurt, 1/2 cup cottage cheese, 1/2 cup protein powder, 1/4 cup powdered sugar, 2 tablespoons espresso powder, 1 teaspoon vanilla extract, and 1/4 teaspoon kosher salt. Blend on high for 45-60 seconds until completely smooth and lump-free. Scrape down the sides halfway through to ensure even mixing.
- Taste the filling: It should be intensely coffee-flavored with a balanced sweetness. If you prefer a stronger coffee kick, add another teaspoon of espresso powder and blend for 10 seconds. If the mixture is too thick, add a tablespoon of milk (any type) to loosen it slightly—it should be pourable but not runny.
- Assemble: Remove the crust from the freezer. Pour the filling over the chilled crust and spread it evenly with an offset spatula. Tap the pan gently on the counter a few times to release any air bubbles. Smooth the top with the spatula.
- Chill: Cover the pan with plastic wrap, ensuring the wrap doesn’t touch the surface of the cheesecake. Refrigerate for at least 4 hours, or preferably overnight, until the filling is fully set and firm to the touch. The longer it chills, the better the flavor and texture.
- Make the topping: Just before serving, whip 1/4 cup heavy cream with 1 tablespoon powdered sugar and 1/4 teaspoon vanilla extract using a hand mixer or whisk. Whip until soft peaks form—when you lift the beaters, the cream should hold a gentle peak that curls slightly. Do not overwhip, or it will become grainy.
- Finish and serve: Run a thin knife around the edge of the cheesecake to loosen it from the pan, then release the springform ring (or lift the parchment from the loaf pan). Slice into 4 equal portions. Top each slice with a dollop of whipped cream and a light dusting of cocoa powder, if desired. Serve immediately.
- For clean slices: Dip your knife in hot water and wipe it dry between cuts. This ensures sharp, professional-looking slices.
Notes
Storage: Store leftover cheesecake tightly covered in the refrigerator for up to 3 days. For best texture, enjoy within 2 days. Freezing: Freeze individual slices wrapped in plastic wrap and then in foil for up to 1 month. Thaw overnight in the refrigerator. Reheating: Do not reheat; this is a cold dessert. Protein Boost: For an extra 5g protein per serving, add 1/4 cup unflavored collagen peptides or swap the heavy cream topping for additional Greek yogurt. Alcohol-Free: This recipe contains no alcohol; espresso powder is pure coffee. Ingredient Swaps: For a dairy-free version, use plant-based yogurt, cottage cheese, and coconut cream, but note that protein content will be lower. For a sweeter cheesecake, increase powdered sugar to 1/3 cup.
Nutrition
- Calories: 436
- Sugar: 11g
- Sodium: 311mg
- Saturated Fat: 3g
- Carbohydrates: 23g
- Fiber: 3g
- Protein: 45g
- Cholesterol: 8mg
Keywords: high protein no bake coffee cheesecake, no bake cheesecake, coffee cheesecake, protein cheesecake, Greek yogurt cheesecake, cottage cheese dessert, no bake dessert, espresso dessert, high protein dessert, easy cheesecake recipe, healthy cheesecake, coffee dessert