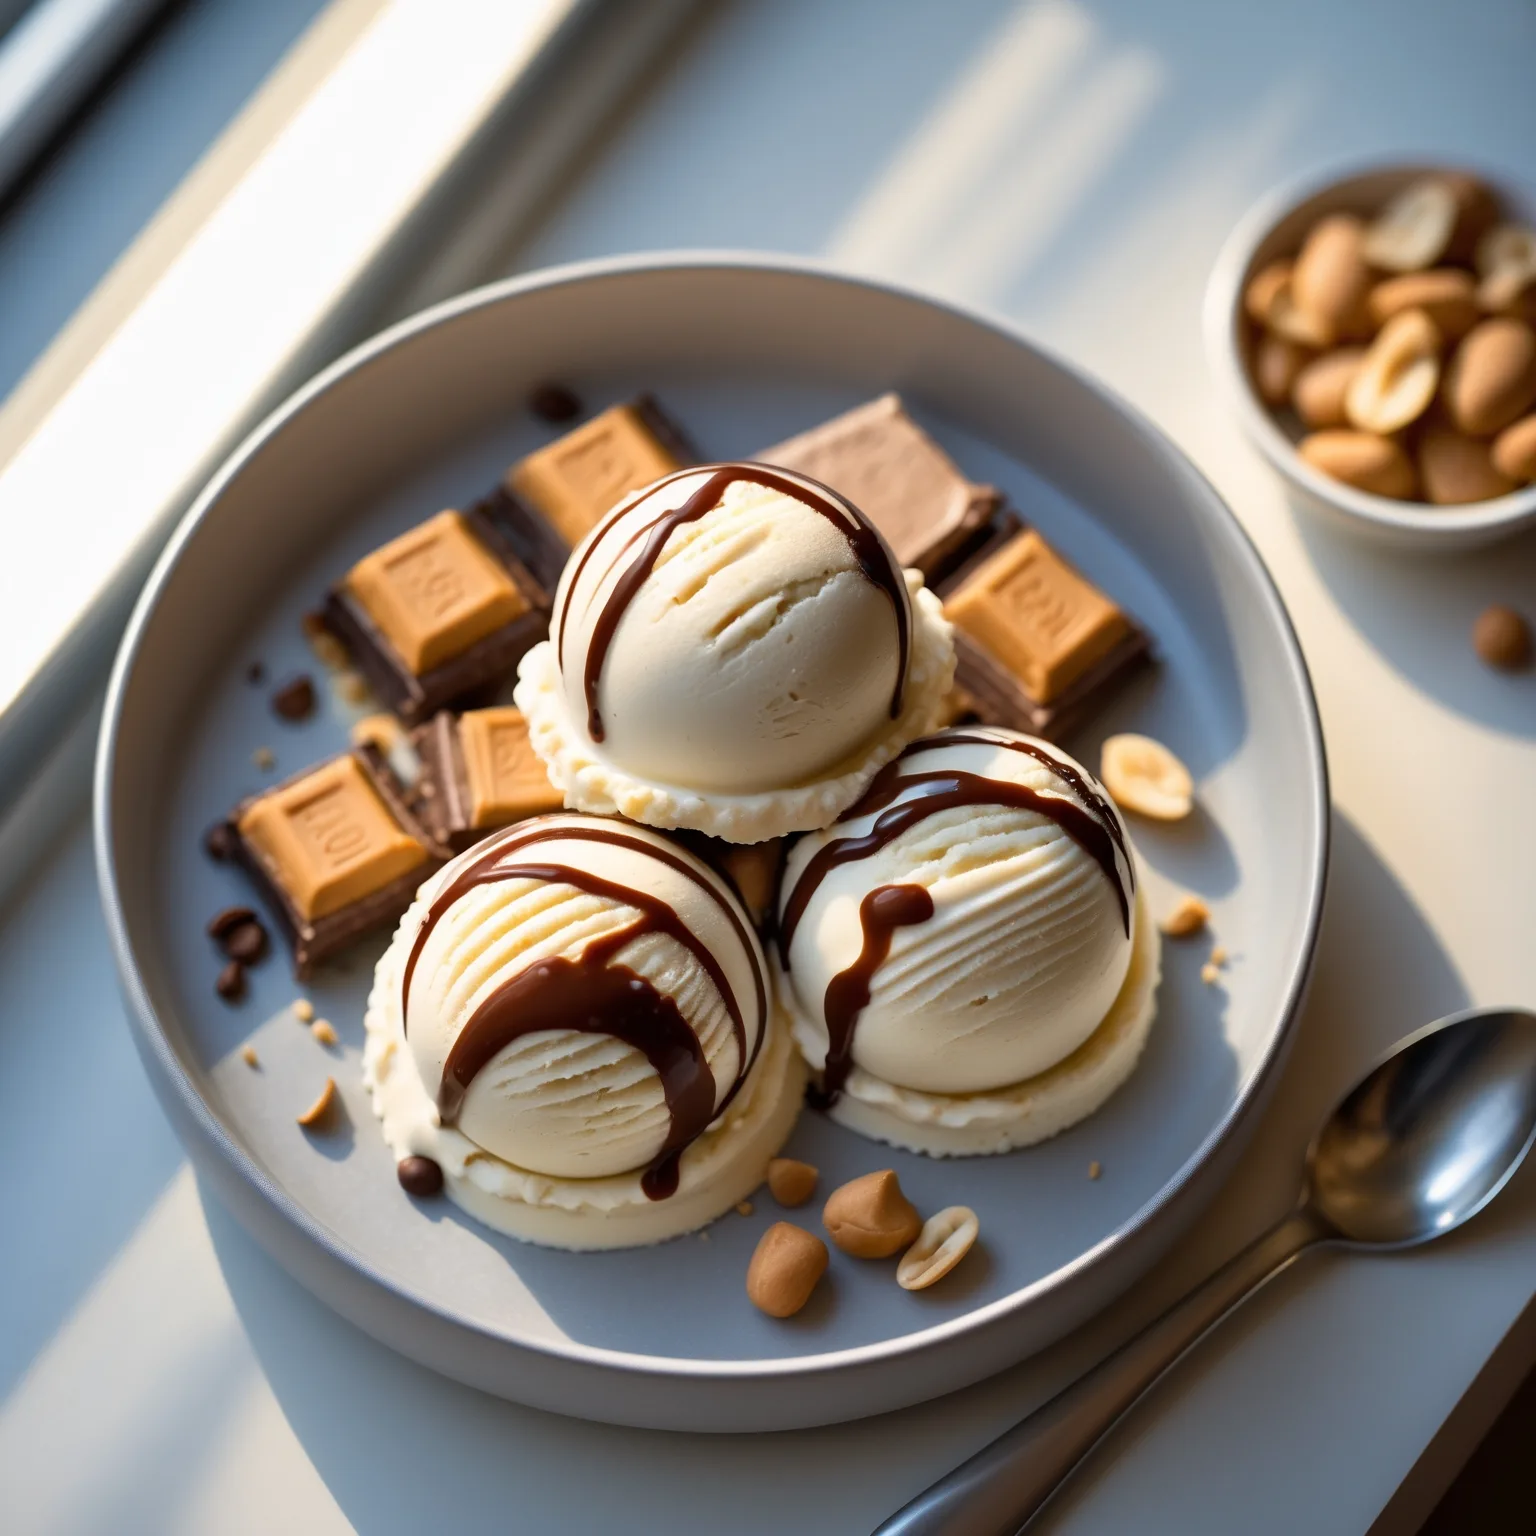
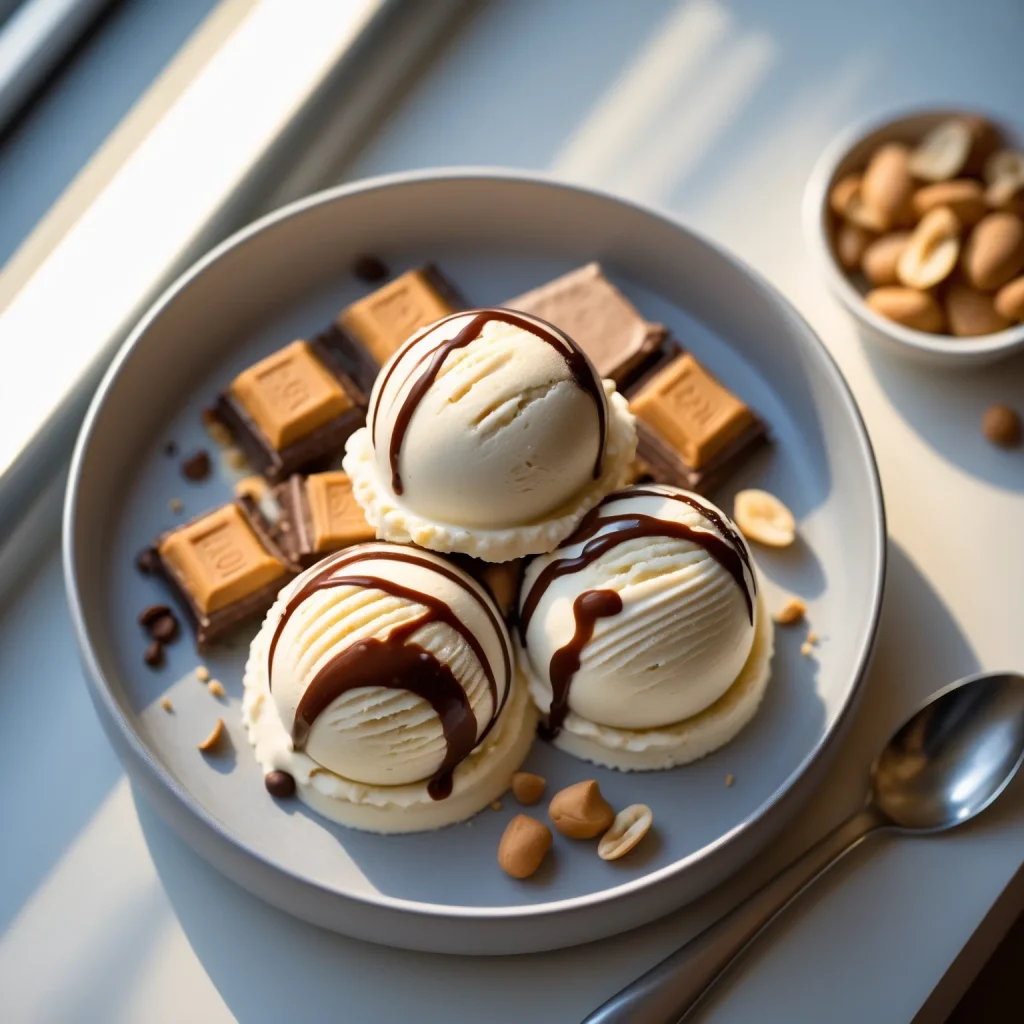
I’ve tried a lot of high-protein ice creams, and many of them feel like a compromise. You get the protein but miss the creamy, indulgent texture of real ice cream. That’s why I was determined to perfect a Ninja Creami Snickers-Inspired Protein Ice Cream. It delivers that perfect trifecta of salted peanuts, ribbons of caramel, and rich chocolate we all love, but in a surprisingly healthy package.
Each generous serving packs 22 grams of protein, thanks to a base of full-fat Greek yogurt and vanilla protein powder. The whole recipe comes together in about 15 minutes of active prep before freezing. It’s the ultimate smart dessert for when you’re craving something decadent after a workout or just want a guilt-free treat.
This frozen dessert captures the essence of a Snickers bar without any of the processed sugar or guilt. Using your Ninja Creami transforms a simple, protein-packed base into something magically creamy. It’s become my go-to for satisfying sweet cravings in a way that actually supports my goals.
What is Ninja Creami Snickers-Inspired Protein Ice Cream?
This isn’t your average protein ice cream. It’s a specifically crafted frozen dessert designed for the Ninja Creami machine, which uses a spinning blade to pulverize a frozen base into an ultra-creamy texture. The magic here is how it replicates the classic candy bar flavor profile using wholesome ingredients.
What makes it special is the layering of flavors and textures. You get a tangy, creamy base from the Greek yogurt, a nutty depth from the peanut butter, sweet caramel swirls, and the satisfying crunch of peanuts and chocolate chips. It’s a homemade, high-protein take on a nostalgic treat, perfect for American dessert lovers looking for a healthier alternative.
Why You’ll Love This Recipe
Here are a few reasons this recipe has earned a permanent spot in my freezer rotation.
- You’ll Get a Major Protein Boost — With 22 grams per serving, this dessert is genuinely filling and helps with muscle recovery, making it a fantastic post-workout option.
- Every Bite Tastes Indulgent — The combination of peanut butter, caramel, and chocolate chips perfectly mimics a Snickers bar, satisfying serious sweet cravings.
- Making It Is Incredibly Simple — There’s no cooking involved. Just mix, freeze, and spin. It’s a beginner-friendly recipe that feels foolproof.
- Customizing the Sweetness Is Easy — Using sugar-free syrups and chocolate keeps the carbs low, but you can use regular versions if you prefer.
- It’s Surprisingly Creamy Without Heavy Cream — The full-fat Greek yogurt and the Ninja Creami’s unique processing create a rich, scoopable texture you wouldn’t expect from a high-protein dessert.
Ingredients Needed to Make Ninja Creami Snickers-Inspired Protein Ice Cream
You only need seven simple ingredients to build all those classic Snickers flavors. Here’s what to grab, broken down by their role in the recipe.
The Protein-Packed Base
- 2 cups full-fat Greek yogurt, chilled — This is the creamy foundation that provides protein and tang; full-fat is key for the richest texture, but low-fat will work in a pinch.
- 1 scoop (30g) vanilla whey protein powder — It boosts the protein content and adds vanilla flavor; ensure it’s a powder you enjoy the taste of on its own to avoid any off-flavors.
- 1/2 cup unsweetened almond milk — This thins the base just enough for the Creami to process it smoothly; any unsweetened milk alternative works here.
The Flavor Swirls & Mix-Ins
- 1/4 cup creamy natural peanut butter, no sugar added — It gives the ice cream its fundamental nutty flavor; the natural kind blends more easily than stiff, processed peanut butter.
- 2 tbsp sugar-free caramel syrup — This creates the signature caramel ribbons; if you don’t need sugar-free, regular caramel sauce is a delicious swap.
- 1/4 cup roasted peanuts, unsalted, roughly chopped — They provide the essential crunchy texture; chopping them yourself ensures perfect, irregular pieces.
- 2 tbsp sugar-free dark chocolate chips — These add little pockets of chocolatey goodness; mini chips distribute even better throughout the pint.
Equipment Needed
You probably have most of these items already in your kitchen.
- A Ninja Creami Machine — This is the essential piece of equipment that creates the creamy ice cream texture from a frozen block; there’s no true alternative for this specific recipe.
- Two Creami Pint Containers — The recipe makes enough for two pints; having both allows you to process them separately for optimal texture.
- A Large Mixing Bowl — You need ample space to whisk the base ingredients thoroughly without making a mess.
- A Sturdy Whisk and Spatula — The whisk dissolves the protein powder completely, while the spatula helps fold in the peanut butter and syrup.
- Measuring Cups and Spoons — Accuracy matters for the right consistency, especially with the almond milk and syrups.
Instructions to Make Ninja Creami Snickers-Inspired Protein Ice Cream
Follow these steps closely for a perfectly creamy result on your first try.
Step 1: Create the Smooth Base
In your large bowl, combine the 2 cups of Greek yogurt and the scoop of vanilla protein powder. Whisk this vigorously for a full 2-3 minutes. This isn’t a step to rush—dissolving the powder completely now prevents a grainy, chalky texture in your final ice cream.
Step 2: Incorporate the Peanut Butter
Add the 1/2 cup of almond milk and 1/4 cup of peanut butter to the bowl. Switch to a spatula and fold everything together until the mixture is homogenous and no streaks of peanut butter remain. The almond milk is crucial here; it thins the base just enough so the Creami’s blade can spin it effectively.
Step 3: Add the Caramel Swirl
Pour in the 2 tablespoons of caramel syrup. Now, stir gently just 3-4 times to create a marbled effect. What surprised me was how easily over-mixing can blend the caramel completely into the base. You want distinct ribbons for that true Snickers experience.
Step 4: Fill and Freeze the Pints
Divide the mixture evenly between the two pint containers, filling to the max line. Firmly tap each container on the counter to release air bubbles and create a flat surface. Trapped air can cause voids, leading to uneven processing. Freeze the pints for at least 24 hours until rock solid. This long freeze is non-negotiable for the right consistency.
Step 5: Process and Add Mix-Ins
Let a pint sit at room temperature for 5-10 minutes to slightly soften the edges. Place it in the Creami and run the ‘Ice Cream’ cycle. Once done, open the lid and add 2 tablespoons of chopped peanuts and 1 tablespoon of chocolate chips directly into the spun ice cream. Use a spoon to gently fold them in—stirring with the machine can over-process the mix-ins.
Step 6: Final Spin and Serve
For the best texture, select the ‘Re-spin’ function for 30-60 seconds. This evenly distributes the add-ins and aerates the ice cream for a lighter mouthfeel. Scoop and enjoy immediately, topped with an extra drizzle of caramel if you like. For the second pint, simply repeat the process.
What Went Wrong and How I Fixed It
Here’s what tripped me up during my early tests and exactly how to solve it.
- A Grainy Texture Appeared — This usually means the protein powder wasn’t fully dissolved. The fix is to whisk the yogurt and powder together for a solid three minutes until completely smooth before adding anything else.
- The Ice Cream Was Icy, Not Creamy — This happens if you don’t freeze the base long enough. Ensure a full 24-hour freeze. The pint should feel completely solid, like a brick, before spinning.
- My Caramel Swirl Disappeared — Over-mixing the syrup into the base is the culprit. Swirl it gently with just a few folds; it should look marbled, not uniform.
- The Blade Struggled or Sounded Strained — Not letting the pint soften for 5-10 minutes after freezing can cause this. That brief rest lets the edges soften just enough for the blade to engage smoothly.
- Leftovers Became Hard and Crystalline — Storing without a protective barrier allows ice crystals to form. Always press parchment paper directly onto the surface of the ice cream before re-freezing.
- The Mix-Ins Sank to the Bottom — If you add peanuts and chocolate before the first spin, they’ll get pulverized or sink. Always fold them in by hand after the ‘Ice Cream’ cycle is complete.
What Do I Serve With Ninja Creami Snickers-Inspired Protein Ice Cream?
While it’s fantastic on its own, here are a few ways to turn it into a bigger dessert.
- A Warm Brownie Square — The contrast of hot, fudgy brownie and cold, creamy ice cream is simply unbeatable.
- Fresh Sliced Bananas — They add a natural sweetness and a soft texture that complements the crunchy peanuts perfectly.
- An Extra Drizzle of Salted Caramel Sauce — This amplifies the Snickers flavor and makes for a beautiful, decadent presentation.
- A Small Shot of Espresso — Enjoying a bite of the ice cream after a sip of coffee highlights the roasted notes in the chocolate and peanuts.
- Crumbled Protein Cookie Pieces — For an extra protein punch and more texture, sprinkle pieces of your favorite high-protein cookie on top.
Pro Tips to Make Perfect Ninja Creami Snickers-Inspired Protein Ice Cream
A few small tweaks can make a big difference in your final result.
- Chill Your Yogurt First — Starting with cold ingredients helps the base freeze faster and more uniformly, leading to better texture.
- Whisk Until Your Arm Complains — Seriously, don’t stop whisking the yogurt and protein powder early. This is the single biggest factor in avoiding graininess.
- Natural Peanut Butter Works Best — Its runnier consistency incorporates more easily into the cold base than the stiff, shelf-stable kind.
- Resist the Urge to Peak During the Spin — Let the ‘Ice Cream’ cycle run completely uninterrupted. Opening the lid can disrupt the processing and affect creaminess.
- Use the ‘Re-spin’ Function Judiciously — Thirty to sixty seconds is usually plenty. Over-spinning can start to melt the ice cream, making it icy when it refreezes.
- Process One Pint at a Time — Even if you’re serving both, spin them individually. This ensures each one gets the full attention of the blade for maximum creaminess.
- Garnish Just Before Serving — Add any final drizzle of syrup or extra peanuts right as you plate it so they stay distinct and don’t get soggy.
Variations of Ninja Creami Snickers-Inspired Protein Ice Cream
Don’t be afraid to play with this formula. Here are some of my favorite twists.
- For a Chocolate Lover’s Version — Swap the vanilla protein powder for chocolate protein powder and use chocolate syrup instead of caramel for a double-chocolate experience.
- Try a Different Nut Butter — Almond butter or cashew butter can create a new flavor profile while keeping the protein high.
- Boost the Protein Even Further — Add a tablespoon of collagen peptides or a half-scoop of unflavored protein powder to the base mixture.
- Make a “Salted Caramel” Edition — Use a salted caramel protein powder and sprinkle a little flaky sea salt into the mix with the peanuts.
- Create a “Snickers Crisp” Texture — Add 1/4 cup of crushed rice cakes or protein cereal when folding in the peanuts for an extra crunch.
- For a Dairy-Free Option — Use a thick, dairy-free yogurt alternative and a plant-based protein powder. Check that your chocolate chips are also dairy-free.
How Do I Store Ninja Creami Snickers-Inspired Protein Ice Cream Leftovers?
If you have any left, here’s how to keep it tasting great.
- Immediate Short-Term Storage — If you’ll eat it within an hour, you can leave the spun ice cream right in the Creami pint container with the lid on.
- Long-Term Freezer Storage — For keeping leftovers beyond a day, transfer the ice cream back to the pint, press parchment paper on the surface, seal the lid, and freeze for up to 2 weeks.
- Preventing Ice Crystals Is Key — That parchment paper pressed directly onto the ice cream’s surface creates a barrier against air, which is what causes freezer burn and crystallization.
- Label Your Pints Clearly — Write the date you spun it on the lid with a marker. It’s easy to forget how long something has been in the freezer.
- Keep the Pints Upright — Store them standing up in a flat spot in your freezer to maintain the shape and prevent the ingredients from settling unevenly.
How Do I Reheat Ninja Creami Snickers-Inspired Protein Ice Cream Leftovers?
“Reheating” isn’t quite the right term for frozen desserts, but here’s how to restore the perfect texture.
- The Ninja Creami ‘Re-spin’ is Best — Take the frozen pint from the freezer, let it temper for 5 minutes, then process on the ‘Re-spin’ setting for 30 seconds to restore the soft-serve consistency.
- A Quick Countertop Thaw Works — For a softer scoop, let the pint sit on the counter for 10-15 minutes before digging in. This is easier on your spoon than digging into a rock-hard block.
- Microwave in Extreme Pinch — If you’re in a real hurry, microwave the entire sealed pint for no more than 10 seconds. Watch it closely, as melting happens fast and ruins the texture.
FAQs
Can I make this Ninja Creami Snickers-Inspired Protein Ice Cream without a Ninja Creami?
Unfortunately, no. The Ninja Creami is specifically designed to transform a solid frozen block into a creamy dessert. A standard ice cream maker churns a liquid base and won’t work with this pre-frozen method.
Why does my protein ice cream have a chalky texture?
This almost always comes from undissolved protein powder. The solution is to whisk the powder into the Greek yogurt much more vigorously and for longer than you think you need to—aim for a full 3 minutes.
How long can I freeze the base before spinning it?
You can freeze the prepared pints for up to 1 month before processing. Just make sure the lids are on tight to prevent any freezer burn from affecting the flavor.
Can I use a different type of protein powder?
Yes, but stick to whey or casein blends for the creamiest result. Plant-based powders can sometimes yield a grainier texture and may require a bit more liquid to blend smoothly.
My ice cream is too soft after spinning. What did I do wrong?
This usually means the base wasn’t frozen solid enough. Ensure a full 24-hour freeze next time. If it’s soft now, you can pop it back in the freezer for 30-60 minutes to firm up before serving.
Is Ninja Creami Snickers-Inspired Protein Ice Cream keto-friendly?
With only 12g of carbs and 1.25g of sugar per serving, it can fit into many low-carb or keto plans, especially since the sweeteners used are sugar-free. Always check your specific ingredients to be sure.
Try These Recipes
- Ninja Creami Cheesecake Protein Ice Cream (Low Sugar, Creamy)
- Ninja Creami Chocolate Fudge Protein Ice Cream
- Ninja Creami Brownie Batter Protein Ice Cream (High Protein Dessert)
- Chocolate Chip Protein Pancakes
Final Words
This recipe proves you don’t have to choose between a treat that tastes amazing and one that fuels your body well. The Ninja Creami Snickers-Inspired Protein Ice Cream has become my favorite way to end the day on a high note—literally and figuratively. I hope it brings a little guilt-free joy and a lot of creamy satisfaction to your kitchen, too.
PrintNinja Creami Snickers-Inspired Protein Ice Cream

This Snickers-inspired protein ice cream delivers the classic combination of caramel, peanuts, and chocolate in a high-protein, creamy frozen dessert. Made with Greek yogurt and protein powder, it has a rich texture and indulgent flavor without the guilt, perfect for a post-workout treat or healthy dessert.
- Prep Time: 10
- Cook Time: 5
- Total Time: 15
- Yield: 4 1x
- Category: Dessert
- Method: Frozen
- Cuisine: American
Ingredients
- 2 cups full-fat Greek yogurt, chilled
- 1 scoop (30g) vanilla whey protein powder
- 1/2 cup unsweetened almond milk
- 1/4 cup creamy natural peanut butter, no sugar added
- 2 tbsp sugar-free caramel syrup
- 1/4 cup roasted peanuts, unsalted, roughly chopped
- 2 tbsp sugar-free dark chocolate chips
Instructions
- In a large mixing bowl, combine 2 cups of full-fat Greek yogurt and 1 scoop of vanilla protein powder. Whisk vigorously for 2-3 minutes until the protein powder is fully dissolved and no lumps remain; this ensures a smooth base and prevents graininess in the final ice cream, as undissolved powder can lead to a chalky texture.
- Add 1/2 cup of unsweetened almond milk and 1/4 cup of creamy peanut butter to the bowl. Use a spatula to fold and stir until the peanut butter is evenly incorporated and the mixture is homogenous; the almond milk thins the base slightly for better processing in the Creami, ensuring it spins smoothly without being too thick.
- Pour in 2 tablespoons of sugar-free caramel syrup and stir gently to create a marbled effect without fully mixing it in. This will give subtle caramel swirls in the ice cream, mimicking the Snickers bar, and avoid over-mixing which could dilute the swirls.
- Divide the mixture evenly between two Ninja Creami pint containers, filling each to the maximum fill line. Tap the containers firmly on the counter to remove any air bubbles and ensure an even surface for freezing; trapped air can cause voids and uneven texture during processing.
- Place the lids on the containers and freeze for at least 24 hours, or until completely solid. The long freezing time is crucial for the Creami to process the ice cream properly and achieve a creamy texture; insufficient freezing can result in a slushy consistency.
- Once frozen, remove one pint from the freezer and let it sit at room temperature for 5-10 minutes to slightly soften the edges. This prevents damage to the Creami blade and ensures smoother processing by allowing the blade to engage the frozen base without strain.
- Place the pint in the Ninja Creami outer bowl, secure the lid, and process on the ‘Ice Cream’ setting. This typically takes 2-3 minutes and will transform the frozen base into a soft-serve consistency; listen for the motor to run smoothly and stop when the ice cream is uniformly creamy.
- After the first spin, open the lid and add 2 tablespoons of chopped peanuts and 1 tablespoon of sugar-free chocolate chips per pint. Use a spoon to gently fold them into the ice cream while it is still in the container; folding instead of stirring preserves the mix-ins’ texture and prevents over-processing.
- For a firmer texture, process on the ‘Re-spin’ setting for 30-60 seconds. This incorporates the mix-ins evenly and further aerates the ice cream for a lighter mouthfeel; avoid over-spinning, which can melt the ice cream and make it icy.
- Repeat steps 6-9 for the second pint if serving immediately, or store the processed ice cream in the freezer for up to 1 hour before serving to maintain optimal texture. Keeping it too long after spinning can cause crystallization, so serve promptly for best results.
- To serve, scoop the ice cream into bowls or cones. If desired, drizzle with additional caramel syrup and sprinkle with extra peanuts for garnish; this enhances the Snickers flavor and adds visual appeal for presentation.
- For leftovers, transfer the ice cream back to the pint container, press a piece of parchment paper directly on the surface to prevent ice crystals, and freeze for up to 2 weeks. Re-spin for 30 seconds before serving to restore creaminess; this reactivates the texture without needing to thaw completely.
Notes
Storage: After processing, store in an airtight container in the freezer for up to 2 weeks. Press parchment paper on the surface to minimize ice crystals. Reheating: Not applicable, but for best texture, re-spin in the Ninja Creami for 30 seconds if frozen solid before serving. Freezing: The base can be frozen in the pint containers for up to 1 month before processing; ensure they are tightly sealed to prevent freezer burn.
Nutrition
- Calories: 304
- Sugar: 1.25g
- Sodium: 200mg
- Unsaturated Fat: 8g
- Trans Fat: 20g
- Carbohydrates: 12g
- Fiber: 1.5g
- Protein: 22g
- Cholesterol: 10mg
Keywords: Snickers protein ice cream, Ninja Creami recipe, high-protein dessert, healthy ice cream, caramel peanut chocolate, frozen treat, protein powder dessert, no-cook ice cream, homemade protein ice cream, low-sugar dessert, post-workout snack, guilt-free indulgence