
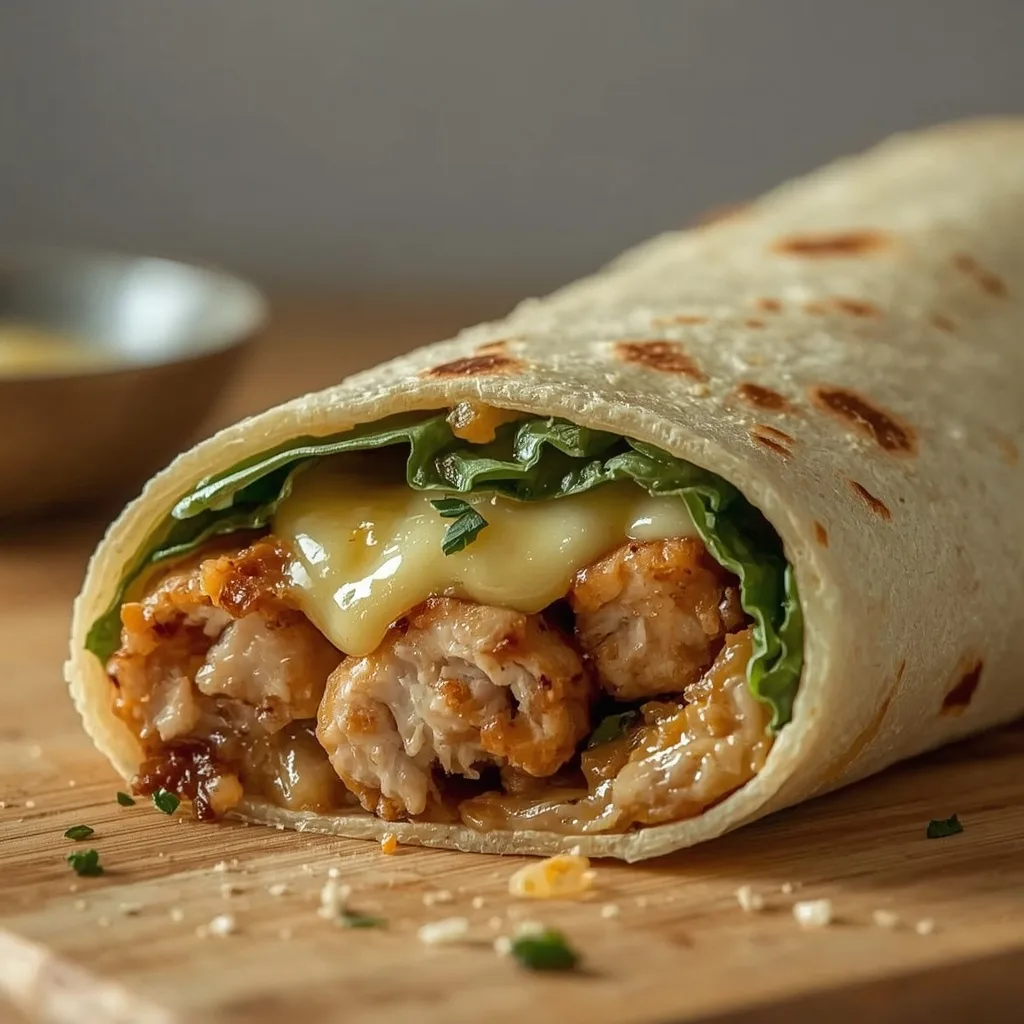
High Protein Low Carb Cheesy Garlic Chicken Wraps are exactly what they sound like—tender seasoned chicken strips, a gooey three-cheese blend, and low-carb tortillas seared until golden and crisp. The garlic butter brushed on top takes them from good to genuinely crave-worthy, and the whole thing comes together in one skillet.
You’ll need about 40 minutes from start to finish, and this recipe sits comfortably at a beginner-friendly level. Each serving delivers a hefty 48g of protein with only 16g of carbohydrates, making it a solid weeknight dinner or meal-prep lunch. The only mildly finicky part is rolling the wraps tightly enough to keep the filling sealed during the sear.
What is High Protein Low Carb Cheesy Garlic Chicken Wraps?
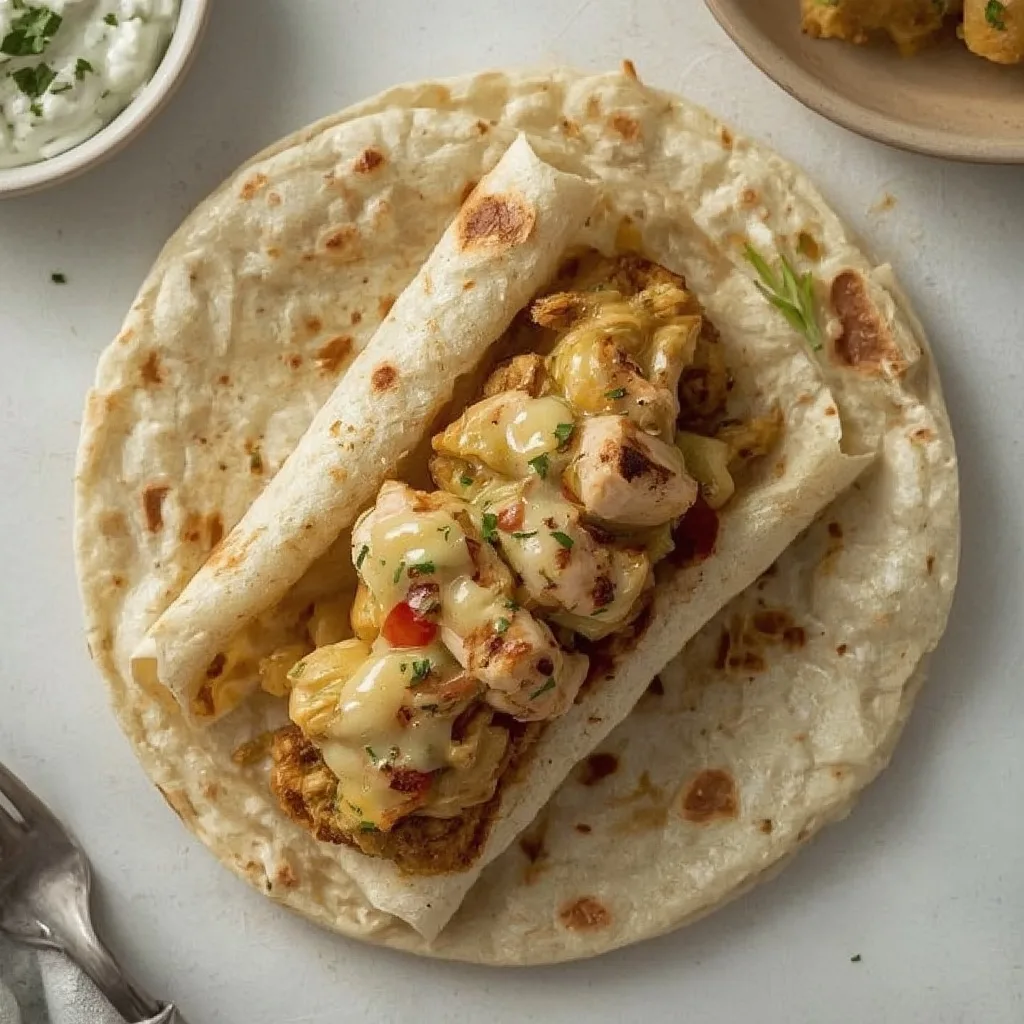
Think of this as the love child of a classic chicken burrito and a grilled cheese sandwich. The filling combines shredded mozzarella, sharp cheddar, and softened cream cheese into a rich, garlicky blend that gets wrapped up with seared chicken breast strips in a low-carb flour tortilla.
While the concept leans American in its assembly, the flavor profile draws from classic garlic bread and Italian-American comfort food. The wraps are pan-seared rather than baked, which gives the exterior that satisfying crunch while the cheese melts into a molten center.
What makes these wraps stand out is the balance—you get the indulgence of a cheesy, buttery meal without blowing your macros. The low-carb tortillas keep net carbs around 3-4g each, and the chicken provides the protein foundation that keeps you full for hours.
Why You’ll Love This Recipe
Here is what makes these wraps worth adding to your regular rotation:
- Protein powerhouse — Each wrap packs roughly 48g of protein, which covers a huge chunk of your daily needs in one meal.
- Customizable heat level — Add red pepper flakes to the cheese mixture or serve with pickled jalapeños if you like things spicy.
- Meal-prep friendly — These wraps hold up beautifully in the fridge for up to 3 days, making them perfect for batch cooking on Sundays.
- Kid-approved — The cheesy, garlicky flavor appeals to picky eaters, and the crispy exterior makes them fun to eat.
- Macro-friendly comfort food — You get the indulgence of a cheesy wrap without derailing your low-carb goals.
Ingredients Needed to Make High Protein Low Carb Cheesy Garlic Chicken Wraps
You’ll need just 14 ingredients for this recipe, and most of them are probably already in your kitchen. Here’s what to grab:
For the Chicken
- 1 lb (450g) boneless, skinless chicken breast — Cut into 1/2-inch strips so they cook quickly and fit neatly inside the wraps. Look for uniform pieces to ensure even cooking.
- 1/2 tsp kosher salt — This seasons the chicken directly, so don’t skip it. You’ll also want a pinch more for final seasoning if needed.
- 1/4 tsp black pepper — Freshly ground offers better flavor than pre-ground, but either works.
- 1/2 tsp garlic powder — Adds savory depth to the chicken without the moisture that fresh garlic would bring.
- 1/2 tsp onion powder — Complements the garlic powder and rounds out the seasoning blend.
- 2 tbsp olive oil, divided — You’ll use half for searing the chicken and half for crisping the wraps.
For the Filling
- 4 low-carb flour tortillas (8-inch, ~50g each) — Look for ones with 3-4g net carbs per tortilla. The brand matters less than the size and carb count.
- 1 cup (4 oz / 113g) part-skim mozzarella cheese — Shredded mozzarella melts beautifully and gives that stretchy, gooey texture.
- 1/2 cup (2 oz / 57g) sharp cheddar cheese — Sharp cheddar adds a bold flavor contrast to the milder mozzarella.
- 1/4 cup (2 oz / 57g) cream cheese — Softened cream cheese binds the filling and adds richness that prevents the cheese from drying out.
For the Garlic Butter and Garnish
- 2 tbsp unsalted butter, melted — This creates the garlic butter brushed on top of the finished wraps.
- 2 cloves garlic, minced — Fresh garlic is key here; don’t substitute garlic powder for the butter mixture.
- 1 tbsp fresh parsley, finely chopped (optional) — Adds color and a fresh note to cut through the richness.
- 1/4 cup (4 tbsp) low-carb marinara or sugar-free tomato sauce (optional) — For dipping, if you want a bit of acidity to balance the cheese.
Equipment Needed
You probably have most of these already. Here’s what you’ll need:
- Large non-stick skillet — Essential for searing the chicken and crisping the wraps without sticking. A 12-inch skillet gives you room to work in batches.
- Medium mixing bowl — For tossing the chicken with seasonings and later mixing the cheese filling.
- Small microwave-safe bowl — For melting the butter and infusing it with garlic.
- Spatula — A wide, flat spatula works best for pressing the wraps down and flipping them without breaking the seal.
- Sharp knife and cutting board — You’ll need these to slice the chicken into strips and later cut the wraps in half.
Instructions to Make High Protein Low Carb Cheesy Garlic Chicken Wraps
This recipe flows in a logical sequence—season the chicken, make the cheese mixture, sear, assemble, and crisp. Follow these steps in order and you’ll nail it on the first try.
Step 1: Season the Chicken
Place the chicken strips in a medium bowl and sprinkle with the kosher salt, black pepper, garlic powder, and onion powder. Toss well to coat every piece evenly. Let it sit at room temperature for 10 minutes while you prepare the cheese mixture—this brief rest helps the seasoning penetrate the meat.
Step 2: Make the Cheese Filling
In a small bowl, combine the softened cream cheese, shredded mozzarella, and shredded cheddar. Mix with a spatula until everything is well blended. The cream cheese should be at room temperature so it incorporates smoothly rather than leaving lumps.
Step 3: Prepare the Garlic Butter
Combine the melted butter and minced garlic in a small microwave-safe bowl. Microwave for 20 seconds until fragrant. This step releases the garlic’s aroma and infuses the butter, so don’t skip the brief heating even if the butter is already warm.
Step 4: Sear the Chicken
Heat 1 tbsp of olive oil in a large non-stick skillet over medium-high heat. When the oil shimmers, add the seasoned chicken strips in a single layer—be careful not to overcrowd the pan. Sear for 4-5 minutes per side until golden brown and cooked through, with the internal temperature reaching 165°F / 74°C. Transfer to a plate and let rest for 5 minutes so the juices redistribute.
Step 5: Assemble the Wraps
While the chicken rests, lay the 4 tortillas flat on a clean work surface. Divide the cheese mixture equally among them, spreading it over the bottom half of each tortilla and leaving a 1-inch border. After the chicken rests, chop it into bite-sized pieces (about 1/2-inch) and distribute evenly over the cheese mixture.
Step 6: Roll the Wraps
Fold the bottom edge of each tortilla over the filling, then fold in the sides, and roll tightly into a burrito shape. Make sure the seam is tucked underneath. This tight rolling is what keeps the filling from leaking out during cooking.
Step 7: Crisp the Wraps
Wipe out the skillet with a paper towel and return it to medium heat. Add the remaining 1 tbsp olive oil. Place the wraps seam-side down in the skillet, working in batches if needed. Cook for 3-4 minutes per side until golden brown and crispy, pressing gently with a spatula to ensure even contact with the pan.
Step 8: Finish and Serve
While the wraps cook, mix the melted garlic butter with the parsley. Brush the top of each warm wrap with the garlic butter. Let them rest for 2 minutes before slicing each wrap in half on a diagonal. Serve immediately with optional marinara dip and enjoy that crispy exterior and gooey, garlicky center.
What Went Wrong and How I Fixed It
We’ve all had kitchen mishaps. Here are the most common issues I’ve run into with this recipe and how I solved them:
- Filling leaking out during cooking — This happened when I overfilled the tortillas or didn’t roll tightly enough. Use less filling per wrap and make sure the seam is firmly pressed down in the pan.
- Tortillas sticking to the skillet — A dry pan or insufficient oil causes this. Always add the full tablespoon of olive oil and let it heat before adding the wraps.
- Chicken turning out dry — Overcooking is the culprit. Pull the chicken off the heat at 165°F and let it rest; the residual heat finishes the job without drying it out.
- Cheese mixture too stiff to spread — Cold cream cheese is the problem. Let it soften at room temperature for 20-30 minutes before mixing.
- Wraps not getting crispy — Medium heat is crucial. Too high and the tortilla burns before the cheese melts; too low and you get a soggy exterior with no crunch.
- Garlic butter burning — I once added it to the pan while cooking. Brush it on after the wraps come out, not during.
What Do I Serve With High Protein Low Carb Cheesy Garlic Chicken Wraps?
These wraps are satisfying on their own, but the right sides can round out the meal. Here are some pairings I’ve tried and loved:
- Simple green salad — The freshness and crunch of lettuce, cucumber, and a light vinaigrette balance the richness of the wraps.
- Roasted vegetables — Brussels sprouts, broccoli, or asparagus tossed in olive oil and roasted at 425°F bring a smoky contrast.
- Cauliflower rice — A quick sauté with garlic and a squeeze of lime keeps the meal low-carb while adding bulk.
- Zucchini noodles — Spiralized zucchini lightly sautéed in olive oil makes the whole plate feel like a lighter version of pasta night.
- Guacamole or sour cream — A cooling, creamy dip works surprisingly well, especially if you’ve added heat to the filling.
- Pickled jalapeños and sliced avocado — These add brightness, creaminess, and a tangy kick that cuts through the cheese.
Pro Tips to Make Perfect High Protein Low Carb Cheesy Garlic Chicken Wraps
These tips come from many batches of trial and error. Use them to get the best results the first time:
- Softening the cream cheese is non-negotiable — Leave it on the counter for 20-30 minutes before mixing. Room-temperature cream cheese blends smoothly instead of leaving white chunks throughout the filling.
- Dry the chicken before seasoning — Pat the strips with paper towels before adding the spice blend. Less moisture means better browning and a more concentrated flavor.
- Don’t skip the resting period — Letting the cooked chicken rest for 5 minutes keeps it juicy when you chop it. Cutting too early releases the juices into the cutting board instead of the wrap.
- Press gently while searing — Use your spatula to press down on each wrap for a few seconds after placing it in the pan. This ensures even browning and prevents air pockets.
- Batch cooking means wiping the pan — After the chicken, wipe out the skillet before adding the wraps. Burnt bits from the chicken can make the tortillas taste bitter.
- Slice on the diagonal — The angle exposes more of the cheesy center and makes each half look more appealing. It’s a small touch that makes a difference.
Variations of High Protein Low Carb Cheesy Garlic Chicken Wraps
This recipe is a great starting point for experimentation. Here are some variations I’ve enjoyed:
- Buffalo chicken wraps — Toss the cooked chicken in buffalo sauce before assembling. Swap the cheddar for blue cheese crumbles and add a drizzle of ranch dressing.
- Extra-protein boost — Add 2 tbsp of unflavored protein powder to the cream cheese mixture. It incorporates seamlessly and adds another few grams of protein without affecting the taste.
- Spicy jalapeño popper version — Fold finely diced pickled jalapeños and a pinch of red pepper flakes into the cheese mixture. Serve with extra jalapeños on the side.
- Italian-inspired style — Replace the cheddar with provolone, add Italian seasoning to the chicken, and serve with marinara for dipping.
- Smoky barbecue twist — Brush the cooked chicken with sugar-free barbecue sauce before wrapping. Swap the parsley for a sprinkle of smoked paprika in the garlic butter.
- Breakfast-style wraps — Swap the chicken for crumbled breakfast sausage and add a scrambled egg inside. Same technique, completely different meal.
How Do I Store High Protein Low Carb Cheesy Garlic Chicken Wraps Leftovers?
If you have leftovers—or you’re prepping ahead—here’s how to keep them fresh:
- Airtight container — Place the wraps in a single layer so they don’t squash each other. They’ll stay fresh in the refrigerator for up to 3 days.
- Aluminum foil — Wrap each wrap individually in foil before placing them in the fridge. This protects them from absorbing other odors.
- Freezer bag — For longer storage, wrap each cooled wrap individually in plastic wrap, then place them in a freezer-safe bag for up to 2 months.
- Parchment paper — If you’re stacking wraps in the fridge, put a sheet of parchment paper between each one to prevent sticking.
How Do I Reheat High Protein Low Carb Cheesy Garlic Chicken Wraps Leftovers?
Reheating these wraps properly makes all the difference. The microwave will ruin the crispiness, so use one of these methods instead:
- Skillet method — Heat a skillet over medium heat and reheat each wrap for 2-3 minutes per side until the exterior is crispy again. This is the closest to the original texture.
- Air fryer — Set the air fryer to 375°F (190°C) and heat for 5-6 minutes. The circulating air restores the crunch beautifully.
- Oven approach — Place the wraps on a baking sheet and heat at 350°F for 8-10 minutes. Flip halfway through for even reheating.
FAQs
Can I freeze High Protein Low Carb Cheesy Garlic Chicken Wraps?
Yes, absolutely. Wrap each cooled wrap individually in plastic wrap and place them in a freezer-safe bag for up to 2 months. Thaw overnight in the refrigerator before reheating.
How long does High Protein Low Carb Cheesy Garlic Chicken Wraps last in the fridge?
Stored properly in an airtight container, these wraps will stay fresh for up to 3 days. Beyond that, the tortillas start to lose their texture and the filling can dry out.
Can I use regular flour tortillas instead of low-carb ones?
You can, but it changes the nutrition significantly. Regular flour tortillas add roughly 20-25g of carbs each, which defeats the low-carb purpose of this recipe.
What if I don’t have cream cheese?
You can substitute Greek yogurt in equal measure, though the filling will be slightly less rich. For a more similar texture, try blended cottage cheese.
Can I grill these wraps instead of using a skillet?
Yes, a grill pan or outdoor grill works well. Use medium heat and oil the grates to prevent sticking. Cook for 3-4 minutes per side.
Is this recipe gluten-free?
Only if you use gluten-free low-carb tortillas. The rest of the ingredients are naturally gluten-free, so just swap in your preferred tortilla brand.
Try These Recipes
Final Words
These High Protein Low Carb Cheesy Garlic Chicken Wraps have earned a permanent spot in my weekly rotation. They’re proof that eating high-protein and low-carb doesn’t mean giving up comfort food. Whether you’re meal-prepping for the week or feeding the family on a busy Tuesday, this recipe delivers every time.
I hope you give them a try. If you do, I’d love to hear which variation you tried or how they turned out in the comments. Happy cooking!
PrintHigh Protein Low Carb Cheesy Garlic Chicken Wraps
Tender, seasoned chicken breast strips wrapped in a gooey, garlicky cheese blend and tucked into low-carb tortillas, then seared until golden and crispy. Each wrap delivers a satisfying crunch with a molten, savory center—perfect for a high-protein, low-carb meal that feels indulgent.
- Prep Time: 20
- Cook Time: 20
- Total Time: 40
- Yield: 4 1x
- Category: Main Course
- Method: Stovetop
- Cuisine: American
Ingredients
- 1 lb (450g) boneless, skinless chicken breast, cut into 1/2-inch strips
- 1/2 tsp kosher salt, plus more for seasoning
- 1/4 tsp black pepper, freshly ground
- 1/2 tsp garlic powder
- 1/2 tsp onion powder
- 2 tbsp olive oil, divided
- 4 low-carb flour tortillas (8-inch, ~50g each, net carbs 3-4g per tortilla)
- 1 cup (4 oz / 113g) part-skim mozzarella cheese, shredded
- 1/2 cup (2 oz / 57g) sharp cheddar cheese, shredded
- 1/4 cup (2 oz / 57g) cream cheese, softened to room temperature
- 2 tbsp unsalted butter, melted
- 2 cloves garlic, minced
- 1 tbsp fresh parsley, finely chopped (optional, for garnish)
- 1/4 cup (4 tbsp) low-carb marinara or sugar-free tomato sauce (optional, for dipping)
Instructions
- Place the chicken strips in a medium bowl. Sprinkle with 1/2 tsp kosher salt, 1/4 tsp black pepper, 1/2 tsp garlic powder, and 1/2 tsp onion powder. Toss well to coat evenly. Let sit at room temperature for 10 minutes while you prepare the cheese mixture.
- In a small bowl, combine the softened cream cheese, shredded mozzarella, and shredded cheddar. Mix with a spatula until well blended. Set aside.
- In a small microwave-safe bowl, combine the melted butter and minced garlic. Microwave for 20 seconds until fragrant. Set aside.
- Heat 1 tbsp of olive oil in a large non-stick skillet over medium-high heat. When the oil shimmers, add the seasoned chicken strips in a single layer, being careful not to overcrowd. Sear for 4-5 minutes per side, until the chicken is golden brown on the outside and cooked through (internal temperature reaches 165°F / 74°C). Transfer to a plate and let rest for 5 minutes.
- While the chicken rests, lay the 4 tortillas flat on a clean work surface. Divide the cheese mixture equally among the tortillas, spreading it over the bottom half of each tortilla, leaving a 1-inch border.
- After resting, chop the chicken strips into bite-sized pieces (about 1/2-inch pieces). Evenly distribute the chicken over the cheese mixture on each tortilla.
- Fold the bottom edge of each tortilla over the filling, then fold in the sides, and roll tightly into a burrito shape. Ensure the seam is tucked underneath.
- Wipe out the skillet with a paper towel and return to medium heat. Add the remaining 1 tbsp olive oil. Place the wraps seam-side down in the skillet (working in batches if needed). Cook for 3-4 minutes per side, until golden brown and crispy, pressing gently with a spatula. Remove from the skillet and let rest for 2 minutes before slicing.
- While the wraps cook, mix the melted garlic butter with the parsley. Brush the top of each warm wrap with the garlic butter.
- Slice each wrap in half on a diagonal and serve immediately with optional marinara dip. Enjoy the crispy exterior and gooey, garlicky center.
- Storage: Store leftover wraps in an airtight container in the refrigerator for up to 3 days.
- Freezing: Wrap each cooled wrap individually in plastic wrap and place in a freezer-safe bag for up to 2 months.
- Reheating: For best results, reheat in a skillet over medium heat for 2-3 minutes per side, or in an air fryer at 375°F (190°C) for 5-6 minutes until crispy. Microwave is not recommended as it will make the tortilla soggy.
- Tip: If you prefer a spicier kick, add a pinch of red pepper flakes to the cheese mixture or serve with pickled jalapeños.
Notes
Storage: Wrap leftovers tightly in foil or an airtight container and refrigerate for up to 3 days. Freezing: Wrap each cooled wrap individually in plastic wrap and place in a freezer-safe bag for up to 2 months. Reheating: For best results, reheat in a skillet over medium heat for 2-3 minutes per side, or in an air fryer at 375°F (190°C) for 5-6 minutes until crispy. Microwave is not recommended as it will make the tortilla soggy.
Nutrition
- Calories: 530
- Sugar: 3g
- Sodium: 850mg
- Unsaturated Fat: 11g
- Carbohydrates: 16g
- Fiber: 8g
- Protein: 48g
- Cholesterol: 135mg
Keywords: high protein low carb, cheesy garlic chicken wraps, low carb wraps, chicken wraps, garlic chicken, high protein dinner, low carb dinner, gluten free wraps, keto friendly, chicken breast recipe, easy weeknight meal