
If you need a snack that actually keeps you satisfied, these High Protein No Bake Granola Bars are the answer. They come together in 15 minutes of active work and deliver 18 grams of protein per serving, thanks to peanut butter, oats, and whey protein. The flavor is sweet from honey, nutty from the almonds, and just chocolaty enough from the optional mini chips.
This recipe is perfect for busy mornings, post-workout refueling, or an afternoon slump buster. It requires zero oven time and only a handful of basic ingredients. Even if you are new to no-bake treats or protein snacks, the method is straightforward and forgiving. Let me walk you through it.
What are High-Protein No-Bake Granola Bars?
These are chewy, handheld bars made by binding rolled oats, peanut butter, whey protein, and honey together without any heat from an oven. The texture is dense and satisfying — firm enough to hold its shape when chilled but with a pleasant give when you bite into it. You get the creamy richness of peanut butter balanced against the slight crunch of chopped almonds. They are essentially a cross between a classic granola bar and a protein ball, designed for convenience and lasting energy.
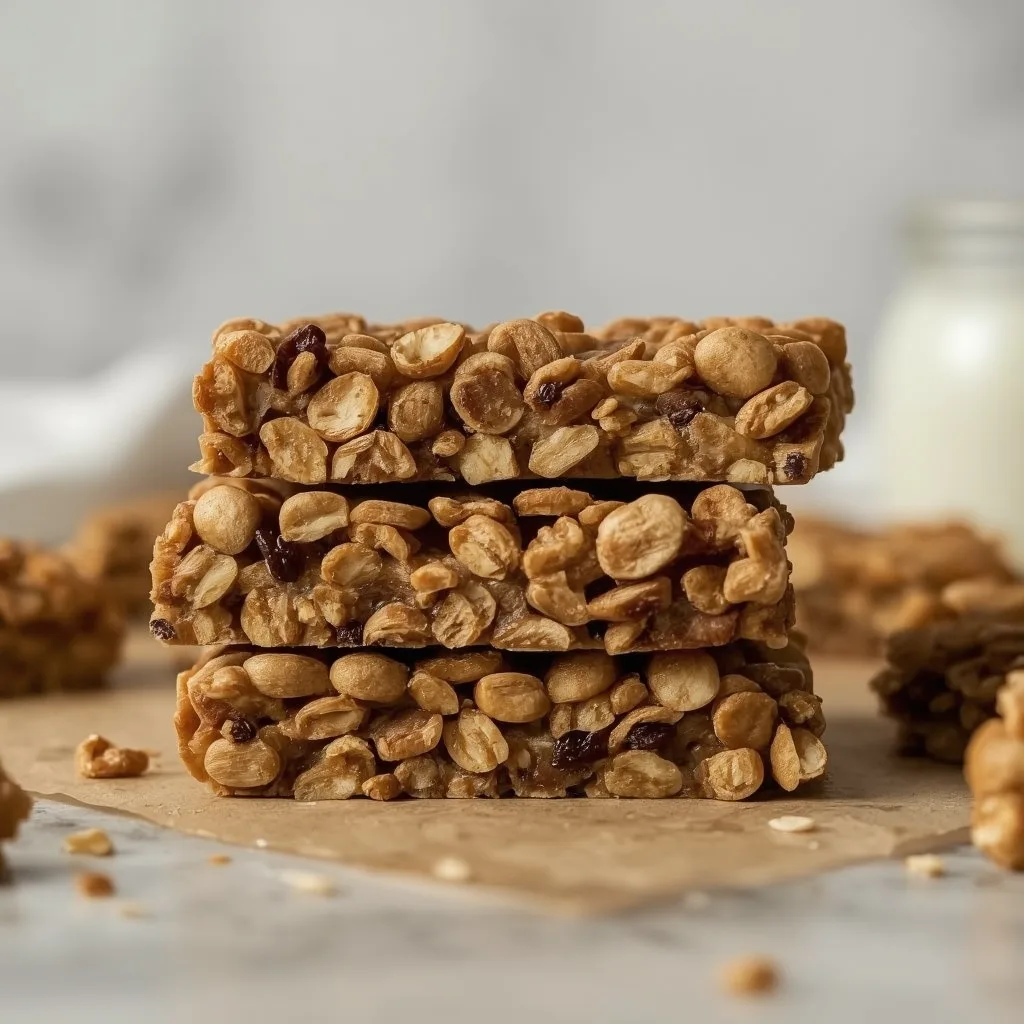
Why You’ll Love This Recipe
Here is what makes these bars stand out from store-bought versions and other homemade snacks.
- Protein-packed — Each bar has 18g of protein, making it a genuinely filling snack that supports muscle recovery and curbs hunger.
- No oven required — You skip the baking entirely. Just mix, press, and chill. Great for hot days or when you don’t want to heat up the kitchen.
- Simple ingredients — Everything comes from common pantry staples: oats, peanut butter, honey, protein powder, almonds, and chocolate chips. No obscure or expensive items.
- Customizable base — The recipe adapts easily to different dietary needs. Swap honey for maple syrup, use plant-based protein powder, or replace peanut butter with sunflower seed butter.
- Quick hands-on time — You only spend about 15 minutes actively prepping. The rest is passive chill time in the fridge.
Ingredients Needed to Make High Protein No Bake Granola Bars
Every ingredient here plays a specific role in texture, flavor, or protein content. I have included notes on what to look for at the store.
Base Ingredients
- 1 cup (80g) rolled oats — Use certified gluten-free oats if needed. Old-fashioned rolled oats give the best chewy texture. Quick oats work in a pinch but produce a softer, less structured bar.
- 1/2 cup (120g) creamy peanut butter — Natural, no-sugar-added peanut butter is preferred because it has a runnier consistency that binds the bars well. Stir it thoroughly before measuring.
- 1/4 cup (60ml) honey — Honey adds sweetness and helps the bars hold together. Maple syrup is a fine substitute for a vegan version.
- 1/4 cup (30g) vanilla or unflavored whey protein powder — This is your main protein booster. Vanilla adds a light sweetness, but unflavored keeps the peanut butter flavor front and center. Avoid plant-based blends with gritty textures unless you test them first.
Mix-Ins and Flavorings
- 1/4 cup (30g) chopped almonds — They add crunch and a toasty flavor. You can substitute walnuts, pecans, or omit them entirely for a smoother bar.
- 1/4 cup (40g) mini chocolate chips — These are optional, but highly recommended. Use sugar-free chips if you want to cut sugar. Mini chips distribute more evenly than regular-sized ones.
- 1/2 teaspoon vanilla extract — A small amount that rounds out the sweetness and complements the peanut butter and honey.
- 1/8 teaspoon fine sea salt — Don’t skip this. It balances the sweetness and enhances every flavor in the bar. Table salt works but reduce to a pinch because it is denser.
Equipment Needed
You probably have most of these already. Here is what you need and why each piece matters.
- 8×4-inch loaf pan — This size gives bars with a good thickness. A 9×5-inch pan makes thinner, wider bars. Line it with parchment paper, leaving overhang on two sides for easy lifting.
- Medium microwave-safe bowl — Used to warm the peanut butter and honey together. A glass bowl works well. Do not use metal.
- Silicone spatula — The best tool for stirring the thick dough and pressing it into the pan. A wooden spoon can work but is harder to scrape clean.
- Sharp chef’s knife — Essential for cutting clean slices through the chilled block. A serrated knife can create ragged edges.
- Parchment paper — Lining the pan prevents sticking and makes removal effortless. Without it, the bars may crack when you try to lift them out.
Instructions to Make High Protein No Bake Granola Bars
Follow these steps in order. The process is simple, but the details matter for getting bars that hold together and taste great.
Step 1: Prep the Pan and Ingredients
Line your 8×4-inch loaf pan with parchment paper, leaving overhang on two long sides. This is your handle for lifting the finished block out later. Measure all ingredients before you start — the process moves fast once you warm the peanut butter.
Step 2: Warm the Peanut Butter and Honey
In a medium microwave-safe bowl, combine the peanut butter and honey. Microwave on high for 20 to 30 seconds until the mixture is warm and runny. Stir until completely smooth. Do not overheat — the mixture can burn and seize up if you go past 40 seconds. If your microwave runs hot, use 15-second intervals.
Step 3: Add Vanilla and Salt
Stir in the vanilla extract and fine sea salt. The salt is not optional here. It cuts the sweetness and makes the peanut butter taste more pronounced. Mix until fully incorporated.
Step 4: Combine Dry Ingredients
In a large mixing bowl, whisk together the rolled oats and whey protein powder. This step prevents protein clumps from forming in the final bars. If you skip whisking, you will find dry pockets of powder when you bite into a bar.
Step 5: Mix the Dough
Pour the warm peanut butter mixture over the dry ingredients. Add the chopped almonds and mini chocolate chips. Stir with a silicone spatula until all dry ingredients are thoroughly coated and a thick, cohesive dough forms. If the mixture seems dry, add 1 to 2 teaspoons of water or milk. If it feels too wet and sticky, add a tablespoon more oats.
Step 6: Press into the Pan
Transfer the mixture into the prepared pan. Using the spatula or a piece of parchment paper, press it down firmly and evenly to compact the bars. This step is crucial to prevent crumbling later. Apply steady, even pressure across the entire surface. The more compact the base, the cleaner the bars will cut.
Step 7: Chill Until Firm
Place the pan in the refrigerator and chill for at least 1 hour, until the bars are firm and set. For best results, chill for 2 hours. Do not rush this. If you cut too early, the bars will be soft and fall apart. A full 2-hour chill gives you clean, stable slices.
Step 8: Cut and Store
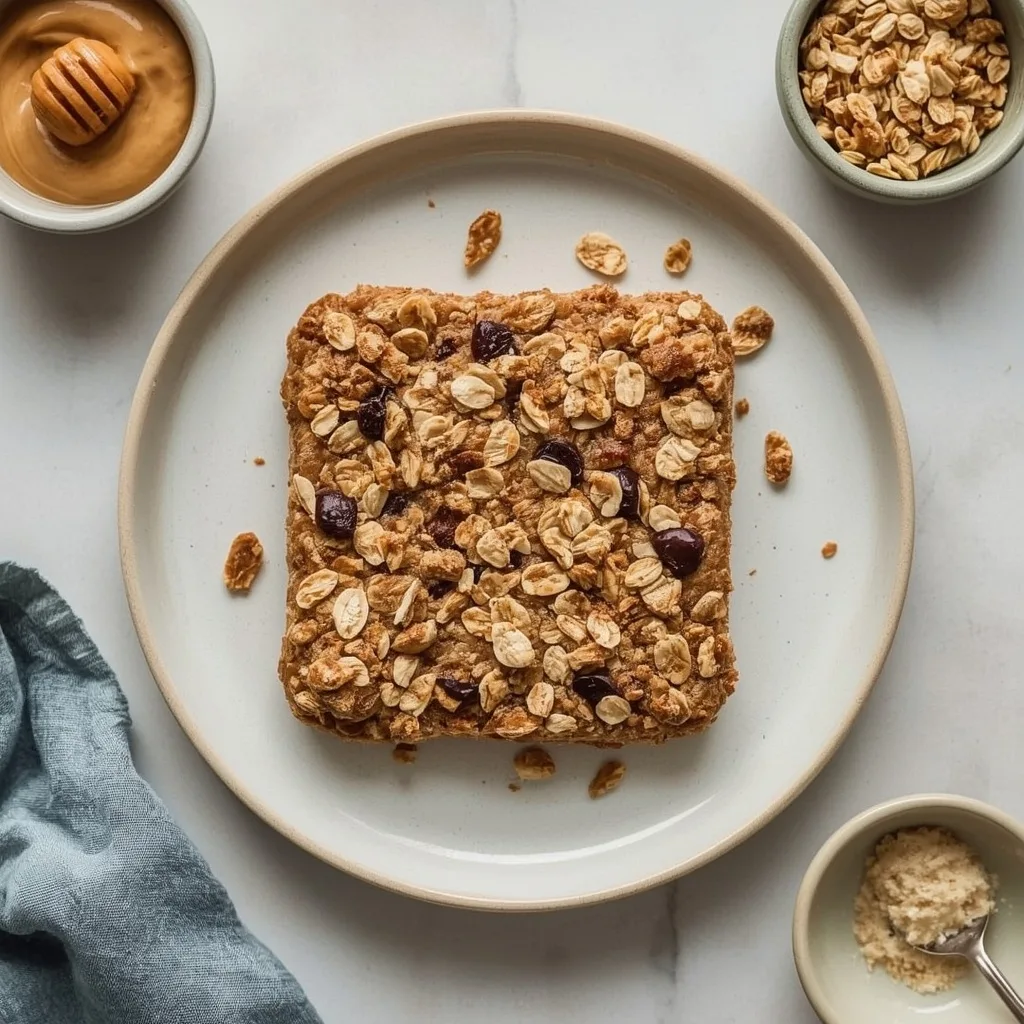
Lift the block out of the pan using the parchment overhang. Place it on a cutting board and use a sharp chef’s knife to cut into 4 equal bars for a hearty snack, or 8 smaller squares for a lighter bite. Wipe the knife clean between cuts for neat edges. Wrap each bar individually in plastic wrap or store in an airtight container in the fridge for up to 1 week.
What Went Wrong and How I Fixed It
Here is what tripped me up the first few times I made these bars, along with simple fixes.
- The bars crumbled when cut — This usually means the mixture was not pressed firmly enough into the pan, or it did not chill long enough. Next time, press down with serious force and extend the chill time to a full 2 hours.
- Dry, dusty spots in the bars — That happens when the protein powder is not whisked into the oats before adding the wet ingredients. Always whisk the dry ingredients together first to distribute the powder evenly.
- Mixture was too sticky to press down — Wet your spatula or hands with a little water, or place a sheet of parchment paper over the mixture before pressing. This prevents the dough from sticking to everything.
- The peanut butter separated and looked oily — Natural peanut butter can separate if overheated. Microwave in shorter bursts and stir well after each interval. Stirring re-emulsifies the oils.
- Chocolate chips melted into streaks — This can happen if you pour hot peanut butter directly over the chips. Let the mixture cool for 2 minutes after microwaving, or stir the chips in last after the dough has come together.
- The bars tasted too sweet — The honey and chocolate chips add up. Use unsweetened peanut butter, sugar-free chocolate chips, and reduce the honey to 3 tablespoons if you prefer less sugar.
What Do I Serve With High Protein No Bake Granola Bars?
These bars shine on their own, but pairing them thoughtfully turns them into a complete mini-meal or snack board.
- Greek yogurt — A dollop of plain Greek yogurt adds tangy creaminess and bumps the protein even higher. The cool yogurt contrasts nicely with the chewy bar.
- Sliced apple or banana — Fresh fruit provides natural sweetness and a crisp or creamy texture that complements the dense bar. Dip the apple slices in a bit of extra peanut butter for a treat.
- Milk of choice — A glass of dairy milk, oat milk, or almond milk turns two bars into a quick breakfast. The liquid helps soften the bar slightly as you eat.
- Coffee or iced latte — The coffee’s bitterness cuts through the sweetness and peanut butter richness. It makes for an excellent afternoon pick-me-up.
- Trail mix or nuts — Serve alongside a small bowl of almonds, cashews, or dried fruit for a portable snack mix that travels well in a lunch bag.
- Chia pudding — A small cup of chia pudding layered with crumbled granola bar pieces makes a textural, protein-packed dessert or breakfast parfait.
Pro Tips to Make Perfect High Protein No Bake Granola Bars
These insights come from multiple batches and a few mistakes. Apply them for consistent, reliable results every time.
- Use room temperature peanut butter — If your peanut butter is fridge-cold, it will be stiff and hard to mix. Let it sit on the counter for 15 minutes before starting. Cold peanut butter creates uneven distribution.
- Weigh your oats with a kitchen scale — A cup of rolled oats can vary by 15 grams depending on how you scoop. Weighing ensures the right dry-to-wet ratio, which directly affects how well the bars hold together.
- Press the mixture down with a measuring cup — A flat-bottomed measuring cup or glass covers more surface area than a spatula. Use it after the spatula to really compact the dough. It makes a noticeable difference in bar integrity.
- Chill for 2 hours minimum, not 1 — One hour works in a pinch, but the bars are soft and prone to crumbling. Two hours gives you a clean, solid cut and a firmer bite that travels better.
- Cut with a warm, damp knife — Run your chef’s knife under hot water, wipe it dry, then slice. The warmth glides through the chilled bar without cracking it. Wipe and reheat the blade between cuts.
- Add a teaspoon of chia seeds for extra staying power — Chia seeds absorb moisture and add fiber, making the bars even more filling. They also contribute a small amount of additional protein.
- Store in single layers with parchment between bars — If you stack them in a container, separate layers with parchment. Otherwise, the bars can stick together and lose their shape when you peel them apart.
Variations of High Protein No Bake Granola Bars
Once you master the base recipe, try these twists to keep things interesting across different batches.
- Chocolate peanut butter — Replace 1 tablespoon of the oats with 1 tablespoon of unsweetened cocoa powder. Add an extra teaspoon of honey to balance the bitterness. You get a double-chocolate pb bar.
- Almond joy style — Swap peanut butter for almond butter, use sliced almonds instead of chopped, and add 2 tablespoons of unsweetened shredded coconut. The protein stays similar, but the flavor shifts completely.
- Boosted protein version — Add 1 tablespoon of collagen peptides on top of the whey protein. Collagen dissolves without changing texture, pushing the protein content closer to 24g per bar. Stir it with the oats and protein powder.
- Vegan version — Replace honey with maple syrup and use a plant-based protein powder. Peanut butter remains the main binder. Note that the texture may be slightly less firm — chill for 2.5 hours to compensate.
- Nut-free version — Substitute sunflower seed butter for peanut butter and omit the almonds. Sunflower butter can react with baking soda in other recipes, but here it is perfectly safe. The bars will have a mild earthy, nutty flavor.
- Spiced pumpkin — Add 1 tablespoon of pumpkin puree, 1/2 teaspoon of pumpkin pie spice, and reduce the honey to 3 tablespoons. Use white chocolate chips instead of dark for a fall-inspired treat. The puree adds moisture but requires a longer chill time.
How Do I Store High Protein No Bake Granola Bars Leftovers?
Proper storage keeps these bars fresh and prevents them from drying out or absorbing fridge odors.
- Refrigerator in an airtight container — Place bars in a single layer or separated by parchment paper. They stay fresh for up to 1 week. If you stack them without barriers, the bars can stick together and lose their shape.
- Individually wrapped in plastic wrap — Wrap each bar tightly in plastic wrap before placing them in a container or bag. This method is great for grab-and-go snacks. They stay fresh for the full week when wrapped well.
- Freezer for long-term storage — Wrap each bar first in plastic wrap, then place in a freezer-safe zip-top bag. Squeeze out excess air. Frozen bars keep for up to 2 months without quality loss.
- Thawing frozen bars — Let a frozen bar sit at room temperature for 5 to 10 minutes before eating. If you are in a hurry, microwave on low power for 10 seconds. Do not microwave on high, or the chocolate chips can melt and the bar becomes greasy.
How Do I Reheat High Protein No Bake Granola Bars Leftovers?
These bars are designed to be eaten cold or at room temperature. Reheating is optional and best done in specific ways.
- No reheating needed — Simply pull a bar from the fridge and let it sit at room temperature for 5 minutes. This is the default method. The texture is best when cold and slightly firm.
- Microwave for 10 seconds — If you want a softer, warmer bar, microwave on low power (30% to 40% power) for 10 seconds. Check it after 10 seconds — longer than that can make the peanut butter separate and the chocolate chips melt into a gooey mess.
- Air fryer at 200°F — Place a bar in the air fryer at 200°F for 2 to 3 minutes. This warms it gently without drying it out. Do not use higher temperatures; the nuts and chocolate can burn while the center stays cold.
FAQs
Can I freeze High Protein No Bake Granola Bars?
Yes, you can freeze them for up to 2 months. Wrap each bar tightly in plastic wrap, then place them in a freezer bag. Thaw at room temperature for 5 to 10 minutes before eating.
How long do High Protein No Bake Granola Bars last in the fridge?
Stored in an airtight container, they stay fresh for up to 1 week. If you notice the bars becoming soft or sticky after 5 days, they are still safe to eat, but the texture will be less pleasant.
Can I make these bars without protein powder?
You can, but the protein content drops from 18g to about 8g per bar, and the texture changes significantly. Without powder, increase the oats by 2 tablespoons to maintain structure. The bars will be less dense and slightly more crumbly.
Why are my bars falling apart?
The most common cause is not pressing the mixture firmly enough into the pan. Another reason is insufficient chill time. Press down with serious force and chill for a full 2 hours. If the mixture felt dry before pressing, add a teaspoon of water or milk to help it bind.
Can I use quick oats instead of rolled oats?
You can, but the bars will have a softer, less chewy texture. Rolled oats give the best structure because they are larger and flatter. Quick oats break down more during mixing, resulting in a denser, almost paste-like bar.
Is this recipe gluten-free?
It can be if you use certified gluten-free rolled oats. Peanut butter, honey, protein powder, almonds, and chocolate chips are naturally gluten-free, but always check labels on protein powder for hidden gluten.
Try These Recipes
Final Words
Making your own high-protein no-bake granola bars at home gives you complete control over ingredients, sweetness, and protein content. Store-bought bars often cost more and contain stabilizers or added sugars you do not need. This version is simple, honest, and genuinely satisfying.
Give it a try — you will be surprised how easy it is to have a week’s worth of protein snacks ready in under two hours.
PrintHigh Protein No Bake Granola Bars
These no-bake granola bars are packed with protein from peanut butter, oats, and whey protein, offering a chewy, satisfying texture with a hint of honey sweetness. Perfect for a post-workout snack or a quick breakfast on the go, they hold together beautifully without any baking.
- Prep Time: 15
- Total Time: 75
- Yield: 4 1x
- Category: Snack
- Method: No-Cook
- Cuisine: American
Ingredients
- 1 cup (80g) rolled oats (use certified gluten-free if needed)
- 1/2 cup (120g) creamy peanut butter (natural, no-sugar-added preferred)
- 1/4 cup (60ml) honey
- 1/4 cup (30g) vanilla or unflavored whey protein powder
- 1/4 cup (30g) chopped almonds
- 1/4 cup (40g) mini chocolate chips (optional, or use sugar-free)
- 1/2 teaspoon vanilla extract
- 1/8 teaspoon fine sea salt
Instructions
- Line an 8×4-inch loaf pan with parchment paper, leaving overhang on two sides for easy removal. Alternatively, use a 9×5-inch pan for slightly thinner bars.
- In a medium microwave-safe bowl, combine the creamy peanut butter and honey. Microwave on high for 20 to 30 seconds, until warm and runny, then stir until smooth. Do not overheat, as the mixture can burn.
- Add the vanilla extract and fine sea salt to the peanut butter-honey mixture. Stir well to incorporate. The salt balances sweetness and enhances flavor.
- In a large mixing bowl, whisk together the rolled oats and whey protein powder until evenly distributed. This prevents protein clumps in the final bars.
- Pour the warm peanut butter mixture over the dry ingredients. Add the chopped almonds and mini chocolate chips if using. Stir with a silicone spatula until all dry ingredients are thoroughly coated and a thick, cohesive dough forms. If the mixture seems dry, add 1 to 2 teaspoons of water or milk; if too wet, add a tablespoon more oats.
- Transfer the mixture to the prepared pan. Using the spatula or a piece of parchment paper, press it down firmly and evenly to compact the bars. This step is crucial to prevent crumbling later.
- Place the pan in the refrigerator and chill for at least 1 hour, until the bars are firm and set. For best results, chill for 2 hours.
- Once set, lift the block out of the pan using the parchment overhang. Place on a cutting board and cut into 4 equal bars (or 8 smaller squares for a snack). Use a sharp chef’s knife for clean cuts.
- Wrap each bar individually in plastic wrap or store in an airtight container. Keep refrigerated for up to 1 week, or freeze for up to 2 months. Let frozen bars sit at room temperature for 5 minutes before eating.
Notes
Storage: Refrigerate bars in an airtight container for up to 1 week. Freezing: Wrap each bar tightly in plastic wrap and place in a freezer bag for up to 2 months. Thaw at room temperature for 5 to 10 minutes before serving. For a vegan version, use maple syrup instead of honey and plant-based protein powder. For nut-free, substitute sunflower seed butter for peanut butter and omit almonds. If the mixture crumbles, it likely needs more moisture or pressing; add 1 teaspoon of water or a dash more honey if dry.
Nutrition
- Calories: 386
- Sugar: 22g
- Sodium: 214mg
- Unsaturated Fat: 4g
- Carbohydrates: 42g
- Fiber: 5g
- Protein: 18g
- Cholesterol: 15mg
Keywords: protein granola bars, no bake granola bars, high protein snack, peanut butter granola bars, whey protein bars, healthy snack, meal prep bars, chewy granola bars, energy bars, gluten free with oat verification