
High Protein No Bake Peanut Butter Protein Bars are exactly what I reach for when the 3 p.m. slump hits and a handful of almonds just won’t cut it. They’re thick, chewy, and taste like peanut butter cookie dough, but they come together in 15 minutes with no oven involved. If you’ve ever choked down a chalky store-bought protein bar, this recipe will change your mind.
Total time is 2 hours 15 minutes, though almost all of that is hands-off chilling. The difficulty level is beginner — the only tricky part is adding the almond milk slowly so the mixture doesn’t turn mushy. Each serving packs 23g of protein, which makes these a legit post-workout snack or meal prep staple for the week.
What is High Protein No Bake Peanut Butter Protein Bars?
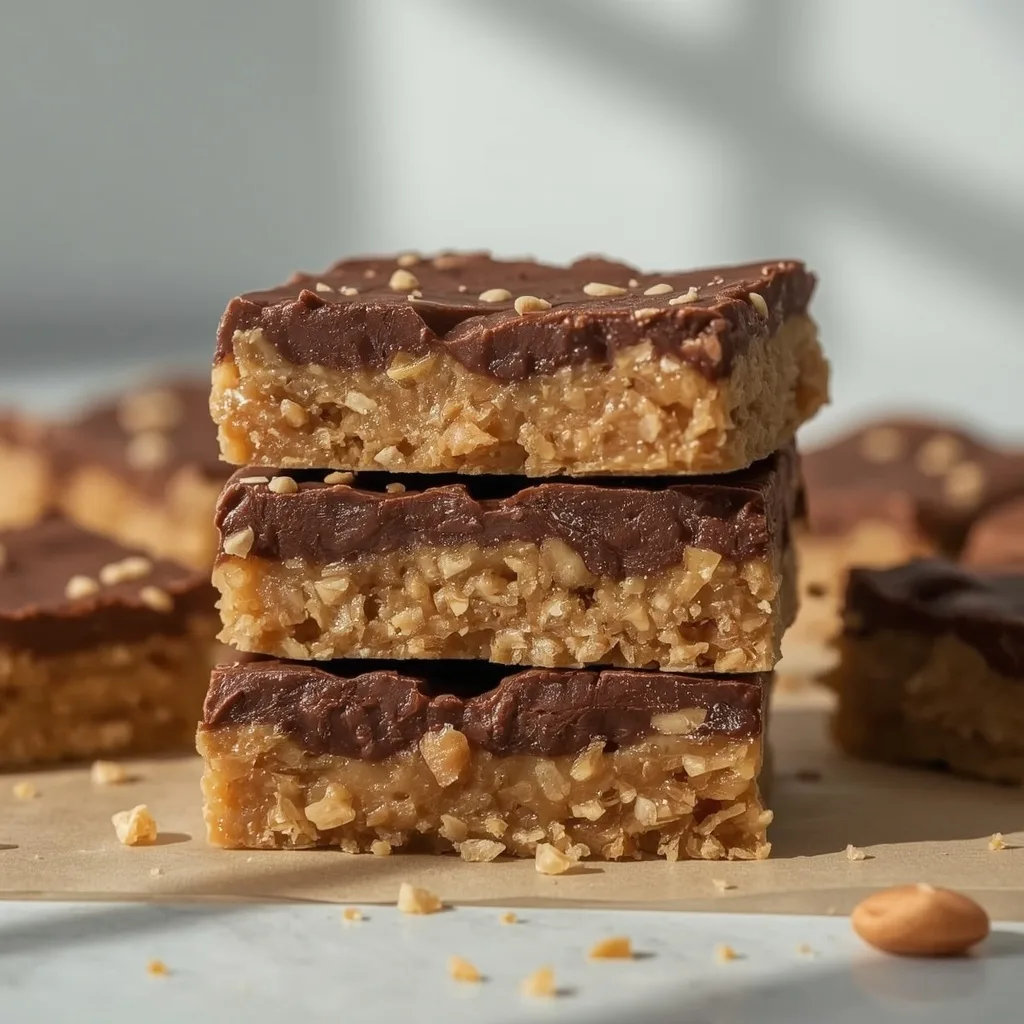
These bars are a no-cook snack made from rolled oats, creamy natural peanut butter, whey protein isolate, and honey, all pressed into a loaf pan and chilled until firm. The texture lands somewhere between a soft granola bar and edible cookie dough — chewy, dense, and slightly sweet without being cloying. You’ll get a gentle peanut flavor up front with a clean vanilla finish, and they hold their shape when you bite in. Perfect for meal prep Sundays or anytime you want grab-and-go fuel without turning on the stove.
Why You’ll Love This Recipe
These are the reasons I keep making batch after batch instead of buying bars at the store.
- Protein that actually fills you up — 23g per serving means these hold you over far longer than a piece of fruit or a granola bar.
- No oven, no fuss — one bowl, one loaf pan, and a fridge. That’s the whole operation.
- Real ingredients you can pronounce — oats, peanut butter, whey, honey, salt, vanilla, and a splash of almond milk. Nothing else.
- Clean slicing — because you press the mixture firmly and chill it uncovered, the slab cuts into tidy bars instead of crumbling apart.
- Built for meal prep — wrap them individually and they last a full week in the fridge, or three months in the freezer.
Ingredients Needed to Make High Protein No Bake Peanut Butter Protein Bars
You probably have most of these sitting in your pantry already. Here’s what each one contributes.
The Base
- 1 1/2 cups old-fashioned rolled oats — these give the bars structure and a chewy bite. Use certified gluten-free oats if that matters for you, and skip quick oats since they turn pasty.
- 1/4 cup vanilla or unflavored whey protein isolate powder — the protein backbone here. Isolate blends smoother than concentrate, so it won’t turn gritty.
The Binder
- 1/2 cup creamy natural peanut butter — look for unsweetened with no added palm oil. The natural oils keep the dough pliable without making it greasy.
- 1/4 cup honey or pure maple syrup — this sweetens and helps everything stick together. Maple syrup works fine if you want a vegan-friendly version.
The Flavor and Finish
- 1/2 teaspoon fine sea salt — balances the sweetness and makes the peanut flavor pop.
- 1/2 teaspoon vanilla extract — a small amount, but you’d notice its absence.
- 2-4 tablespoons unsweetened almond milk or water — add one tablespoon at a time until the dough just holds together when squeezed.
Equipment Needed
Nothing fancy required — this is a one-bowl situation.
- 9×5-inch loaf pan — the standard size gives you thick, bakery-style bars. An 8×4 pan works too, just expect taller pieces.
- Parchment paper — line it with an overhang on two sides so you can lift the whole slab out cleanly.
- Large mixing bowl — big enough to stir everything without spilling oats over the edge.
- Sturdy spatula or wooden spoon — the dough gets thick, so a flimsy utensil will bend on you.
- Sharp chef’s knife — for clean cuts. Wipe the blade between slices and you’ll get crisp edges every time.
Instructions to Make High Protein No Bake Peanut Butter Protein Bars
The whole process takes about 15 minutes of active work, then the fridge does the rest. Follow these steps and you’ll get firm, sliceable bars on the first try.
Step 1: Prep the Pan and Dry Ingredients
Line your 9×5-inch loaf pan with parchment paper, leaving an overhang on two sides, then lightly grease it with neutral oil or nonstick spray. In a large bowl, whisk together the rolled oats, whey protein isolate, and fine sea salt until evenly distributed. Break up any clumps of protein powder with your fingers — those little lumps won’t dissolve later.
Step 2: Bring the Dough Together
Add the peanut butter, honey, and vanilla to the dry mix. Stir with a sturdy spatula until it looks like coarse, sticky crumbs. Then add the almond milk one tablespoon at a time, stirring after each addition, until the mixture just holds together when you squeeze a handful. Stop there — one tablespoon too many and the bars turn mushy.
Step 3: Press and Chill
Transfer everything to the prepared pan and press it firmly with the back of a measuring cup or a flat-bottomed glass. Pay extra attention to the corners, and really compact it — loose spots are where crumbly bars come from. If you want, sprinkle 1 tablespoon of mini dark chocolate chips or a pinch of flaky sea salt on top and press gently so they stick. Refrigerate uncovered for at least 2 hours, until the slab is firm to the touch.
Step 4: Slice and Store
Lift the slab out by the parchment overhang and set it on a cutting board. Slice crosswise into 4 equal bars with a sharp chef’s knife, wiping the blade between cuts for clean edges. Wrap each bar in parchment or wax paper and keep them in an airtight container in the fridge for up to a week. For longer storage, freeze them on a parchment-lined sheet until solid, then move to a freezer bag for up to 3 months. Thaw at room temperature for 10-15 minutes before eating.
What Went Wrong and How I Fixed It
Here’s what tripped me up the first few times I made these, so you can skip the trial and error.
- Crumbly bars — I didn’t press the mixture firmly enough into the pan. Use the back of a measuring cup and really lean into the corners.
- Mushy texture — adding all the almond milk at once did it. Add one tablespoon at a time and stop as soon as the dough holds when squeezed.
- Gritty protein powder — cheap concentrate blends don’t dissolve well. Whey isolate gives a much smoother result every time.
- Sticky peanut butter — the kind with added palm oil makes the dough greasy and harder to press. Stick with natural, unsweetened.
- Bars falling apart when sliced — usually a sign they weren’t chilled long enough. Give them the full 2 hours, or overnight if you can wait.
- Tough, dense texture — overmixing after the liquid goes in develops a chewy, almost rubbery bite. Stir just until everything comes together.
What Do I Serve With High Protein No Bake Peanut Butter Protein Bars?
These work as a standalone snack, but a few pairings make them feel more like a real meal.
- Cold brew coffee — the bitterness cuts through the sweetness and makes the peanut flavor stand out.
- Greek yogurt with berries — adds another 15g of protein and turns a snack into a balanced breakfast.
- Sliced apple — crisp and tart, a classic match for anything peanut butter based.
- Glass of cold milk — the old-school pairing that still works better than anything else.
- Banana — a pre-workout combo that covers carbs and protein in one go.
- Green tea — lighter than coffee and won’t compete with the vanilla notes in the bars.
Pro Tips to Make Perfect High Protein No Bake Peanut Butter Protein Bars
Small details make a big difference with a no-bake recipe, so here’s what I’ve learned after many batches.
- Chill uncovered — covering the pan traps moisture and makes the tops sticky. Uncovered lets them firm up properly.
- Wipe your knife between cuts — a clean blade means clean edges instead of smeared, ragged slices.
- Weigh your protein powder if you can — a packed scoop can add 5-10 extra grams, which dries out the dough.
- Boost the protein further — swap 1/4 cup of oats for 2 extra tablespoons of whey isolate and add 1 more tablespoon of almond milk for roughly 5g extra protein per serving.
- Toast the oats for 5 minutes first — this is optional, but it deepens the flavor if you have the time.
- Press before chilling, not after — once the dough firms up, it won’t compact any further.
- Use a warm knife for cold bars — run the blade under hot water, dry it, then slice for bakery-quality edges.
Variations of High Protein No Bake Peanut Butter Protein Bars
Once you’ve nailed the base, these swaps keep things interesting.
- Chocolate peanut butter — use chocolate whey protein and add 1 tablespoon of cocoa powder to the dry mix.
- Almond butter version — swap the peanut butter for creamy almond butter for a milder, slightly sweeter flavor.
- Oat flour swap — pulse the oats in a blender first for a smoother, brownie-like texture.
- Coconut twist — fold in 2 tablespoons of unsweetened shredded coconut for extra texture.
- Protein-packed version — add 2 tablespoons of chia seeds for fiber and a small protein bump.
- Maple cinnamon — use maple syrup instead of honey and add 1/2 teaspoon of ground cinnamon.
How Do I Store High Protein No Bake Peanut Butter Protein Bars Leftovers?
Storage is simple, but a few habits keep them tasting fresh all week.
- Refrigerator — wrap each bar individually and store in an airtight container for up to 7 days.
- Freezer — freeze individually wrapped bars in a freezer-safe bag for up to 3 months.
- Parchment wrapping — prevents bars from sticking together and keeps them from drying out.
- Airtight container — a sealed glass or plastic container beats a zip bag for longer storage.
- Label with dates — write the freeze date on the bag so you’re not guessing three months later.
How Do I Reheat High Protein No Bake Peanut Butter Protein Bars Leftovers?
Honestly, these taste best cold or at room temperature, but here’s how to warm them if you prefer.
- Microwave — 10-15 seconds on high is plenty. Any longer and the peanut butter turns oily.
- Room temperature thaw — the best method for frozen bars. 10-15 minutes on the counter and they’re ready.
- Toaster oven — 2-3 minutes at 300°F gives a slightly crispy exterior without drying out the center.
- Air fryer — 2 minutes at 300°F works if you want warm edges, but keep a close eye on them.
FAQs
Can I freeze High Protein No Bake Peanut Butter Protein Bars?
Yes, and they freeze beautifully. Wrap each bar individually in parchment or wax paper, then store them in a freezer-safe bag for up to 3 months. Thaw at room temperature for 10-15 minutes before eating.
How long do High Protein No Bake Peanut Butter Protein Bars last in the fridge?
About 7 days when stored in an airtight container. Individual wrapping keeps them from sticking together and helps them stay moist.
Can I use a different protein powder?
Whey isolate blends the smoothest, but plant-based protein works too. You’ll likely need 1-2 extra tablespoons of almond milk since plant proteins absorb more liquid.
Why are my bars crumbly?
Usually it’s not enough pressing or not enough liquid. Press the mixture firmly into the pan with the back of a measuring cup, and add almond milk one tablespoon at a time until the dough holds together when squeezed.
Do I have to use honey?
Not at all. Pure maple syrup works just as well and makes the bars vegan-friendly if you’re using plant-based protein.
How much protein is in each bar?
Each serving has 23g of protein, along with 475 calories and 6g of fiber. You can push it closer to 28g by swapping 1/4 cup of oats for extra whey isolate.
Try These Recipes
Final Words
High Protein No Bake Peanut Butter Protein Bars are one of those recipes that quietly earn a permanent spot in your rotation. Fifteen minutes of work, a couple hours of chilling, and you’ve got a week of snacks that actually keep you full. Give them a try this weekend — I think you’ll be surprised how close they come to real cookie dough.
PrintHigh Protein No Bake Peanut Butter Protein Bars
These thick, chewy no-bake bars deliver serious protein without turning gritty or dry, thanks to a blend of creamy peanut butter, whey protein, and a touch of honey. They set firm in the fridge, slice cleanly, and taste like a peanut butter cookie dough you can feel good about. Perfect for meal prep, post-workout fuel, or an afternoon snack.
- Prep Time: 15
- Total Time: 135
- Yield: 4 1x
- Category: Snack
- Method: No-Cook
- Cuisine: American
Ingredients
- 1 1/2 cups old-fashioned rolled oats (certified gluten-free if needed)
- 1/2 cup creamy natural peanut butter (unsweetened, no added palm oil)
- 1/4 cup vanilla or unflavored whey protein isolate powder
- 1/4 cup honey or pure maple syrup
- 1/2 teaspoon fine sea salt
- 1/2 teaspoon vanilla extract
- 2–4 tablespoons unsweetened almond milk or water (as needed to bring dough together)
Instructions
- Line a 9×5-inch loaf pan with parchment paper, leaving an overhang on two sides for easy removal. Lightly grease the parchment with a neutral oil or nonstick spray.
- In a large mixing bowl, combine the rolled oats, whey protein isolate powder, and fine sea salt. Whisk until evenly distributed, breaking up any clumps of protein powder.
- Add the creamy natural peanut butter, honey (or maple syrup), and vanilla extract to the dry ingredients. Stir with a sturdy spatula or wooden spoon until the mixture resembles coarse, sticky crumbs.
- Add unsweetened almond milk 1 tablespoon at a time, stirring after each addition, until the mixture just holds together when squeezed in your palm. Avoid over-moistening, as this will make the bars mushy.
- Transfer the mixture to the prepared loaf pan. Use the back of a measuring cup or a flat-bottomed glass to press it firmly and evenly into the pan, paying special attention to the corners. Compact the mixture well; this prevents crumbly bars.
- Optional: Sprinkle the top with 1 tablespoon of mini dark chocolate chips or a pinch of flaky sea salt, pressing gently so they adhere.
- Refrigerate uncovered for at least 2 hours, or until the bars are firm to the touch and hold their shape when lifted by the parchment overhang.
- Lift the slab out of the pan using the parchment overhang and place on a cutting board. Slice crosswise into 4 equal bars with a sharp chef’s knife, wiping the blade between cuts for clean edges.
- For best texture and flavor, wrap each bar individually in parchment or wax paper and store in an airtight container in the refrigerator for up to 1 week.
- Alternatively, freeze the bars on a parchment-lined sheet until solid, then transfer to a freezer-safe bag or container for up to 3 months. Thaw at room temperature for 10-15 minutes before eating.
Notes
Storage: Keep bars in an airtight container in the refrigerator for up to 7 days. For longer storage, freeze individually wrapped bars for up to 3 months; thaw at room temperature for 10-15 minutes. Reheating not recommended; enjoy cold or at room temperature. Protein boost: For an extra 5g protein per serving, substitute 1/4 cup of the oats with an additional 2 tablespoons of whey protein isolate and add 1 extra tablespoon of almond milk. If using plant-based protein powder, you may need 1-2 extra tablespoons of liquid. Avoid overmixing after adding liquid to prevent a tough texture.
Nutrition
- Calories: 475
- Sugar: 19
- Sodium: 210
- Saturated Fat: 3
- Carbohydrates: 48
- Fiber: 6
- Protein: 23
Keywords: high protein no bake bars, peanut butter protein bars, no bake protein bars, healthy snack, meal prep snack, post workout snack, gluten free bars, easy protein bars, whey protein bars, no bake snacks